Difference between revisions of "Translations:MBPlus AttitudeControl-HowToSetupTX/9/de"

From BEASTX Wiki
Jump to navigation Jump to search
(Created page with "===Setting up AttitudeControl using the gyro gain channel=== Especially when using a transmitter with 6 channels only or when using a receiver with "Standard" 5-wire layout th...")
 
Line 1: Line 1:
===Setting up AttitudeControl using the gyro gain channel===
+
===Aktivierung der AttitudeControl über den Kanal vom Heckkreisel===
Especially when using a transmitter with 6 channels only or when using a receiver with "Standard" 5-wire layout the channel for adjusting tail gyro gain (channel 5) can also be used to activate/deactivate AttitudeControl. Here instead of toggling the tail gyro between "Normal-Rate" and "HeadingLock" mode you activate the AttitudeControl when changing the direction of gyro channel. The tail gyro can only be operated in "HeadingLock" mode. When adjusting the throw in the direction where AttitudeControl is OFF, this will change the tail gyro gain. When adjusting the servo throw of the gain channel in the direction where AttitudeControl is ON, this will change the gain of AttitudeControl.<br />
+
Insbesondere wenn ein Sender mit nur 6 Steuerkanälen verwendet wird oder ein "Standardempfänger" mit 5 einzelnen Steueranschlüssen, dann kann die AttitudeControl über den Kanal vom Heckkreisel (Kanal 5) mit angesteuert werden. Anstatt der Umschaltung zwischen Normal- and HeadingLock-Modus wird die AttitudeControl aktiviert oder deaktiviert, wenn der Steuerkanal die Richtung ändert. Der Heckkreisel wird dann immer im HeadingLock-Modus betrieben. In die Richtung, in der die AttitudeControl deaktiviert ist, wird durch die Größe des Steuerausschlags wie gewohnt die Wirkstärke des Heckkreisel eingestellt. In die Gegenrichtung in der die AttitudeControl aktiviert ist, bestimmt die Höhe des Steuerausschlags die Wirkstärke der AttitudeControl.<br />
 
<br />
 
<br />
 
{|class="gallery" style="font-style: italic"
 
{|class="gallery" style="font-style: italic"
Line 9: Line 9:
 
|width="200pt" style="padding:0px 20px;" align="center"|[[Image:Gyro_onoff.png|192px|none|border]]
 
|width="200pt" style="padding:0px 20px;" align="center"|[[Image:Gyro_onoff.png|192px|none|border]]
 
|-
 
|-
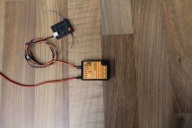
|width="200pt" style="padding:0px 20px; vertical-align: top;"|In the transmitter's gyro menu we assign a switch to control the gyro channel (channel 5).  
+
|width="200pt" style="padding:0px 20px; vertical-align: top;"|Im Menü KREISEL vom Fernsteuersender weisen wir einen Schalter für den Kreiselkanal (Kanal 5) zu.  
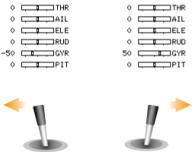
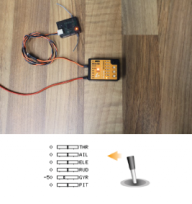
|width="200pt" style="padding:0px 20px; vertical-align: top;"|When the switch is released we can set the tail gyro gain. As starting point we use 50% gain (=50% deflection).
+
|width="200pt" style="padding:0px 20px; vertical-align: top;"|Wenn der Schalter losgelassen ist, bestimmt der Kanal die Höhe der Wirkstärke des Heckkreisels. Als Ausgangsbasis wählen wir 50% Wirkstärke (=ca. 50% Steuerauschlag).
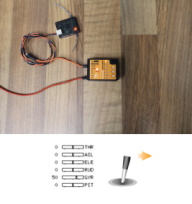
|width="200pt" style="padding:0px 20px; vertical-align: top;"|When we pull the switch for AttitudeControl the channel is moved to the opposite direction. Here we set -50% deflection which sets the AttitudeControl gain to 50% as well.
+
|width="200pt" style="padding:0px 20px; vertical-align: top;"|Wenn der Schalter für die AttitudeControl gezogen wird wechselt der Steuerkanal die Richtung, die AttitudeControl wird aktiviert. Hier stellen wir -50% Steuerausschlag ein, so dass die AttitudeControl mit 50% Wirkstärke betrieben wird.
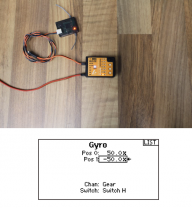
|width="200pt" style="padding:0px 20px; vertical-align: top;"|Use the servo monitor to check if the gain channel is changing direction when actuating the "rescue switch".
+
|width="200pt" style="padding:0px 20px; vertical-align: top;"|Prüfe anhand des Servomonitors nach, wie sich der Steuerausschlag ändert, wenn der "Rettungsschalter" betätigt wird.
 
|}<br />
 
|}<br />
To setup MICROBEAST PLUS for this kind of operation you must perform the function assignment in receiver setup menu manually as by default it is intended that a separate channel is used for AttitudeControl.<br />
+
Damit MICROBEAST PLUS in diesem Betriebsmodus verwendet werden kann, muss die Funktionszuweisung im Empfängereinstellmenü manuell vorgenommen werden, da die Standardbelegung einen separaten Steuerkanal vorsieht.<br />
 
<br />
 
<br />
 
{|class="gallery" style="font-style: italic"
 
{|class="gallery" style="font-style: italic"
Line 23: Line 23:
 
|width="200pt" style="padding:0px 20px;" align="center"|[[Image:Other_functions.png|192px|none|border]]
 
|width="200pt" style="padding:0px 20px;" align="center"|[[Image:Other_functions.png|192px|none|border]]
 
|-
 
|-
|width="200pt" style="padding:0px 20px; vertical-align: top;"|For manual function assignment we need to be able to lock the throttle output when moving the thrust stick.
+
|width="200pt" style="padding:0px 20px; vertical-align: top;"|Für die manuelle Funktionszuweisung müssen wir den Gaskanal sperren, damit dieser nicht gleichzeitig mit dem Pitch bewegt wird.
|width="200pt" style="padding:0px 20px; vertical-align: top;"|For this we can use the throttle hold function which needs to be assigned to a switch.
+
|width="200pt" style="padding:0px 20px; vertical-align: top;"|Dazu kann z.B. der Schalter für die Flugphase Autorotation verwendet werden.
|width="200pt" style="padding:0px 20px; vertical-align: top;"|Now when throttle hold is active we can control the collective pitch channel without moving the throttle.
+
|width="200pt" style="padding:0px 20px; vertical-align: top;"|Wenn die Flugphase Autorotation aktiv ist, kann der Pitchsteuerknüppel bewegt werden ohne dass sich das Gas verändert.
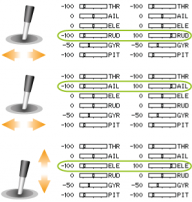
|width="200pt" style="padding:0px 20px; vertical-align: top;"|For manual assignment also make sure each of the other functions only control one channel.
+
|width="200pt" style="padding:0px 20px; vertical-align: top;"|Stelle auch sicher, dass bei allen anderen Steuerfunktionen immer nur ein Kanal bewegt wird, wenn der jeweilige Steuerknüppel bewegt wird.
 
|}<br />
 
|}<br />
 
<br />
 
<br />

Revision as of 12:52, 18 March 2016

Information about message (contribute)
This message has no documentation. If you know where or how this message is used, you can help other translators by adding documentation to this message.
Message definition (MBPlus AttitudeControl-HowToSetupTX)
===Setting up AttitudeControl using the gyro gain channel===
Especially when using a transmitter with 6 channels only or when using a receiver with "Standard" 5-wire layout the channel for adjusting tail gyro gain (channel 5) can also be used to activate/deactivate AttitudeControl. Here instead of toggling the tail gyro between "Normal-Rate" and "HeadingLock" mode you activate the AttitudeControl when changing the direction of gyro channel. The tail gyro can only be operated in "HeadingLock" mode. When adjusting the throw in the direction where AttitudeControl is OFF, this will change the tail gyro gain. When adjusting the servo throw of the gain channel in the direction where AttitudeControl is ON, this will change the gain of AttitudeControl.<br />
<br />
{|class="gallery" style="font-style: italic"
|- 
|width="300pt" style="padding:0px 20px;" align="center"|[[Image:Gyro switch.png|192px|none|border]]
|width="300pt" style="padding:0px 20px;" align="center"|[[Image:Gyro 50.png|192px|none|border]]
|width="400pt" style="padding:0px 20px;" align="center"|[[Image:Attctrl 50.png|192px|none|border]]
|width="200pt" style="padding:0px 20px;" align="center"|[[Image:Gyro_onoff.png|192px|none|border]]
|-
|width="200pt" style="padding:0px 20px; vertical-align: top;"|In the transmitter's gyro menu we assign a switch to control the gyro channel (channel 5). 
|width="200pt" style="padding:0px 20px; vertical-align: top;"|When the switch is released we can set the tail gyro gain. As starting point we use 50% gain (=50% deflection).
|width="200pt" style="padding:0px 20px; vertical-align: top;"|When we pull the switch for AttitudeControl the channel is moved to the opposite direction. Here we set -50% deflection which sets the AttitudeControl gain to 50% as well.
|width="200pt" style="padding:0px 20px; vertical-align: top;"|Use the servo monitor to check if the gain channel is changing direction when actuating the "rescue switch".
|}<br />
To setup MICROBEAST PLUS for this kind of operation you must perform the function assignment in receiver setup menu manually as by default it is intended that a separate channel is used for AttitudeControl.<br />
<br />
{|class="gallery" style="font-style: italic"
|- 
|width="300pt" style="padding:0px 20px;" align="center"|[[Image:Lock thr.png|192px|none|border]]
|width="300pt" style="padding:0px 20px;" align="center"|[[Image:SPM_0020.png|192px|none|border]]
|width="400pt" style="padding:0px 20px;" align="center"|[[Image:Thr_locked.png|192px|none|border]]
|width="200pt" style="padding:0px 20px;" align="center"|[[Image:Other_functions.png|192px|none|border]]
|-
|width="200pt" style="padding:0px 20px; vertical-align: top;"|For manual function assignment we need to be able to lock the throttle output when moving the thrust stick.
|width="200pt" style="padding:0px 20px; vertical-align: top;"|For this we can use the throttle hold function which needs to be assigned to a switch.
|width="200pt" style="padding:0px 20px; vertical-align: top;"|Now when throttle hold is active we can control the collective pitch channel without moving the throttle.
|width="200pt" style="padding:0px 20px; vertical-align: top;"|For manual assignment also make sure each of the other functions only control one channel.
|}<br />
<br />
In Receiver setup menu we choose the correct receiver type (in this example we use a Spektrum remote satellite in combination with a Spektrum DX6 transmitter) and assign the transmitter channels to the functions by moving the appropriate control sticks on the transmitter.<br />
<br />
{|class="gallery" style="font-style: italic"
|- 
|width="400pt" style="padding:0px 20px;" align="center"|[[Image:SpektrumSetup 1.jpg|192px|none|border]]
|width="300pt" style="padding:0px 20px;" align="center"|[[Image:SpektrumSetup 2.jpg|192px|none|border]]
|width="200pt" style="padding:0px 20px;" align="center"|[[Image:SpektrumSetup 3.jpg|192px|none|border]]
|width="300pt" style="padding:0px 20px;" align="center"|[[Image:SpektrumSetup 4.jpg|192px|none|border]]
|-
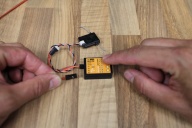
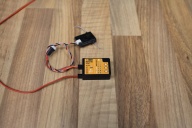
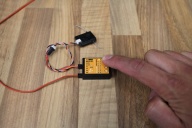
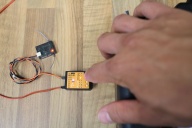
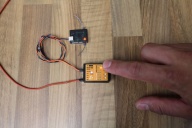
|width="200pt" style="padding:0px 20px; vertical-align: top;"|The serial signal line is connected to ELE/DI1 input at MICROBEAST PLUS. For setup the power supply can be connected to one of the servo output port CH1 to CH4. Before and while switching on/connecting power we hold down the push button to enter receiver setup menu.
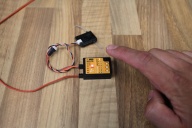
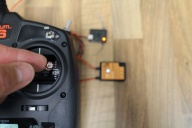
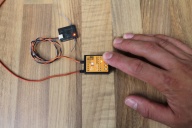
|width="200pt" style="padding:0px 20px; vertical-align: top;"|Menu LED A lights up instantly and Status LED shows current receiver type (by default Standard receiver = LED off).
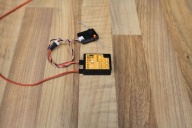
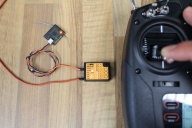
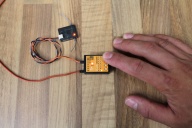
|width="200pt" style="padding:0px 20px; vertical-align: top;"|Again push and hold down the button repeatedly until the Status LED lights up in the color and state that represents our receiver type. 
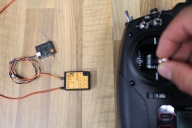
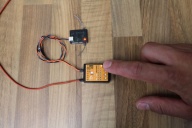
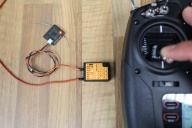
|width="200pt" style="padding:0px 20px; vertical-align: top;"|In this case we need the Status LED light up in purple color = Spektrum remote satellite.
|}<br />
{|class="gallery" style="font-style: italic"
|- 
|width="400pt" style="padding:0px 20px;" align="center"|[[Image:SpektrumSetup 5.jpg|192px|none|border]]
|width="300pt" style="padding:0px 20px;" align="center"|[[Image:SpektrumSetup 6.jpg|192px|none|border]]
|width="200pt" style="padding:0px 20px;" align="center"|[[Image:SpektrumSetup 7.jpg|192px|none|border]]
|width="300pt" style="padding:0px 20px;" align="center"|[[Image:SpektrumSetup 8.jpg|192px|none|border]]
|-
|width="200pt" style="padding:0px 20px; vertical-align: top;"|Briefly push the button to proceed to function assignment (Menu point B) where the Status LED should light up in blue color if the transmitter is on and the Spektrum remote signal is received.
|width="200pt" style="padding:0px 20px; vertical-align: top;"|To teach the collective pitch just move the thrust stick back and forth. The Status LED will flash instantly to signalize the channel has been detected.
|width="200pt" style="padding:0px 20px; vertical-align: top;"|Briefly push the button to save the assignment and to continue with teaching the channel for aileron function (menu point C).
|width="200pt" style="padding:0px 20px; vertical-align: top;"|Move the aileron stick; the Status LED must flash instantly. Briefly push the button and proceed with teaching elevator (D), rudder (E) and gyro channel (F) ...
|}<br />
{|class="gallery" style="font-style: italic"
|- 
|width="200pt" style="padding:0px 20px;" align="center"|[[Image:SpektrumSetup 9.jpg|192px|none|border]]
|width="400pt" style="padding:0px 20px;" align="center"|[[Image:SpektrumSetup 10.jpg|192px|none|border]]
|width="200pt" style="padding:0px 20px;" align="center"|[[Image:SpektrumSetup 11.jpg|192px|none|border]]
|width="400pt" style="padding:0px 20px;" align="center"|[[Image:SpektrumSetup 12.jpg|192px|none|border]]
|-
|width="200pt" style="padding:0px 20px; vertical-align: top;"|At menu point G release the throttle hold switch to unlock the throttle control and teach the throttle channel again by moving the thrust stick.
|width="200pt" style="padding:0px 20px; vertical-align: top;"|At point H you can assign an auxiliary channel that control the CH6 output on the MICROEBAST PLUS. Skip this by simply pressing the button again without teaching any channel.
|width="200pt" style="padding:0px 20px; vertical-align: top;"|Same can be done at menu point I which is used to assign an auxiliary channel for the nitro RPM Governor function.
|width="200pt" style="padding:0px 20px; vertical-align: top;"|'''Now the important part is that we must NOT assign any channel for AttitudeControl but simply skip the function assignment at menu point J! This will set the special assignment that uses the gyro channel for AttitudeControl.'''
|}<br />
{|class="gallery" style="font-style: italic"
|- 
|width="200pt" style="padding:0px 20px;" align="center"|[[Image:SpektrumSetup 13.jpg|192px|none|border]]
|width="400pt" style="padding:0px 20px;" align="center"|[[Image:SpektrumSetup 14.jpg|192px|none|border]]
|width="200pt" style="padding:0px 20px;" align="center"|[[Image:SpektrumSetup 15.jpg|192px|none|border]]
|-
|width="200pt" style="padding:0px 20px; vertical-align: top;"|Last step is menu point N.
|width="200pt" style="padding:0px 20px; vertical-align: top;"|Move the throttle stick to motor off position and teach this position for failsafe function by pushing the button briefly.
|width="200pt" style="padding:0px 20px; vertical-align: top;"|The end of receiver setup menu is shown by all LEDs flashing.
|}<br />
<br />
{{QUOTE|Note you must go through the complete receiver setup menu until you reach the menu end (all Menu LEDs flashing). Otherwise your settings will not be stored.}}<br />
<br />
Power off and on again. MICROBEAST PLUS will perform initialization sequence. When the init is finished perform basic setup procedure (if not already done). When the heli is ready to fly open Parameter menu by briefly pushing the button while in operation mode and directly go to menu point L by skipping the other menu points pushing the button repeatedly. At menu point L choose your desired AttitudeControl mode and save it by again pushing the button briefly. If using a AttitudeControl mode with collective pitch input you may change the pitch at menu point M. When out of the Parameter menu check if AttitudeControl reacts correctly when flipping your AttitudeControl switch.<br />
<br />
{|class="gallery" style="font-style: italic"
|- 
|width="400pt" style="padding:0px 20px;" align="center"|[[Image:Att SetupGyro 1.png|192px|none|border]]
|width="400pt" style="padding:0px 20px;" align="center"|[[Image:Att SetupGyro 2.png|192px|none|border]]
|width="400pt" style="padding:0px 20px;" align="center"|[[Image:Att SetupGyro 3.png|192px|none|border]]
|-
|width="200pt" style="padding:0px 20px; vertical-align: top;"|Flipping the switch into one direction AttitudeControl is ON. This is shown by Menu LED G lighting up while the Status LED is red. By adjusting the servo throw of the gyro channel into this direction you can adjust the AttitudeControl gain later.
|width="200pt" style="padding:0px 20px; vertical-align: top;"|Flipping the switch to OFF position, Menu LED A will flash while the Status LED is red. If the switch reacts inverted use your transmitter's servo reverse function and reverse the gyro channel (channel 5)!
|width="200pt" style="padding:0px 20px; vertical-align: top;"|Adjusting the servo throw of the gyro channel into this direction will change the tail gyro gain which is indicated by the yellow Menu LED in combination with a blue Status LED.
|}<br />
{{QUOTE|Don't forget: AttitudeControl gain and status will only be shown each time after the gain changes which is the case when flipping the switch. After 8 seconds the Menu LED will go off and the Status LED color changes back to blue showing the tail gyro mode.}}<br />
<br />
Translation===Aktivierung der AttitudeControl über den Kanal vom Heckkreisel===
Insbesondere wenn ein Sender mit nur 6 Steuerkanälen verwendet wird oder ein "Standardempfänger" mit 5 einzelnen Steueranschlüssen, dann kann die AttitudeControl über den Kanal vom Heckkreisel (Kanal 5) mit angesteuert werden. Anstatt der Umschaltung zwischen Normal- and HeadingLock-Modus wird die AttitudeControl aktiviert oder deaktiviert, wenn der Steuerkanal die Richtung ändert. Der Heckkreisel wird dann immer im HeadingLock-Modus betrieben. In die Richtung, in der die AttitudeControl deaktiviert ist, wird durch die Größe des Steuerausschlags wie gewohnt die Wirkstärke des Heckkreisel eingestellt. In die Gegenrichtung in der die AttitudeControl aktiviert ist, bestimmt die Höhe des Steuerausschlags die Wirkstärke der AttitudeControl.<br />
<br />
{|class="gallery" style="font-style: italic"
|- 
|width="300pt" style="padding:0px 20px;" align="center"|[[Image:Gyro switch.png|192px|none|border]]
|width="300pt" style="padding:0px 20px;" align="center"|[[Image:Gyro 50.png|192px|none|border]]
|width="400pt" style="padding:0px 20px;" align="center"|[[Image:Attctrl 50.png|192px|none|border]]
|width="200pt" style="padding:0px 20px;" align="center"|[[Image:Gyro_onoff.png|192px|none|border]]
|-
|width="200pt" style="padding:0px 20px; vertical-align: top;"|Im Menü KREISEL vom Fernsteuersender weisen wir einen Schalter für den Kreiselkanal (Kanal 5) zu. 
|width="200pt" style="padding:0px 20px; vertical-align: top;"|Wenn der Schalter losgelassen ist, bestimmt der Kanal die Höhe der Wirkstärke des Heckkreisels. Als Ausgangsbasis wählen wir 50% Wirkstärke (=ca. 50% Steuerauschlag).
|width="200pt" style="padding:0px 20px; vertical-align: top;"|Wenn der Schalter für die AttitudeControl gezogen wird wechselt der Steuerkanal die Richtung, die AttitudeControl wird aktiviert. Hier stellen wir -50% Steuerausschlag ein, so dass die AttitudeControl mit 50% Wirkstärke betrieben wird.
|width="200pt" style="padding:0px 20px; vertical-align: top;"|Prüfe anhand des Servomonitors nach, wie sich der Steuerausschlag ändert, wenn der "Rettungsschalter" betätigt wird.
|}<br />
Damit MICROBEAST PLUS in diesem Betriebsmodus verwendet werden kann, muss die Funktionszuweisung im Empfängereinstellmenü manuell vorgenommen werden, da die Standardbelegung einen separaten Steuerkanal vorsieht.<br />
<br />
{|class="gallery" style="font-style: italic"
|- 
|width="300pt" style="padding:0px 20px;" align="center"|[[Image:Lock thr.png|192px|none|border]]
|width="300pt" style="padding:0px 20px;" align="center"|[[Image:SPM_0020.png|192px|none|border]]
|width="400pt" style="padding:0px 20px;" align="center"|[[Image:Thr_locked.png|192px|none|border]]
|width="200pt" style="padding:0px 20px;" align="center"|[[Image:Other_functions.png|192px|none|border]]
|-
|width="200pt" style="padding:0px 20px; vertical-align: top;"|Für die manuelle Funktionszuweisung müssen wir den Gaskanal sperren, damit dieser nicht gleichzeitig mit dem Pitch bewegt wird.
|width="200pt" style="padding:0px 20px; vertical-align: top;"|Dazu kann z.B. der Schalter für die Flugphase Autorotation verwendet werden.
|width="200pt" style="padding:0px 20px; vertical-align: top;"|Wenn die Flugphase Autorotation aktiv ist, kann der Pitchsteuerknüppel bewegt werden ohne dass sich das Gas verändert.
|width="200pt" style="padding:0px 20px; vertical-align: top;"|Stelle auch sicher, dass bei allen anderen Steuerfunktionen immer nur ein Kanal bewegt wird, wenn der jeweilige Steuerknüppel bewegt wird.
|}<br />
<br />
In Receiver setup menu we choose the correct receiver type (in this example we use a Spektrum remote satellite in combination with a Spektrum DX6 transmitter) and assign the transmitter channels to the functions by moving the appropriate control sticks on the transmitter.<br />
<br />
{|class="gallery" style="font-style: italic"
|- 
|width="400pt" style="padding:0px 20px;" align="center"|[[Image:SpektrumSetup 1.jpg|192px|none|border]]
|width="300pt" style="padding:0px 20px;" align="center"|[[Image:SpektrumSetup 2.jpg|192px|none|border]]
|width="200pt" style="padding:0px 20px;" align="center"|[[Image:SpektrumSetup 3.jpg|192px|none|border]]
|width="300pt" style="padding:0px 20px;" align="center"|[[Image:SpektrumSetup 4.jpg|192px|none|border]]
|-
|width="200pt" style="padding:0px 20px; vertical-align: top;"|The serial signal line is connected to ELE/DI1 input at MICROBEAST PLUS. For setup the power supply can be connected to one of the servo output port CH1 to CH4. Before and while switching on/connecting power we hold down the push button to enter receiver setup menu.
|width="200pt" style="padding:0px 20px; vertical-align: top;"|Menu LED A lights up instantly and Status LED shows current receiver type (by default Standard receiver = LED off).
|width="200pt" style="padding:0px 20px; vertical-align: top;"|Again push and hold down the button repeatedly until the Status LED lights up in the color and state that represents our receiver type. 
|width="200pt" style="padding:0px 20px; vertical-align: top;"|In this case we need the Status LED light up in purple color = Spektrum remote satellite.
|}<br />
{|class="gallery" style="font-style: italic"
|- 
|width="400pt" style="padding:0px 20px;" align="center"|[[Image:SpektrumSetup 5.jpg|192px|none|border]]
|width="300pt" style="padding:0px 20px;" align="center"|[[Image:SpektrumSetup 6.jpg|192px|none|border]]
|width="200pt" style="padding:0px 20px;" align="center"|[[Image:SpektrumSetup 7.jpg|192px|none|border]]
|width="300pt" style="padding:0px 20px;" align="center"|[[Image:SpektrumSetup 8.jpg|192px|none|border]]
|-
|width="200pt" style="padding:0px 20px; vertical-align: top;"|Briefly push the button to proceed to function assignment (Menu point B) where the Status LED should light up in blue color if the transmitter is on and the Spektrum remote signal is received.
|width="200pt" style="padding:0px 20px; vertical-align: top;"|To teach the collective pitch just move the thrust stick back and forth. The Status LED will flash instantly to signalize the channel has been detected.
|width="200pt" style="padding:0px 20px; vertical-align: top;"|Briefly push the button to save the assignment and to continue with teaching the channel for aileron function (menu point C).
|width="200pt" style="padding:0px 20px; vertical-align: top;"|Move the aileron stick; the Status LED must flash instantly. Briefly push the button and proceed with teaching elevator (D), rudder (E) and gyro channel (F) ...
|}<br />
{|class="gallery" style="font-style: italic"
|- 
|width="200pt" style="padding:0px 20px;" align="center"|[[Image:SpektrumSetup 9.jpg|192px|none|border]]
|width="400pt" style="padding:0px 20px;" align="center"|[[Image:SpektrumSetup 10.jpg|192px|none|border]]
|width="200pt" style="padding:0px 20px;" align="center"|[[Image:SpektrumSetup 11.jpg|192px|none|border]]
|width="400pt" style="padding:0px 20px;" align="center"|[[Image:SpektrumSetup 12.jpg|192px|none|border]]
|-
|width="200pt" style="padding:0px 20px; vertical-align: top;"|At menu point G release the throttle hold switch to unlock the throttle control and teach the throttle channel again by moving the thrust stick.
|width="200pt" style="padding:0px 20px; vertical-align: top;"|At point H you can assign an auxiliary channel that control the CH6 output on the MICROEBAST PLUS. Skip this by simply pressing the button again without teaching any channel.
|width="200pt" style="padding:0px 20px; vertical-align: top;"|Same can be done at menu point I which is used to assign an auxiliary channel for the nitro RPM Governor function.
|width="200pt" style="padding:0px 20px; vertical-align: top;"|'''Now the important part is that we must NOT assign any channel for AttitudeControl but simply skip the function assignment at menu point J! This will set the special assignment that uses the gyro channel for AttitudeControl.'''
|}<br />
{|class="gallery" style="font-style: italic"
|- 
|width="200pt" style="padding:0px 20px;" align="center"|[[Image:SpektrumSetup 13.jpg|192px|none|border]]
|width="400pt" style="padding:0px 20px;" align="center"|[[Image:SpektrumSetup 14.jpg|192px|none|border]]
|width="200pt" style="padding:0px 20px;" align="center"|[[Image:SpektrumSetup 15.jpg|192px|none|border]]
|-
|width="200pt" style="padding:0px 20px; vertical-align: top;"|Last step is menu point N.
|width="200pt" style="padding:0px 20px; vertical-align: top;"|Move the throttle stick to motor off position and teach this position for failsafe function by pushing the button briefly.
|width="200pt" style="padding:0px 20px; vertical-align: top;"|The end of receiver setup menu is shown by all LEDs flashing.
|}<br />
<br />
{{QUOTE|Note you must go through the complete receiver setup menu until you reach the menu end (all Menu LEDs flashing). Otherwise your settings will not be stored.}}<br />
<br />
Power off and on again. MICROBEAST PLUS will perform initialization sequence. When the init is finished perform basic setup procedure (if not already done). When the heli is ready to fly open Parameter menu by briefly pushing the button while in operation mode and directly go to menu point L by skipping the other menu points pushing the button repeatedly. At menu point L choose your desired AttitudeControl mode and save it by again pushing the button briefly. If using a AttitudeControl mode with collective pitch input you may change the pitch at menu point M. When out of the Parameter menu check if AttitudeControl reacts correctly when flipping your AttitudeControl switch.<br />
<br />
{|class="gallery" style="font-style: italic"
|- 
|width="400pt" style="padding:0px 20px;" align="center"|[[Image:Att SetupGyro 1.png|192px|none|border]]
|width="400pt" style="padding:0px 20px;" align="center"|[[Image:Att SetupGyro 2.png|192px|none|border]]
|width="400pt" style="padding:0px 20px;" align="center"|[[Image:Att SetupGyro 3.png|192px|none|border]]
|-
|width="200pt" style="padding:0px 20px; vertical-align: top;"|Flipping the switch into one direction AttitudeControl is ON. This is shown by Menu LED G lighting up while the Status LED is red. By adjusting the servo throw of the gyro channel into this direction you can adjust the AttitudeControl gain later.
|width="200pt" style="padding:0px 20px; vertical-align: top;"|Flipping the switch to OFF position, Menu LED A will flash while the Status LED is red. If the switch reacts inverted use your transmitter's servo reverse function and reverse the gyro channel (channel 5)!
|width="200pt" style="padding:0px 20px; vertical-align: top;"|Adjusting the servo throw of the gyro channel into this direction will change the tail gyro gain which is indicated by the yellow Menu LED in combination with a blue Status LED.
|}<br />
{{QUOTE|Don't forget: AttitudeControl gain and status will only be shown each time after the gain changes which is the case when flipping the switch. After 8 seconds the Menu LED will go off and the Status LED color changes back to blue showing the tail gyro mode.}}<br />
<br />

Aktivierung der AttitudeControl über den Kanal vom Heckkreisel

Insbesondere wenn ein Sender mit nur 6 Steuerkanälen verwendet wird oder ein "Standardempfänger" mit 5 einzelnen Steueranschlüssen, dann kann die AttitudeControl über den Kanal vom Heckkreisel (Kanal 5) mit angesteuert werden. Anstatt der Umschaltung zwischen Normal- and HeadingLock-Modus wird die AttitudeControl aktiviert oder deaktiviert, wenn der Steuerkanal die Richtung ändert. Der Heckkreisel wird dann immer im HeadingLock-Modus betrieben. In die Richtung, in der die AttitudeControl deaktiviert ist, wird durch die Größe des Steuerausschlags wie gewohnt die Wirkstärke des Heckkreisel eingestellt. In die Gegenrichtung in der die AttitudeControl aktiviert ist, bestimmt die Höhe des Steuerausschlags die Wirkstärke der AttitudeControl.


Damit MICROBEAST PLUS in diesem Betriebsmodus verwendet werden kann, muss die Funktionszuweisung im Empfängereinstellmenü manuell vorgenommen werden, da die Standardbelegung einen separaten Steuerkanal vorsieht.


In Receiver setup menu we choose the correct receiver type (in this example we use a Spektrum remote satellite in combination with a Spektrum DX6 transmitter) and assign the transmitter channels to the functions by moving the appropriate control sticks on the transmitter.


Note you must go through the complete receiver setup menu until you reach the menu end (all Menu LEDs flashing). Otherwise your settings will not be stored.


Power off and on again. MICROBEAST PLUS will perform initialization sequence. When the init is finished perform basic setup procedure (if not already done). When the heli is ready to fly open Parameter menu by briefly pushing the button while in operation mode and directly go to menu point L by skipping the other menu points pushing the button repeatedly. At menu point L choose your desired AttitudeControl mode and save it by again pushing the button briefly. If using a AttitudeControl mode with collective pitch input you may change the pitch at menu point M. When out of the Parameter menu check if AttitudeControl reacts correctly when flipping your AttitudeControl switch.


Don't forget: AttitudeControl gain and status will only be shown each time after the gain changes which is the case when flipping the switch. After 8 seconds the Menu LED will go off and the Status LED color changes back to blue showing the tail gyro mode.