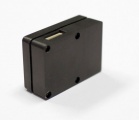
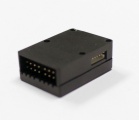
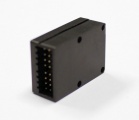
The MICROBEAST PLUS unit can be attached '''flat or upright''' on the helicopter. However, the '''servo connector pins must always point towards the front or rear''' of the helicopter. The small white sensor pinboard on the side must always be inline with flight direction.<br />
The MICROBEAST PLUS unit can be attached '''flat or upright''' on the helicopter. However, the '''servo connector pins must always point towards the front or rear''' of the helicopter. The small white sensor pinboard on the side must always be inline with flight direction.<br />
'''Pay attention that the edges of the Microbeast PLUS unit are all parallel with the corresponding rotational axes of the helicopter!''' Especially make sure that the mounting platform is perpendicular to the main shaft! On the other hand it is not important that the unit is directly placed on the rotation axis (which is nearly impossible).<br/>
'''Pay attention that the edges of the Microbeast PLUS unit are all parallel with the corresponding rotational axes of the helicopter!''' Especially make sure that the mounting platform is perpendicular to the main shaft! On the other hand it is not important that the unit is directly placed on the rotation axis (which is nearly impossible).<br/>
Attach the Microbeast PLUS unit by using one of the provided 3M® gyropads at a preferably low vibrating position on your helicopter such as the gyro platform or receiver platform. You may need to choose another type of mounting pad depending on the vibration pattern of your helicopter. For more information please ask you Microbeast PLUS dealer.
The MICROBEAST PLUS unit can be attached flat or upright on the helicopter. However, the servo connector pins must always point towards the front or rear of the helicopter. The small white sensor pinboard on the side must always be inline with flight direction.
Pay attention that the edges of the Microbeast PLUS unit are all parallel with the corresponding rotational axes of the helicopter! Especially make sure that the mounting platform is perpendicular to the main shaft! On the other hand it is not important that the unit is directly placed on the rotation axis (which is nearly impossible).
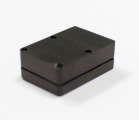
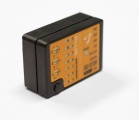
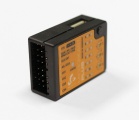
There are eight possible mounting orientations:
flat, cover on top, servo connectors showing to front
upright, button on top, servo connectors showing to front
flat, cover showing to bottom, servo connectors showing to front
upright, button on bottom, servo connectors showing to front
flat, cover on top, servo connectors showing to rear
upright, button on top, servo connectors showing to rear
flat, cover showing to bottom, servo connectors showing to rear
upright, button on bottom, servo connectors showing to rear