Help:FAQ Nanobeast: Difference between revisions
Shornstein (talk | contribs) No edit summary |
Shornstein (talk | contribs) No edit summary |
||
| (One intermediate revision by the same user not shown) | |||
| Line 2: | Line 2: | ||
<!--T:1--> | <!--T:1--> | ||
{{DISPLAYTITLE:Nanobeast and Shape S2 FAQ|noerror}} | {{DISPLAYTITLE:Nanobeast and Shape S2 FAQ|noerror}} | ||
[[File:Nanobeast.png| | [[File:Nanobeast.png|200px|left]]<br /> | ||
<br clear=all> | |||
<br /> | |||
= External programming device for nanobeast / Shape S2 heli = <!--T:2--> | = External programming device for nanobeast / Shape S2 heli = <!--T:2--> | ||
| Line 9: | Line 11: | ||
FYI: In fact only the push button on the device is needed. The 3 DIP switches are no in use with current firmware and may be used for other programming tasks in future.<br /> | FYI: In fact only the push button on the device is needed. The 3 DIP switches are no in use with current firmware and may be used for other programming tasks in future.<br /> | ||
<br /> | <br /> | ||
Additional note: The programming button can be used in combination with the standard nanobeast firmware in order to initiate automatic receiver scan, too. Please refer to the [https://www.beastx.com/download/manual/nanobeast/ShapeS2_Handbuch_V101_web.pdf | Additional note: The programming button can be used in combination with the standard nanobeast firmware in order to initiate automatic receiver scan, too. Please refer to the [https://www.beastx.com/download/manual/nanobeast/ShapeS2_Handbuch_V101_web.pdf Shape S2 instruction manual] (basically procedure is as follows: connect programmer, power up, push and hold button while LED is flashing red, release when LED goes solid, again push briefly to start scan).<br /> | ||
<br /> | |||
<br /> | |||
[[File:Nanobeast_Programming.PNG|x300px|border]]<br /> | |||
<br /> | <br /> | ||
</translate> | </translate> | ||
Latest revision as of 10:09, 30 October 2019

External programming device for nanobeast / Shape S2 heli
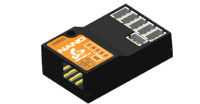
The Shape S2 helicopter is shipped with a small programming device that has a button and a 3 DIP switches. As the Nanobeast on the Shape S2 is pre-programmed it is not necessary to perform initial setup procedure for the helicopter with the StudioX App. Instead you just have to setup your radio system and start radio system detection on the Nanobeast once. For this the included programming device is used. For further information please see the Shape S2 instruction manual.
FYI: In fact only the push button on the device is needed. The 3 DIP switches are no in use with current firmware and may be used for other programming tasks in future.
Additional note: The programming button can be used in combination with the standard nanobeast firmware in order to initiate automatic receiver scan, too. Please refer to the Shape S2 instruction manual (basically procedure is as follows: connect programmer, power up, push and hold button while LED is flashing red, release when LED goes solid, again push briefly to start scan).
