StudioX/en: Difference between revisions
Importing a new version from external source |
Importing a new version from external source |
||
| Line 19: | Line 19: | ||
==Supported Operating Systems== | ==Supported Operating Systems== | ||
StudioX is natively available for these operating systems: | StudioX is natively available for these operating systems: | ||
* Windows (XP, | * Windows (XP, Vista, 7, 8, 8.1, 10) | ||
* OS X (10.7 | * OS X (10.7, 10.8, 10.9 64-Bit, 10.10 64-Bit, 10.11 64-bit) | ||
<br /> | <br /> | ||
Revision as of 15:33, 1 August 2016
Requirements
To connect your BEASTX device to the computer you need one of the following USB interfaces:
 |
 |
 |
| BEASTX USB2SYS interface |
SPEKTRUM SPMA3030 interface |
RCWARE RX2SIM Wireless Multi-Sim Adapter with USB2SYS interface emulation |
Supported Operating Systems
StudioX is natively available for these operating systems:
- Windows (XP, Vista, 7, 8, 8.1, 10)
- OS X (10.7, 10.8, 10.9 64-Bit, 10.10 64-Bit, 10.11 64-bit)
Minimum System Requirements
- available USB 2.0 socket for USB2SYS / SPMA3030 / RX2SIM Interface
- CPU Speed >= 1GHz recommended
- Screen Resolution 1024x786 recommended
Installation
Please download the latest StudioX installer for your system:
StudioX for Windows XP, Vista, 7, 8, 8.1
StudioX for MacOS
Installation on a Windows system
After downloading the StudioXSetup_xxx.exe open it by double clicking from the folder where it was downloaded (here we downloaded it directly to the Desktop):
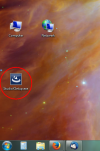
Simply start the install routine by clicking "Next" and "Install". The files will be copied to your default Program Files folder. When done click "Finish":
Before using the software make sure that the driver files for your USB2SYS interface have been installed and install the files if necessary. For further information see this page: Driver installation for Microsoft Windows.
Installation on a Mac
Due to the security features of MacOS the installation might be a little bit more complicated than with Windows.
Open the downloaded StudioX_xxx.dmg Disk Image and Drag'n'Drop the StudioX Application in your Applications folder:
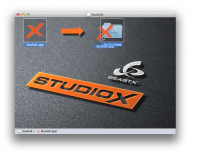
If StudioX is running then everything is fine. If you get this warning, proceed with the steps mentioned below:
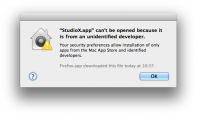
Open your Applications folder and select "Open in Finder":
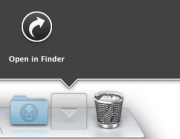
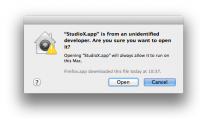
Right-click on the StudioX.app and select "Open":

Click the "Open" button:
Before using the software make sure that the driver files for your USB2SYS/SPMA3030 interface have been installed and install the files if necessary. For further information see this page: Driver installation for Apple MacOS.
Preferences

Check for Updates automatically
If your PC is connected to the internet, this option makes sure that your StudioX installation is up-to-date. Not later than each 7 days the update dialog is show automatically, showing you whether an update is available or not.
Language Selection
If the "Auto" option is selected, StudioX will use the language detected from the system's settings. Otherwise you can force on of the following languages:
- English
- German (coming soon)
- French (coming soon)
- Spanish (coming soon)
- Chinese (coming soon)
Attention: Switching the language requires a restart of the StudioX Application.
Updating StudioX
Updating StudioX is simple and straight.

From the "Update StudioX" dialog, you can press the "Download" button if an update is available.
Execute the downloaded package and follow the instructions given.
Make sure you closed the application before trying to install a newer version.


