Translations:Manuals:BXFbl:Receiver A/12/de: Difference between revisions

From BEASTX Wiki
Jump to navigation Jump to search
No edit summary
No edit summary
 
Line 1: Line 1:
<div class="iosgallery">
<html>
<img class="ios" src="https://wiki.beastx.com/images/studiox/freakware%202019-07-09%20011.PNG">
<div style="display: flex; justify-content: flex-start; flex-wrap: wrap; gap: 50px;">
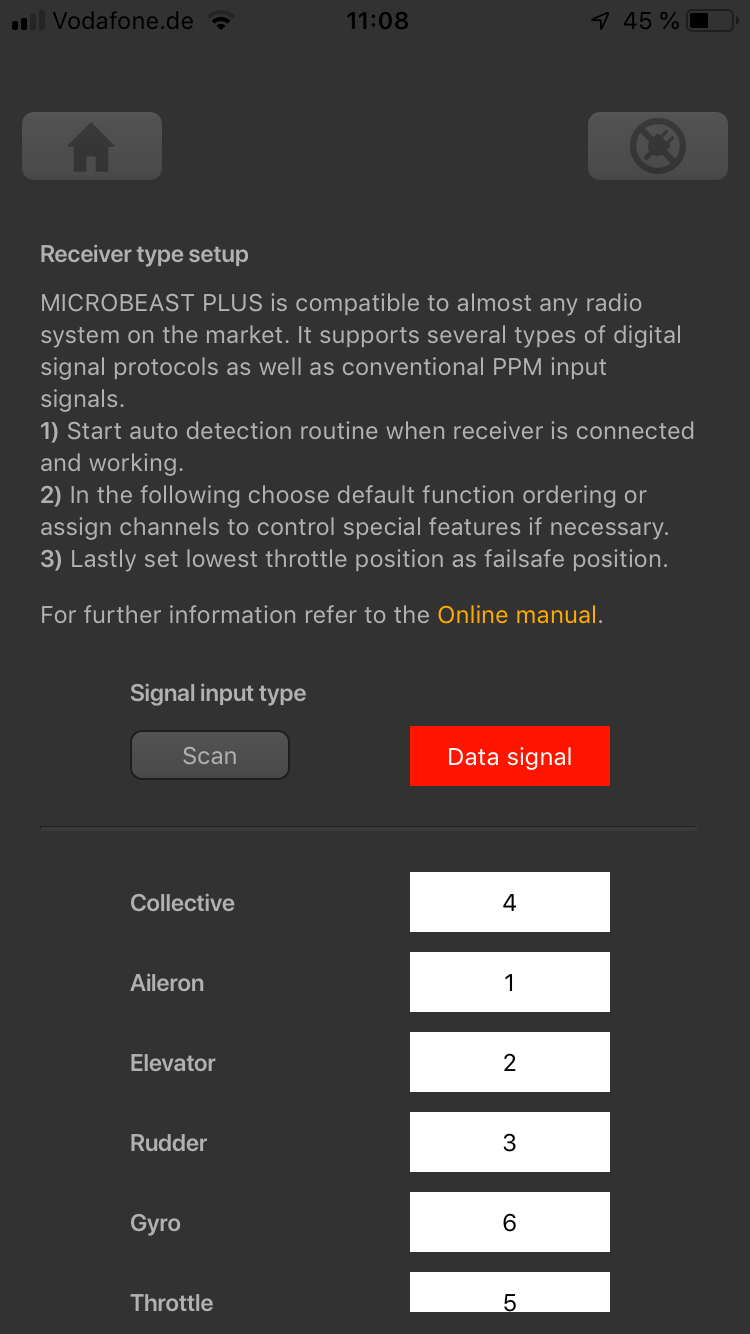
<div class="iostext">Klicke auf "Empfänger"...</div>
  <!-- Erstes Bild und Text -->
</div>
  <div style="width: 250px; text-align: center;">
<div class="iosgallery">
    <div style="border-radius: 30px; overflow: hidden; box-shadow: 0 4px 8px rgba(0, 0, 0, 0.2);">
<img class="ios" src="https://wiki.beastx.com/images/studiox/freakware%202019-07-09%20014.PNG">
        <img src="https://wiki.beastx.com/images/studiox/freakware%202019-07-09%20011.PNG" alt="Screenshot" style="width: 100%; height: auto; display: block;">
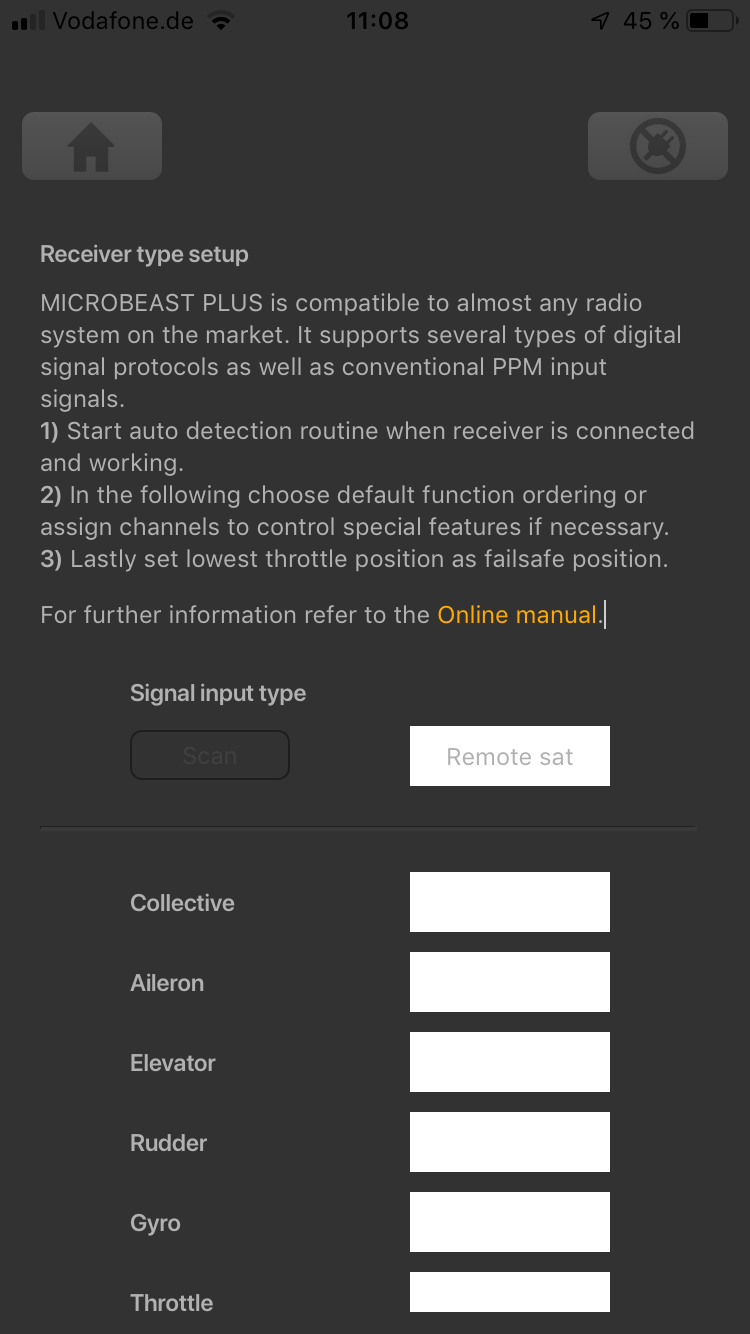
<div class="iostext">...und warte bis der Vorgang abgeschlossen ist.</div>
    </div>
</div>
    <div style="margin-top: 20px; margin-bottom: 10px;">Klicke auf "Empfänger"...</div>
<div class="iosgallery">
  </div
<img class="ios" src="https://wiki.beastx.com/images/studiox/freakware%202019-07-09%20016.PNG">
  <!-- Zweites Bild und Text -->
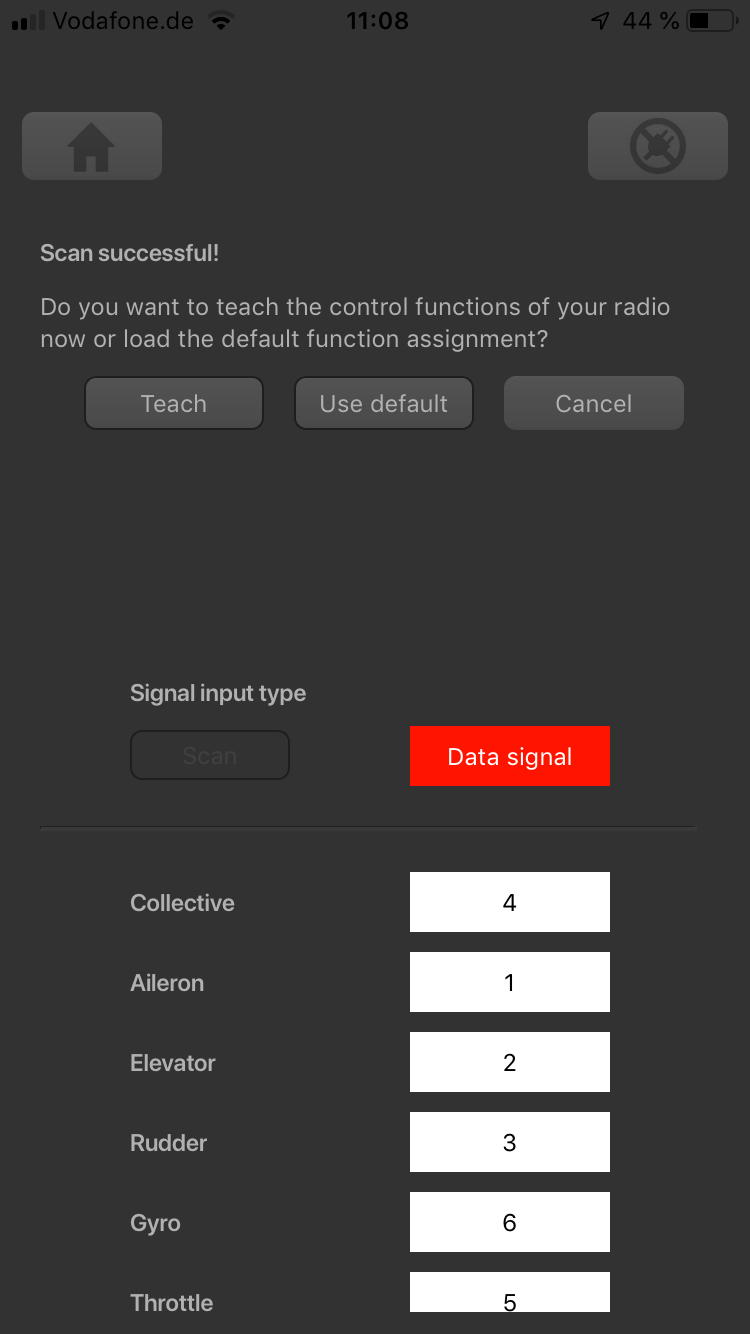
<div class="iostext">Wenn der Scan erfolgreich war, erscheint ein Dialog zur weiteren Vorgehensweise.</div>
  <div style="width: 250px; text-align: center;">
    <div style="border-radius: 30px; overflow: hidden; box-shadow: 0 4px 8px rgba(0, 0, 0, 0.2);">
        <img src="https://wiki.beastx.com/images/studiox/freakware%202019-07-09%20014.PNG" alt="Screenshot" style="width: 100%; height: auto; display: block;">
    </div>
    <div style="margin-top: 20px; margin-bottom: 10px;">...und warte bis der Vorgang abgeschlossen ist.</div>
  </div>
  <!-- Drittes Bild und Text -->
  <div style="width: 250px; text-align: center;">
    <div style="border-radius: 30px; overflow: hidden; box-shadow: 0 4px 8px rgba(0, 0, 0, 0.2);">
        <img src="https://wiki.beastx.com/images/studiox/freakware%202019-07-09%20016.PNG" alt="Screenshot" style="width: 100%; height: auto; display: block;">
    </div>
    <div style="margin-top: 20px; margin-bottom: 10px;">Wenn der Scan erfolgreich war, erscheint ein Dialog zur weiteren Vorgehensweise.</div>
  </div>
</div>
</div>
</html>
<br />
<br />
<br />
<br />

Latest revision as of 08:02, 18 October 2024

Information about message (contribute)
This message has no documentation. If you know where or how this message is used, you can help other translators by adding documentation to this message.
Message definition (Manuals:BXFbl:Receiver A)
<html>
<div style="display: flex; justify-content: flex-start; flex-wrap: wrap; gap: 50px;">
  <!-- Erstes Bild und Text -->
  <div style="width: 250px; text-align: center;">
   <div style="border-radius: 30px; overflow: hidden; box-shadow: 0 4px 8px rgba(0, 0, 0, 0.2);">
       <img src="https://wiki.beastx.com/images/studiox/freakware%202019-07-09%20011.PNG" alt="Screenshot" style="width: 100%; height: auto; display: block;">
   </div>
   <div style="margin-top: 20px; margin-bottom: 10px;">Click "Receiver" button...</div>
  </div>  
  <!-- Zweites Bild und Text -->
  <div style="width: 250px; text-align: center;">
   <div style="border-radius: 30px; overflow: hidden; box-shadow: 0 4px 8px rgba(0, 0, 0, 0.2);">
       <img src="https://wiki.beastx.com/images/studiox/freakware%202019-07-09%20014.PNG" alt="Screenshot" style="width: 100%; height: auto; display: block;">
   </div>
   <div style="margin-top: 20px; margin-bottom: 10px;">...and wait until scan is finished.</div>
  </div>
  <!-- Drittes Bild und Text -->
  <div style="width: 250px; text-align: center;">
   <div style="border-radius: 30px; overflow: hidden; box-shadow: 0 4px 8px rgba(0, 0, 0, 0.2);">
       <img src="https://wiki.beastx.com/images/studiox/freakware%202019-07-09%20016.PNG" alt="Screenshot" style="width: 100%; height: auto; display: block;">
   </div>
   <div style="margin-top: 20px; margin-bottom: 10px;">If scan was successful a dialog will display to proceed.</div>
  </div>
</div>
</html>
<br />
<br />

Screenshot
Klicke auf "Empfänger"...
Screenshot
...und warte bis der Vorgang abgeschlossen ist.
Screenshot
Wenn der Scan erfolgreich war, erscheint ein Dialog zur weiteren Vorgehensweise.