Help:FAQ:General: Difference between revisions
Shornstein (talk | contribs) Marked this version for translation |
Shornstein (talk | contribs) No edit summary |
||
| Line 71: | Line 71: | ||
** swapped Setup Menu Points G and H (now H = Swash servo directions and G = Swash mixing) | ** swapped Setup Menu Points G and H (now H = Swash servo directions and G = Swash mixing) | ||
** now supports up to 4 swashplate servos (when choosing 90° eCCPM swash mixing at Setup Point G and using a single wire receiver); 4th servo (2nd elevator) is connected to CH7 output | ** now supports up to 4 swashplate servos (when choosing 90° eCCPM swash mixing at Setup Point G and using a single wire receiver); 4th servo (2nd elevator) is connected to CH7 output | ||
** Setup Menu Point J (Cyclic throw): measurement and neutral positions can be selected as often as you like now, so you can even check positions after the setup was finished; see manual for | ** Setup Menu Point J (Cyclic throw): measurement and neutral positions can be selected as often as you like now, so you can even check positions after the setup was finished; see manual for further information | ||
** Setup Menu Point K (Collective pitch): no need to teach the stick end positions anymore, instead the user has to adjust the pitch range initially so the stick movement and range is shown correctly on the display; see manual for further information | ** Setup Menu Point K (Collective pitch): no need to teach the stick end positions anymore, instead the user has to adjust the pitch range initially so the stick movement and range is shown correctly on the display; see manual for further information | ||
** Setup Menu Point M (Cyclic directions): no need to check swash gyro compensation by user anymore, instead teach the stick directions to the system; see manual for further information | ** Setup Menu Point M (Cyclic directions): no need to check swash gyro compensation by user anymore, instead teach the stick directions to the system; see manual for further information | ||
| Line 78: | Line 78: | ||
** Parameter Menu Point L (AttitudeControl Mode): swapped LED colors for different modes (now purple = Angular mode, red = Bailout rescue, blue = 3D - Mode) | ** Parameter Menu Point L (AttitudeControl Mode): swapped LED colors for different modes (now purple = Angular mode, red = Bailout rescue, blue = 3D - Mode) | ||
* throttle failsafe indicator (only when using Single line receiver): when throttle is higher than failsafe position and failsafe engages during power up, the system will lock throttle after initialization and the Status LED will flash red/blue! | * throttle failsafe indicator (only when using Single line receiver): when throttle is higher than failsafe position and failsafe engages during power up, the system will lock throttle after initialization and the Status LED will flash red/blue! | ||
<br /> | |||
:''PROEDITION'' | |||
* added new feature "Bank switching" (can be enabled with StudioX/StudioXm only) which allows to set parameters for three flight conditions; when used gain adjustment using the dials and gyro gain adjustment with the radio are disabled, instead the gains and parameters are all set with StudioX/StudioXm; see manual for further information | |||
:''StudioX'' | |||
* added FFT tab to show frequency spektrum of the sensor input to visualize vibrations, especially interesting when planning to use the AttitudeControl; see StudioX manual for further information | |||
<br /> | <br /> | ||
Revision as of 12:45, 8 November 2017
MICROBEAST vs. MICROBEAST PLUS
MICROBEAST was the first product of BEASTX company. It is a flybarless unit that can be programmed without the need for a computer or external programming device. Its unique EasySetup makes it possible to program the system within a few minutes just by using the button on the unit and your transmitter. There are not many parameters to adjust as MICROBEAST can be used with nearly any RC helicopter model "out of the box".

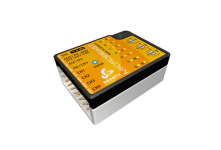
MICROBEAST PLUS is the successor of MICROBEAST and comes with new hardware components like more powerful microcontroller and more accurate gyro sensors. Due to these new capabilities MICROBEAST PLUS can be upgraded with lots of additional features like an artificial horizon for controlling the attitude (used for Bailout rescue, flight training and angular mode), a governor function for controlling the rotor headspeed of the helicopter as well as a Bank switch feature for adding several parameter sets to serve different flight conditions.
MICROBEAST PLUS vs. MICROBEAST PLUS HD
I intend to use the MICROBEAST PLUS on my 600/700 heli. Should I go with the HD version? What's the difference?
Today's servos and especially so-called high voltage servos typically have a very high power consumption. When using Futaba BLS 451 servos for example these are very modest. Savöx 1258/Align DS610 are much more demanding - one alone taking up to 15Amps peak for the instance of a second. And for very extreme example take high voltage Savöx servos SB-2271SG HV. They demand up to 27Amps (1 Servo!) peak which you can see when measuring the power consumption with an oscilloscope. So besides using a good stable and high rated power supply you have to ensure proper supply of the servos with this power. But when only connecting one servo plug with power leads into the receiver this may be insufficient and cause a "bottle neck" in power flow. Also when the current must take a long way through the receiver, the wiring and the MICROBEAST, this will produce high resistance due to the connections in between and additional loss of voltage. There is no benefit if the power supply/BEC itself can deliver 20-25A when this amount of current is not able to flow to the consumers.
 |
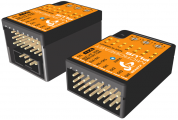
Now the idea behind MICROBEAST PLUS HD is to provide a power connection that allows for using thick power cables and directly connect these to the unit, close to the servos. So the voltage loss due to wiring and plug connection is reduced to a minimum. In general for helis with standard size servo you should always use MICROBEAST PLUS HD, because this will eliminate the "servo plug problem" as one important factor that may be critical in regards to the power supply. But also keep an eye on the design of your power supply in general. I.e. when using an ESC with only one BEC line there will no benefit of using the HD version as you already have a "bottle neck" at the power output. The small wire will not be able to transfer more than 5 Amps continuous current. Connecting this little wire to MICROBEAST's HD input will not help very much here. If on the other hand you have at least two or even three BEC lines then this can be different as you may solder the power wires from the BEC together to the MICROBEAST PLUS HD high power plug. Then you have a much lower contact resistance compared to only connect the wires using the standard servo plugs, which is a real benefit for providing a stable power supply. Ideally you have a BEC or receiver battery that already comes with thick power wires. Here it is ideal to use MICROBEAST PLUS HD. Also when using a separate receiver battery i. e. on nitro or gas helis using MICROBEAST PLUS HD is the ideal way to connect the battery to your RC system. In addition to the adequate connection plug here you have an integrated switch system for switching the heli on and off, so there is no need to buy an extra switch.
In regards to software and functionality in general there is no difference between MICROBEAST PLUS and MICROBEAST PLUS HD! Both use the same firmware and you can buy and upgrade both devices to ProEdition firmware.
MICROBEAST PLUS from ALIGN
MICROBEAST PLUS devices included in ALIGN T-Rex kits come with Firmware Version 4.x.x or 5.x.x BASIC. You can upgrade/update/register and use these devices just like any other MICROBEAST PLUS. Only difference is that these devices are carrying the ALIGN logo on the housing.
 |
Can I use MICROBEAST PLUS with a gasser heli, especially with RPM Governor and AttitudeControl?
We did do several tests with gas powered helis and we do not see any restriction on this. Gas motors produce very low frequent vibrations which normally can be filtered by the gyro sensors very well. So you should be able to fly with MICROBEAST PLUS and use AttitudeControl without issues on gasser helis. Also the RPM Governor function can be used with gas motors. Only restriction is that a rpm sensor with digital sensor output (PWM) must be used for proper function. Analog sensors like the Futaba GV1 magnet sensor or StatorGator which are often installed on gasser helis can't be used.
 |
| JR GSR260Z Sports FBL with MICROBEAST PLUS HD |
Is it possible to connect 4 swash plate servos to MICROBEAST / MICROBEAST PLUS?
Firmware Version 4.x.x and lower: No, 3 swashplate servos only.
Firmware Version 5.x.x: Yes, you can use up to 4 swash servos when using a single line receiver, i.e. for large scale helicopters. In this case we recommend to connect the servo outputs to a separate power distribution system. The 4th servo (2nd elevator servo) is connected to CH7 output of the MICROBEAST PLUS (only signal out!). See manual for further informations.
Differences between firmware versions (changelog)
Here you can see what has changed from one version to the preceeding version.
MICROBEAST PLUS
When updating from firmware 4.x.x or lower to Version 5.x.x you will loose all your settings. Please carefully read the Version 5 instruction manual and do the basic setup again.
5.0.2
- Basic functionality
- now fully adjustable (Setup & Parameters) also with StudioX computer software or StudioXm mobile App; see manuals for further information
- added support for FlySky iBus and Jeti EXBUS serial line input data
- removed "User defined" presets instead you can directly edit a value with StudioX/StudioXm if necessary
- reworked adjustment in Receiver Menu:
- Receiver Menu Point A: automatic receiver type detection; see manual for further information
- Receiver Menu Point A: changed LED colors for receiver types and also changed receiver type naming; see manual for further information
- reworked adjustment in Setup Menu:
- in general values and presets are changed using the rudder stick; menu options (selecting servos, changing adjustment positions) are set with aileron; when directions are setup correctly, left stick decreases a value and right stick increases a value
- Setup Menu Point C (Rudder pulse width): swapped LED colors for 760µs and 960µs (now 760 = purple and 960 = red) so that the values are increasing in the given order from purple (lowest) to blue (highest)
- Setup Menu Point F (Gyro/Rudder direction): no need to check gyro direction by user anymore, instead teach the rudder direction to the system; see manual for further information
- swapped Setup Menu Points G and H (now H = Swash servo directions and G = Swash mixing)
- now supports up to 4 swashplate servos (when choosing 90° eCCPM swash mixing at Setup Point G and using a single wire receiver); 4th servo (2nd elevator) is connected to CH7 output
- Setup Menu Point J (Cyclic throw): measurement and neutral positions can be selected as often as you like now, so you can even check positions after the setup was finished; see manual for further information
- Setup Menu Point K (Collective pitch): no need to teach the stick end positions anymore, instead the user has to adjust the pitch range initially so the stick movement and range is shown correctly on the display; see manual for further information
- Setup Menu Point M (Cyclic directions): no need to check swash gyro compensation by user anymore, instead teach the stick directions to the system; see manual for further information
- reworked settings in Parameter Menu:
- Parameter Menu Point A (Quick trim): added collective trimming and rudder trim can be done with rudder stick now; see manual for further information
- Parameter Menu Point L (AttitudeControl Mode): swapped LED colors for different modes (now purple = Angular mode, red = Bailout rescue, blue = 3D - Mode)
- throttle failsafe indicator (only when using Single line receiver): when throttle is higher than failsafe position and failsafe engages during power up, the system will lock throttle after initialization and the Status LED will flash red/blue!
- PROEDITION
- added new feature "Bank switching" (can be enabled with StudioX/StudioXm only) which allows to set parameters for three flight conditions; when used gain adjustment using the dials and gyro gain adjustment with the radio are disabled, instead the gains and parameters are all set with StudioX/StudioXm; see manual for further information
- StudioX
- added FFT tab to show frequency spektrum of the sensor input to visualize vibrations, especially interesting when planning to use the AttitudeControl; see StudioX manual for further information
4.2.0
- Basic functionality
- modified flight parameters and gain settings on cyclics according to our team pilots, giving a more stable and precise control
- limited function of control loop when heli is standing on the ground. This prevents from swash showing "weird movement" when doing some test on the work bench and prevents the heli from tilting by accident during take off.
- Internal RPM Governor
- softstart can be disabled using StudioX for use with ESC that have built in softstart, i.e. Castle Creations ESC in "External Governor Mode", ALIGN RCE-BL ESCs in "Heli linear mode/Heli mode 1" or other ESC with softstart (but no governor!)
- Added governor rpm display when switching into idle up showing the set rpm and actual rpm, giving a better clue to see if TX is setup correctly and what rpm the system is sensing (see: Governor usage)
- AttitudeControl
- added vibration detection to prevent from using wrong sensor information when vibrations are disturbing the sensors (this can lead to AttitudeControl not leveling super accurate anymore, especially after a few flight minutes doing 3D flight and FFF, but should be accurate enough for leveling and saving the heli in case of emergency)
- modified stopping curve and stick fading when AttitudeControl is enabled; gives more precise stick control and more smooth heli movement; no more servo jumping during bench test
- modifiable stick angle in StudioX Expert Parameters for Flight trainer mode no acts as hard angular limit.
4.1.5
- Basic functionality
- JR DMSS satellite support (RJ01 remote satellite); connect satellite using the Spektrum satellite adapter
- systems with AR9020 fixed firmware only working with Ar9020 receivers (no receiver type selection here!)
- Bugfix: Spektrum DSMX satellites can also be used in 22ms mode, not only with 11ms frame rate
- Bugfix: initialization will not finish when Spektrum SRXL receiver is used and transmitter is still switched off
- Bugfix: tail rotation rates in HeadingLock mode can be set up to 1000deg/s by increasing servo throw of rudder channel
- Bugfix: Single-Line receiver can be connected to Microbeast PLUS even when receiver Setup Menu Point B is opened already
- Internal RPM Governor
- optimized Governor control algorithm
- more options for tweaking the Governor by using StudioX Expert setting (Thrust and Cyclic FeedForward; Gain adjustment)
- more sensitive soft start for electric drives
- Safety feature: throttle lock during initialization phase; if throttle is high during and after init throttle will stay locked until it's lowered
- Transmitter throttle can be lower than set throttle low point also in electric governor mode. This allows to set low throttle point as close as possible the motor starting point but still throttle can be lower in the transmitter, i.e. when the ESC needs lower throttle values for initialisation or when ESC does stop motor at a lower throttle value.
- When failsafe throttle is lower than set throttle low point in electric governor mode, then failsafe throttle position will be used as autorotation bailout position instead of low throttle position. This is necessary for some ESC that start motor at the set lowest throttle value but stop motor only farther below this point (i.e. ALIGN RCE-BL45X ESC).
- increased maximum allowed value for fast rpm spool up/autorotation bail out for nearly instant regaining head speed (be careful: make sure rotor blade bolts are tight otherwise rotor blades may fold in when using very high spool up rate!)
- added more deadzone for throttle stick detection when performing throttle low/high position setup so these menu point can be skipped without detecting stick movement by accident
- Bugfix: StudioX will show the correct RPM Governor mode when system is still performing initialization sequence
- AttitudeControl
- AttitudeVector initialization in any position (no need to keep the helicopter in upright position during power up, i.e. you can lay the heli to the side for initialization when it's windy)
- new feature for Bail out rescue mode: when inverted heli will be leveled in inverted hover first and then turned around only over roll axis. With this the loss of height typically is lower compared to immediately turning it around over all axis. Feature is on by default and can be switched off using StudioX Expert Settings.
- new feature for Bailout rescue and 3D-Mode: locking cyclic stick input when AttitudeControl is enabled (Warning: Be very careful! Use at your own risk. Be aware that the system can fail due to different external factors). Feature is off by default and can be switched on using StudioX Expert Settings.
- new feature for Flight trainer mode: Change tilt maximum tilt angle (stick scale) using StudioX Expert Settings. Default is 45°. As the tilt angle is directly depending on stick input you may increase or decrease the angle here in case the transmitter is only not sending 100% stick output, i.e. when using dual rate function to limit rotation rates in normal flight.
- Normal-Rate tail gyro mode now available even when AttitudeControl is used. But only when AttitudeControl is controlled by separate switch channel!
- Tail gyro gain and AttitudeControl now have similar display scale, so i.e. 50% gyro gain will show the same letter as 50% AttitudeControl gain
- removed resetting of AttitudeControl mode and Governor mode when changing receiver setup
- optimized pitch management during turn around in Bail out rescue mode with pitch
- optimized stick fading for Bail out rescue and 3D - Mode, so flying around even when one of these modes is switched on feels more natural
- no pitch management once the heli was leveled in Bail out rescue or 3D - Mode with pitch and when flying around while one of these modes is still enabled
4.0.0
- The internal RPM Governor can be used for electric and glow helicopters. It has built in soft start and autorotation bail out function. The control it quite similar to electric speed controllers with governor function, so you simply set your throttle curves as switches for "motor off", "headspeed 1", "headspeed 2" and "autorotation bailout". Adjusting complex throttle curves is not necessary anymore and the helicopter will maintain the specified rotor head speed over the whole flight. Optional the nitro governor can be also used in classic style with throttle curves and a separate switch for governor/rpm control.
- AttitudeControl overs different modes of self leveling. These are "Bailout rescue mode", "3D-Mode" and "Flight trainer mode" with angular limitation. Basically when you activate the AttitudeControl it will turn your helicopter back to level position when you release the sticks. Some modes additionaly apply collective pitch input and lock your thrust stick in the ground direction. So the unit will turn your helicopter and keep it leveled in hovering flight regardless of how the pilot moves the stick.
3.2.0
- supports new SRXL receiver types: Spektrum SRXL and Multiplex SRXL V2
- added rudder servo sub trim feature
- changed Status LED colors at Setup Menu Point M (Sensor directions) to be similar to MICROBEAST version 3.0.12
- safety feature for Receiver Menu: to change/setup receiver type and channel assignment you must go through the complete menu otherwise nothing will change
3.1.3
- Bugfix: receiver channel initialisation could cause unit to start without stick control
MICROBEAST and TSA Trajectory
3.0.12
- Supports Graupner HOTT SUMD serial line signal (SRXL HOTT)
- Improved receiver channel initialization
- Improved tail gyro algorithm for Normal-Rate mode
SPEKTRUM AR7210BX
4.1.5
- basically similar to MICROBEAST PLUS firmware 4.1.5 (see above)
SPEKTRUM AR7200BX and AR7300BX
4.0.14
- RPM Governor feature for nitro and gas engines
3.1.0
- basically similar to MICROBEAST firmware 3.0.12 (see above)