Translations:Manuals:MBPlusFblV52:Setupmenu K/5/en: Difference between revisions
Jump to navigation
Jump to search
Importing a new version from external source |
Importing a new version from external source |
||
| Line 1: | Line 1: | ||
=Setup with StudioXm= | =Setup with StudioXm= | ||
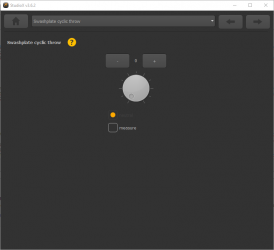
Initially the swashplate will be leveled and rotorblades will have 0 degrees of pitch when the cyclic throw adjustment screen opens. Attach your pitch gauge at the rotorblade or blade grip, calibrate it to 0.0 degrees and then click the '''Measure button'''. This will move the rotorblade into measuring position. Now check the pitch gauge, we want to see exactly +-6.0 degrees. Increase/decrease the throw value with the '''+''' and '''- buttons''' or the '''dial''' until the pitch is adjusted correctly. You can switch back and forth between measure and zero position as often as you like.<br /> | Initially the swashplate will be leveled and rotorblades will have 0 degrees of pitch when the cyclic throw adjustment screen opens. Attach your pitch gauge at the rotorblade or blade grip, calibrate it to 0.0 degrees and then click the '''Measure button'''. This will move the rotorblade into measuring position. Now check the pitch gauge, we want to see exactly +-6.0 degrees. Increase/decrease the throw value with the '''+''' and '''- buttons''' or the '''dial''' until the pitch is adjusted correctly. You can switch back and forth between measure and zero position as often as you like.<br /> | ||
<br /> | |||
[[File:Basic_setup_cyclic_throw.PNG|x250px]]<br /> | |||
<br /> | <br /> | ||
<br /> | <br /> | ||
Latest revision as of 14:41, 22 June 2021
Setup with StudioXm
Initially the swashplate will be leveled and rotorblades will have 0 degrees of pitch when the cyclic throw adjustment screen opens. Attach your pitch gauge at the rotorblade or blade grip, calibrate it to 0.0 degrees and then click the Measure button. This will move the rotorblade into measuring position. Now check the pitch gauge, we want to see exactly +-6.0 degrees. Increase/decrease the throw value with the + and - buttons or the dial until the pitch is adjusted correctly. You can switch back and forth between measure and zero position as often as you like.
