Translations:Manuals:MBUltraFblV5:TelemetryInfo/4/en: Difference between revisions
Importing a new version from external source |
Importing a new version from external source |
||
| Line 1: | Line 1: | ||
= SPEKTRUM SRXL2 = | = SPEKTRUM SRXL2 = | ||
Make sure you receiver is bound as telemetry receiver. Usually this happens automatically when binding the receiver. Message on the radio during bind procedure: "DMSX 11ms - Telemetry".<br /> | |||
<br /> | |||
To enable telemetry display on your SPEKTRUM radio, open the "Function List" and choose telemetry options screen. Here enable "Volts", "ESC", "RPM" and "Flight pack" displays. You don't have to enable all screens, but basically this is what is used by MICROBEAST. If you enter one of the screens, you can enable the specific alarms for each metric, i. e. enable a low voltage alarm from the "Volts" setting, or add maximum allowed capacity draw from the "Flight pack" screen. Please refer to the manual of you SPEKTRUM radio for more information.<br /> | |||
<br /> | |||
{| cellspacing="20" | |||
|- style="text-align: center;" | |||
| [[File:Spektrum_Telemetry_fucntionlist.png|x120px]] | |||
| [[File:Spektrum_Telemetry_overview.png|x120px]] | |||
| [[File:Spektrum Telemetry voltage.png|x120px]] | |||
|}<br /> | |||
<br /> | |||
From the main screen you can then scroll through the different telemetry screens: | |||
{| cellspacing="20" | |||
|- style="text-align: center;" | |||
|[[File:Spektrum Telemetry voltagestatus.png|x120px]] | |||
| [[File:Spektrum Telemetry escstatus.png|x120px]] | |||
| [[File:Spektrum Telemetry fpackstatus.png|x120px]] | |||
|}<br /> | |||
<br /> | <br /> | ||
Latest revision as of 09:34, 19 December 2023
SPEKTRUM SRXL2
Make sure you receiver is bound as telemetry receiver. Usually this happens automatically when binding the receiver. Message on the radio during bind procedure: "DMSX 11ms - Telemetry".
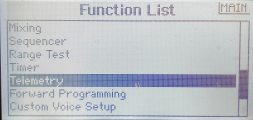
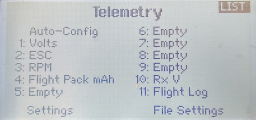
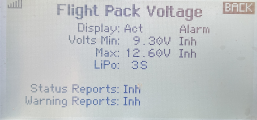
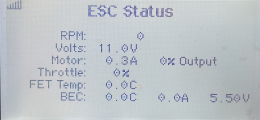
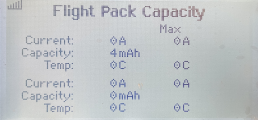
To enable telemetry display on your SPEKTRUM radio, open the "Function List" and choose telemetry options screen. Here enable "Volts", "ESC", "RPM" and "Flight pack" displays. You don't have to enable all screens, but basically this is what is used by MICROBEAST. If you enter one of the screens, you can enable the specific alarms for each metric, i. e. enable a low voltage alarm from the "Volts" setting, or add maximum allowed capacity draw from the "Flight pack" screen. Please refer to the manual of you SPEKTRUM radio for more information.
|
|
|
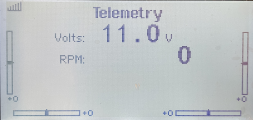
From the main screen you can then scroll through the different telemetry screens:
|
|
|