Help:AttitudeControl: Difference between revisions
Shornstein (talk | contribs) No edit summary |
Shornstein (talk | contribs) No edit summary |
||
| Line 33: | Line 33: | ||
{{QUOTE|Using a Standard type receiver assigning channels and using a separate switch channel for AtittudeControl is NOT applicable as here you can only connect 5 channels to Microbeast and the channel assignment is fixed to the receiver output wires!}}<br /> | {{QUOTE|Using a Standard type receiver assigning channels and using a separate switch channel for AtittudeControl is NOT applicable as here you can only connect 5 channels to Microbeast and the channel assignment is fixed to the receiver output wires!}}<br /> | ||
<br /> | <br /> | ||
{|class="gallery" | {|class="gallery" style="font-style: italic" | ||
|- | |- | ||
|width="400pt" style="padding:0px 20px;" align="center"|[[Image:Futaba Channels.jpg|192px|none|border]] | |width="400pt" style="padding:0px 20px;" align="center"|[[Image:Futaba Channels.jpg|192px|none|border]] | ||
| Line 44: | Line 44: | ||
|} | |} | ||
<br /> | <br /> | ||
{|class="gallery" | {|class="gallery" style="font-style: italic" | ||
|- | |- | ||
|width="400pt" style="padding:0px 20px;" align="center"|[[Image:Futabasetup_3.JPG|192px|none|border]] | |width="400pt" style="padding:0px 20px;" align="center"|[[Image:Futabasetup_3.JPG|192px|none|border]] | ||
| Line 57: | Line 57: | ||
After the basic transmitter setup is done we have to choose the receiver type and assign the functions by choosing the default channel assignment for our SBus system. Before doing so make sure the receiver is properly bound to the transmitter and the receiver is sending a serial line signal on the appropriate output (in our case we have to setup the receiver so it is sending a SBus signal on the output 8/SB by setting the receiver to "Mode B", see receiver manual).<br /> | After the basic transmitter setup is done we have to choose the receiver type and assign the functions by choosing the default channel assignment for our SBus system. Before doing so make sure the receiver is properly bound to the transmitter and the receiver is sending a serial line signal on the appropriate output (in our case we have to setup the receiver so it is sending a SBus signal on the output 8/SB by setting the receiver to "Mode B", see receiver manual).<br /> | ||
<br /> | <br /> | ||
{|class="gallery" | {|class="gallery" style="font-style: italic" | ||
|- | |- | ||
|width="400pt" style="padding:0px 20px;" align="center"|[[Image:Futabasetup_65.JPG|192px|none|border]] | |width="400pt" style="padding:0px 20px;" align="center"|[[Image:Futabasetup_65.JPG|192px|none|border]] | ||
| Line 69: | Line 69: | ||
|width="200pt" style="padding:0px 20px; vertical-align: top;"|In this case we need the Status LED flash in red color = SBus. | |width="200pt" style="padding:0px 20px; vertical-align: top;"|In this case we need the Status LED flash in red color = SBus. | ||
|}<br /> | |}<br /> | ||
{|class="gallery" | {|class="gallery" style="font-style: italic" | ||
|- | |- | ||
|width="400pt" style="padding:0px 20px;" align="center"|[[Image:IMG 3210.JPG|192px|none|border]] | |width="400pt" style="padding:0px 20px;" align="center"|[[Image:IMG 3210.JPG|192px|none|border]] | ||
| Line 86: | Line 86: | ||
Now power off and on again. MICROBEAST PLUS will perform initialization sequence. When the init is finished perform basic setup procedure (if not already done). When the heli is ready to fly open Parameter menu by briefly pushing the button while in operation mode and directly go to menu point L by skipping the other menu points pushing the button repeatedly. At menu point L choose your desired AttitudeControl mode and save it by again pushing the button briefly. If using a AttitudeControl mode with collective pitch input you may change the pitch at menu point M. When out of the Parameter menu check if AttitudeControl reacts correctly when flipping your AttitudeControl switch.<br /> | Now power off and on again. MICROBEAST PLUS will perform initialization sequence. When the init is finished perform basic setup procedure (if not already done). When the heli is ready to fly open Parameter menu by briefly pushing the button while in operation mode and directly go to menu point L by skipping the other menu points pushing the button repeatedly. At menu point L choose your desired AttitudeControl mode and save it by again pushing the button briefly. If using a AttitudeControl mode with collective pitch input you may change the pitch at menu point M. When out of the Parameter menu check if AttitudeControl reacts correctly when flipping your AttitudeControl switch.<br /> | ||
<br /> | <br /> | ||
{|class="gallery" | {|class="gallery" style="font-style: italic" | ||
|- | |- | ||
|width="200pt" style="padding:0px 20px;"|[[Image:IMG 3222.JPG|192px|none|border]] | |width="200pt" style="padding:0px 20px;"|[[Image:IMG 3222.JPG|192px|none|border]] | ||
Revision as of 08:15, 3 September 2015
Where can I get the MICROBEAST ProEdition addon manual
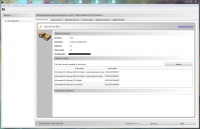
With StudioX Version 2 you can read all manuals that may be relevant for you directly from within the StudioX software. This will allow us to automatically supply you with the latest manuals. To see the manuals in StudioX you must connect your device to the computer und register on the freakware Network. The manuals then will show up on the main screen:
You can get StudioX V2 here: StudioX
Also we offer an online manual covering complete MICROBEAST Plus Version V4 setup here in this wiki.
How can I get the Version 4.x.x. ProEdition upgrade with RPM Governor/AttitudeControl?
To upgrade your MICROBEAST PLUS you need the latest StudioX Software Version 2. This allows to connect to the freakware Network and register your unit.
You can get StudioX V2 here: StudioX
Please note that these are upgrades and not updates. As they enable new functionality to your MICROBEAST PLUS they are not for free. Regular updates will remain free also in future.
After updating MICROBEAST PLUS from Version 3.x.x to Version 4.x.x. the collective pitch does not work anymore
As version 4.x.x can be upgraded with the AttitudeControl functionality it is required to set up thrust stick directions. Firmware Version 3.x.x did not provide such parameters therefore you must set the thrust stick positions by adjusting the collective pitch at Setup menu point K. Otherwise you can only control collective pitch into one direction. Please read the MICROBEAST PLUS ProEdition addon manual carefully. There are also a few other things that are different to Version 3.x.x and that need to be readjusted.
When using a single-line receiver you must go into Receiver setup menu and assign the switch channel for AttitudeControl either by moving the switch on the transmitter at Receiver menu point J, by loading the default assignment or by skipping menu point J in order to use the gyro channel for the AttitudeControl.
Also when using a standard receiver you must go into receiver menu, select "Standard receiver" as type at menu point A (if not done already) and then confirm the type selection by pressing the button short. If you don't do this the assignment gyro channel<->AttitudeControl is not set and you won't be able to switch AttitudeControl on and off.
Please note that after adjusting the receiver setup menu for safety reason AttitudeControl (and also the RPM Governor function) will be reset to default. So after doing the adjustment in receiver menu select your desired AttitudeControl mode a Parameter menu point M again. Otherwise it will still not work.
Setting up a separate switch channel for AttitudeControl
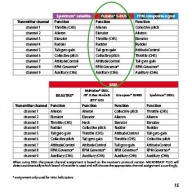
In this example we use a Futaba T14SG with R7008SB SBus receiver. The procedure is basically the same on all types of transmitter systems. For this type of application it is mandatory to use a system with singleline receiver output like SBus, SRXL, SPPM or Spektrum remote satellite signal.
Using a Standard type receiver assigning channels and using a separate switch channel for AtittudeControl is NOT applicable as here you can only connect 5 channels to Microbeast and the channel assignment is fixed to the receiver output wires!
 |
 |
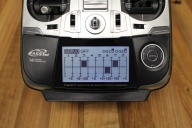 |
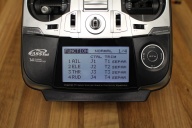
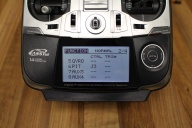
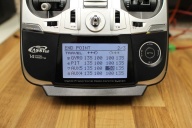
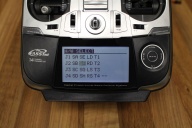
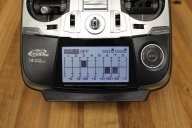
| We choose switch SF to actuate the channel 7. | In the servo monitor we can see how the deflection of channel 7 is changing... | ...when we flip switch SF |
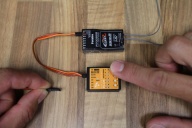
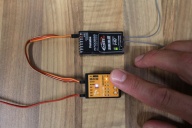
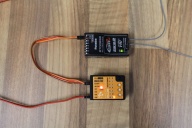
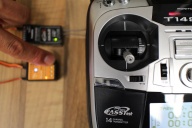
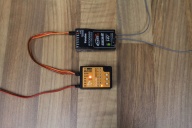
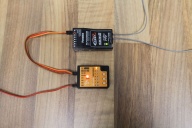
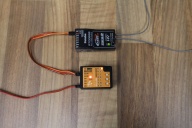
After the basic transmitter setup is done we have to choose the receiver type and assign the functions by choosing the default channel assignment for our SBus system. Before doing so make sure the receiver is properly bound to the transmitter and the receiver is sending a serial line signal on the appropriate output (in our case we have to setup the receiver so it is sending a SBus signal on the output 8/SB by setting the receiver to "Mode B", see receiver manual).
Note you must go through the complete receiver setup menu until you reach the menu end (all Menu LEDs flashing). Otherwise your settings will not be stored.
Now power off and on again. MICROBEAST PLUS will perform initialization sequence. When the init is finished perform basic setup procedure (if not already done). When the heli is ready to fly open Parameter menu by briefly pushing the button while in operation mode and directly go to menu point L by skipping the other menu points pushing the button repeatedly. At menu point L choose your desired AttitudeControl mode and save it by again pushing the button briefly. If using a AttitudeControl mode with collective pitch input you may change the pitch at menu point M. When out of the Parameter menu check if AttitudeControl reacts correctly when flipping your AttitudeControl switch.
Don't forget: AttitudeControl gain and status will only be shown each time after the gain changes which is the case when flipping the switch. After 8 seconds the Menu LED will go off and the Status LED color changes back to blue or purple showing the tail gyro mode.
Setting up AttitudeControl using the gyro gain channel
Using the tail gyro gain to activate AttitudeControl, how can I control AttitudeControl and switch the tail gyro gain with flight mode switch?
If applicable you may use the free programmable mixing functions of your transmitter to mix your AttitudeControl switch on the tail gyro gain output. To enable AttitudeControl you must reverse the sign of the tail gyro gain channel. So by flipping the AttitudeControl switch you must subtract or add enough channel output so that the gyro gain channel will give the amount of desired AttitudeControl gain. In the following example it is shown how this may work out on a Spektrum DX18. We use switch H to activate/deactivate AttidueControl. The AttitudeControl gain is 50% (-50% channel output in this example).
We use a mixer from switch H to the GYR channel that subtracts 100% when flipping the switch. As the gyro gain may differ between different flight modes you can create one mixer for each flight mode. Each mixer subtracts as much as necessary to get always the same amount of AttitudeControl gain (in our example -50%).
AttitudeControl does not level my helicopter perfectly
On the ground everything seems perfect and even the first time I switch on AttitudeControl in flight on the helis levels ok. But after some time the heli is (extremely) tilted to the side when I switch on AttitudeControl again.
The MICROBEAST PLUS AttitudeControl uses gyro sensors and accelerometers to build up the artificial horizon which is necessary to determine the heli's absolute position in space. This artificial horizon is highly dependant on the sensor data input and if the sensors fail, also the artificial horizon will. The sensors can especially be influenced by vibrations which cause them to show wrong data or loose some data at all. This will cause wrong calculations and in consequence cause a wrong repositioning of the heli. The gyro sensors of MICROBEAST PLUS typically are very vibration resistant and you might not see the influence of vibrations in normal flight without AttitudeControl. But as the calculation of the artificial horizon mainly is a big sum of all the sensor inputs over time, even the smallest influence can cause an offset of the system. Additionaly the accelerometers are much more sensitive to vibrations than the gyro sensors. As these are not used in normal flight most of the time, you will not see a direct influence of vibrations on them. But for the AttitudeControl these sensors have an important role and the system can only work with limited capability if these sensors fail.
So when you have problems with correct centering of the AttitudeControl (especially after a very short amount of flight time) please make sure your helicopter is running smooth and absolutely free of vibrations. Particularly with very small electric helis this is sometimes a difficult task, as there is not much mass to compensate for the vibrations and all electric components are placed very close to each other. If you see or hear any abnormalities like twitching tail or loud, vibrant noise it is very likely the AttitudeControl will not work as expected. You may try to place the Microbeast PLUS unit at a different location on the heli or mount it with a different sort of gyro pad to compensate for those vibrations. Anyhow the best solution is to find the source of vibration, i.e. by removing tail and main blades and letting the motor run on the ground, and change defective/unbalanced parts.
Also high temperature changes can cause the sensors to drift and in consequence cause the artificial horizon get offset. When it's very cold outside or very hot make sure the system can acclimatize when moving the helicopter from warm to cold or from cold to warm. When there are still some very small vibrations the system will not recalibrate very often and so the horizon may not wander off by vibrations directly but due to temperature change. Even under this conditions typically the drift should be minimal and during a 5 minutes flight the artificial horizon should not wander off more than a few degrees into one or another direction.
