Manuals:MB Plus:Preliminary steps/de: Difference between revisions
Shornstein (talk | contribs) No edit summary |
Updating to match new version of source page |
||
| Line 2: | Line 2: | ||
__TOC__ | __TOC__ | ||
== | ==Mounting the Microbeast PLUS unit== | ||
Attach the Microbeast PLUS unit by using one of the provided 3M® gyropads at a preferably low vibrating position on your helicopter such as the gyro platform or receiver platform. You may need to choose another type of mounting pad depending on the vibration pattern of your helicopter. For more information please ask you Microbeast PLUS dealer. | |||
<p> | <p> | ||
The MICROBEAST PLUS unit can be attached '''flat or upright''' on the helicopter. However, the '''servo connector pins must always point towards the front or rear''' of the helicopter. The small white sensor pinboard on the side must always be inline with flight direction.</p> | |||
<br /> | <br /> | ||
<div class="noprint"> | <div class="noprint"> | ||
| Line 15: | Line 15: | ||
<div class="onlyinprint"> | <div class="onlyinprint"> | ||
{| | {| | ||
|[[Image:450 flat.jpg| | |[[Image:450 flat.jpg|x200px]] | ||
|[[Image:450 upright.jpg| | |[[Image:450 upright.jpg|x200px]] | ||
|} | |} | ||
</div> | </div> | ||
{{NL}} | {{NL}} | ||
<p> | <p> | ||
''' | '''Pay attention that the edges of the Microbeast PLUS unit are all parallel with the corresponding rotational axes of the helicopter!''' Especially make sure that the mounting platform is perpendicular to the main shaft! On the other hand it is not important that the unit is directly placed on the rotation axis (which is nearly impossible).</p> | ||
<br /> | <br /> | ||
<div class="noprint"> | <div class="noprint"> | ||
| Line 30: | Line 30: | ||
<div class="onlyinprint"> | <div class="onlyinprint"> | ||
{| | {| | ||
|[[Image:Blank_30.png]] | |[[Image:Blank_30.png|left]] | ||
|[[Image:Mounting_trex500.jpg]] | |[[Image:Mounting_trex500.jpg]] | ||
|} | |} | ||
</div> | </div> | ||
{{NL}} | {{NL}} | ||
<p> | <p> | ||
''' | '''There are eight possible mounting orientations:''' | ||
<gallery mode="nolines" widths=200px> | <gallery mode="nolines" widths=200px> | ||
File:orient1.jpg| | File:orient1.jpg|flat, cover on top, servo connectors showing to front | ||
File:orient2.jpg| | File:orient2.jpg|upright, button on top, servo connectors showing to front | ||
File:orient3.jpg| | File:orient3.jpg|flat, cover showing to bottom, servo connectors showing to front | ||
File:orient4.jpg| | File:orient4.jpg|upright, button on bottom, servo connectors showing to front | ||
</gallery> | </gallery> | ||
<gallery mode="nolines" widths=200px> | <gallery mode="nolines" widths=200px> | ||
File:orient5.jpg| | File:orient5.jpg|flat, cover on top, servo connectors showing to rear | ||
File:orient6.jpg| | File:orient6.jpg|upright, button on top, servo connectors showing to rear | ||
File:orient7.jpg| | File:orient7.jpg|flat, cover showing to bottom, servo connectors showing to rear | ||
File:orient8.jpg| | File:orient8.jpg|upright, button on bottom, servo connectors showing to rear | ||
</gallery> | </gallery> | ||
</p> | </p> | ||
Revision as of 17:04, 12 November 2015
Mounting the Microbeast PLUS unit
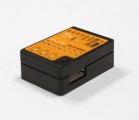
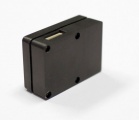
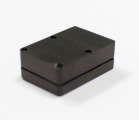
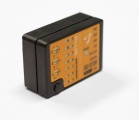
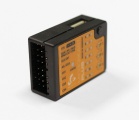
Attach the Microbeast PLUS unit by using one of the provided 3M® gyropads at a preferably low vibrating position on your helicopter such as the gyro platform or receiver platform. You may need to choose another type of mounting pad depending on the vibration pattern of your helicopter. For more information please ask you Microbeast PLUS dealer.
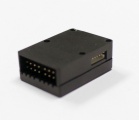
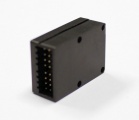
The MICROBEAST PLUS unit can be attached flat or upright on the helicopter. However, the servo connector pins must always point towards the front or rear of the helicopter. The small white sensor pinboard on the side must always be inline with flight direction.

|

|

Pay attention that the edges of the Microbeast PLUS unit are all parallel with the corresponding rotational axes of the helicopter! Especially make sure that the mounting platform is perpendicular to the main shaft! On the other hand it is not important that the unit is directly placed on the rotation axis (which is nearly impossible).
 |

|
There are eight possible mounting orientations:
-
 flat, cover on top, servo connectors showing to front
 -
 upright, button on top, servo connectors showing to front
 -
 flat, cover showing to bottom, servo connectors showing to front
 -
 upright, button on bottom, servo connectors showing to front


-
 flat, cover on top, servo connectors showing to rear
 -
 upright, button on top, servo connectors showing to rear
 -
 flat, cover showing to bottom, servo connectors showing to rear
 -
 upright, button on bottom, servo connectors showing to rear


Vorbereiten der Fernsteueranlage
Es kann nahezu jede Fernsteueranlage mit mindestens 6 Steuerkanälen verwendet werden. Grundsätzlich erfolgt die Bedienung des Microbeast PLUS über 5 Steuerkanäle. Der 6. Kanal steuert den Motorsteller oder das Gasservo. Für die Verwendung der optionalen Zusatzfunktionen wie AttitudeControl oder Drehzahlregler für Verbrennerhelis können zusätzliche Steuerkanäle von Vorteil sein. Ausserdem können im Betrieb mit Summensignalempfängern weitere Servoausgänge z.B. für Beleuchtung oder Einziehfahrwerk angesteuert werden, sofern entsprechende Kanäle zur Verfügung stehen.
Legen Sie in Ihrem Fernsteuersender einen neuen Modellspeicher für Ihr Modell an. Achten Sie darauf, dass sämtliche Mischfunktionen deaktiviert sind, die auf die zyklischen Steuerfunktionen und das Heck wirken. Abgesehen vom Pitchsteuerknüppel, muss jeder Steuergeber genau einen Servoausgang am Empfänger ansteuern!
Verwenden Sie auf keinen Fall die elektronische Taumelscheibenmischung des Fernsteuersenders! Diese Aufgabe wird Microbeast PLUS übernehmen. Wählen Sie bei Ihrem Fernsteuersender immer eine mechanische Taumelscheibenmischung aus (oftmals mit „H1“, „1 Servo“ oder „Normal“ bezeichnet) bzw. deaktivieren Sie jegliche Taumelscheibenmischung („No Mix“).
Stellen Sie alle Trimmungen auf neutral und die Servowege auf 100%. Durch Vergrößerung oder Reduzierung der Servowege auf Heck, Roll und Nick können Sie später die maximale Drehrate des Helikopters beeinflussen. Um die Grundeinstellung durchführen zu können, müssen aber die Steuerwege für den Moment unverändert ausgegeben werden. Verstellen Sie auch die Pitchkurve noch nicht, sondern lassen Sie diese wie Standardmäßig vorgegeben von -100% bis +100% (oder je nach Senderfabrikat von 0 bis 100%) verlaufen.
Stellen Sie nochmals sicher, dass keinerlei Mischfunktionen wie beispielsweise ein Drehmomentausgleich auf Heck aktiv sind und die Einstellungen und Trimmungen in allen Flugphasen gleich sind. Betrachten Sie den Servomonitor des Fernsteuersenders: Jede Steuerknüppelfunktion darf nur genau einen Kanal betätigen (abgesehen vom Pitchknüppel, der üblicherweise auch den Motor mit ansteuert). Bei Knüppelmittenstellung müssen (in allen Flugphasen) die Kanäle in Mittenposition stehen. Denken Sie daran, dass Sie bei Verwendung von Microbeast PLUS nicht die Servos direkt ansteuern werden, sondern nur per Steuerbefehl dem Gerät mitteilen, wie schell es den Helikopter drehen soll. Jeder Steuerbefehl wird dabei über genau einen Kanal des Fernsteuersenders betätigt.
Andere Einstellungen wie z.B. für den Motor oder eventuelle Zusatzkanäle (Beleuchtung, Einziehfahrferwerk, ...) sind wie gewohnt an der Fernsteuerung vorzunehmen. Diese sind im Normalfall von der Einstellung des Microbeast PLUS unabhängig. Falls Sie die Drehzahlreglerfunktion oder die AttitudeControl verwenden, so wird auf die Einstellung dieser Steuerfunktionen an entsprechender Stelle eingegangen.
Achten Sie unbedingt darauf, dass bei Elektromodellen der Motor während der Einstellarbeiten nicht anlaufen kann! Stecken Sie den Motor am besten vom Regler ab, falls der Antriebsakku zur Stromversorgung verwendet wird.