Zurücksetzen auf Werkseinstellung
In the following we will describe how to reset your device to factory settings. This brings all parameters and settings back to the default values as mentioned in the manual and shown on the MICROBEAST PLUS quick reference card (marked with a * there).
Please note: The factory reset will not change your receiver settings (receiver type, function assignments, failsafe settings). This simply can be changed by doing the receiver setup procedure in Receiver Menu again.
In case your system does not pass initialization sequence, you will not be able to perform factory reset on the device as you need to do this in Setup Menu (which is accessed from operation mode). But doing a reset will not solve this problem anyway! When you can't pass radio system initialization sequence, make sure to perform Receiver Menu setup completely!
Performing factory reset at the device
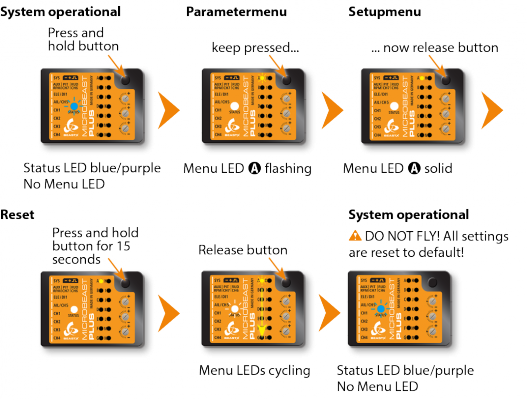
To perform the reset enter SETUP MENU. Release the button once and push and hold it again. Keep the button pressed for at least 15 seconds. You will see the Menu LEDs cycling down from A to N. This shows factory reset was performed. The system will exit SETUP MENU when you release the button. Now all settings are set to default and you have to perform the Basic Setup again, in order to fly the helicopter.

Factory reset with StudioX
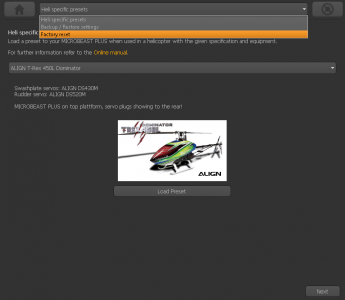
When using the StudioX app/software you can perform the factory reset by computer (requires USB2SYS interface) or with your smartphone/tablet (requires BLE2SYS interface). You will find the reset option by choosing "Backup/Restore" from the overview screen in StudioX (which opens when connection is established to your MICROBEAST PLUS). From there click the "Next" button two times or directly choose "Factory reset" from the selection box above to open the reset screen.


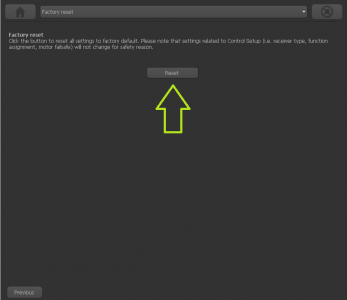
Click the "Reset" button and confirm the question "Are you really sure?". Now all settings are set to default and you have to perform the Basic Setup again, in order to fly the helicopter.