MICROBEAST PLUS Drehzahlregler - Einstellung eines Castle Creations Drehzahlstellers
Für Drehzahlreglerfunktion des MICROBEAST PLUS muss ein SingleLine-Empfänger verwendet werden. Der Drehzahlregler kann nicht mit einem Standard Empfänger verwendet werden.
Einstellungen mit der CastleLink Software
Die Drehzahlsteller der Phoenix und Talon Serie aus dem Hause Castle Creations eignen sich gut um in Kombination mit der Drehzahlregelfunktion von MICROBEAST PLUS Version 4.0 betrieben zu werden. Die Phoenix EDGE Steller bringen hierfür sogar schon eine Signalleitung für das Drehzahlsignal mit. Wenn Ihr Regler nicht über so eine Signalleitung verfügt (wie z.B. Steller vom Typ ICE oder Talon), muss der Helikopter zusätzlich mit einem Phasensensor ausgerüstet werden, wie z.B. unserem Sensor BXA76013. Damit der Phasensensor mit Spannung versorgt und am MICROBEAST PLUS angeschlossen werden kann, wird ausserdem noch der Sensoradapter BXA76401 benötigt.
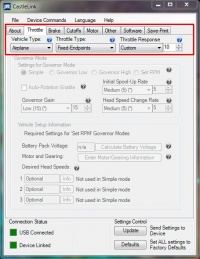
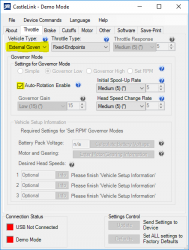
Die Castle Creations Steller bieten softwareseitig einen speziellen "External Governor" Modus, der für die Nutzung in Kombination mit Flybarlesssystemen konzipiert ist. Dieser Modus arbeitet aber nicht rein als Drehzahlsteller, sondern bietet schon eine gewisse Programmlogik über die der Regler selbsttätig die Drehzahl hochfahren kann. Beim MICROBEAST PLUS oder AR7210BX Empfänger ist die Firmware Version 4.2.x oder höher erforderlich, mit der sich der integrierte Sanftanlauf über die StudioX Software abschalten lässt (siehe die entsprechende Anleitung weiter unten). Andernfalls kann dieser Modus nicht verwendet werden, da der Drehzahlregler von MICROBEAST PLUS standardmäßig selbst den Sanftanlauf durchführt! Stelle den Castle Regler über die Einstellung "Vehicle type" auf den Typ "Airplane", sodass der Regler Gaseingaben ganz einfach direkt umsetzt. Für ein bestmögliches Ergebnis stelle außerdem das Ansprechverhalten des Reglers so hoch wie möglich ein:
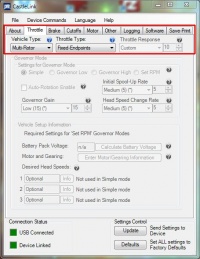
Alternatively you may use the "Multi-Rotor" vehicle type, in case your ESC offers this option. This will provide a very fast and immediate throttle control and thus provide maximum performance of the MICROBEAST's RPM Governor. Adjusting throttle response and brake function is not necessary here and not provided. Please note that this mode doesn't feature any dynamic limitation. Depending on the motor this can cause very high current spikes and overheating of the motor. Only use at your own risk!
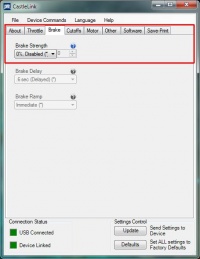
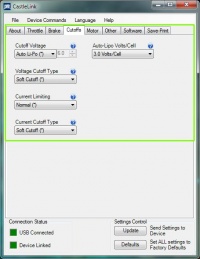
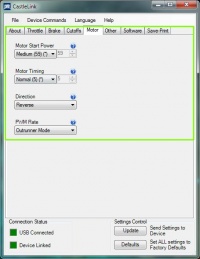
The rest can be setup as you like resp. as it is needed for your motor:
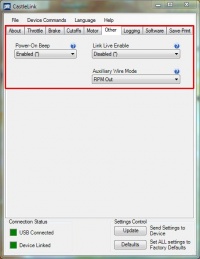
Wenn ein EDGE Steller mit Drehzahlsignal-Ausgang verwendet wird vergiss nicht, dass die Ausgabe des Drehzahlsignals unter "Auxiliary wire mode" eingeschaltet werden muss (Option "RPM out"). Andernfalls bekommt das MICROBEAST PLUS kein Drehzahlsignal:
Einstellung des Senders (Endpunktanpassung)
Bevor der Castle Steller in Betrieb genommen werden kann, müssen die Gas-Endpunkte im Sender an die Vorgabe durch den Steller angepasst werden. Später werden diese Endpunkte dann auch im MICROBEAST PLUS / AR7210BX einprogrammiert.
(1) Stellen zu als erstes sicher, dass im Sender eine gleichmäßig ansteigende, lineare Gaskurve von 0 - 100% eingestellt ist und die Servoendpunkte auf dem Gaskanal -100% und +100% betragen. Im folgenden Beispiel wird ein Spektrum DX9 Fernsteuersender verwendet. Falls ein anderes Modell oder Fabrikat verwendet wird, können diese Werte ggf. abweichen. Ziel ist es, die Ansteuerung des Gaskanals im Sender so einzustellen, wie bei einem frisch angelegten Modellspeicher. Schau auf den Servomonitor im Sender um zu prüfen, ob der Gaskanal mit dem Gassteuerknüppel über den ganzen Steuerbereich bewegt werden kann.
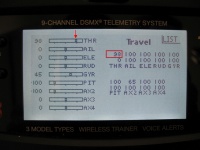
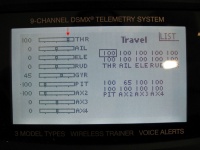
(2) Schränke jetzt den Gasausgang soweit wie möglich ein, indem die Endpunkte in beide Richtungen auf 0% (oder zumindest so klein wie möglich) eingestellt werden, so dass kein oder kaum noch ein Steuerausschlag auf dem Gaskanal erfolgt, wenn der Gassteuerknüppel bewegt wird. Wenn das erledigt ist, bringe den Gassteuerknüppel in Vollgasposition und verbinde den Steller mit dem Antriebsakku (ggf. muss auch die Empfangsanlage eingeschaltet werden, falls der Steller kein BEC hat!). Der Steller bzw. der Motor wird einen lang "beep" Ton erzeugen und mit einer Reihe von kurzen Pieptönen die erkannte Zellenzahl signalisieren. Dann hört man keine weiteren Töne mehr.
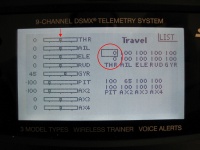
(3) Erhöhe jetzt langsam wieder den Endausschlag in Richtung Vollgasposition. Sobald der Motorsteller die Vollgasposition erkennt, wird er einen einzelnen langen "beep" Ton ausgeben. Erhöhe den Wert dann zur Sicherheit noch um ca. 2% weiter.
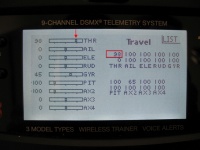
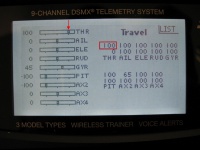
Achtung! Wenn zwei "beep" Töne hintereinander ausgegeben werden dann bedeutet das, dass der Motorsteller die "Motor aus" Position erkannt hat und betriebsbereit ist. Stelle in diesem Fall sofort sämtliche Arbeiten ein und beginne von vorn. Stecke den Antriebsakku aus und drehe die Steuerrichtung des Gaskanals über die Funktion "Servoumpolung" im Sender um. Starten dann wieder bei Schritt (2).
(4) Stelle nach Justieren der Vollgasposition den Gasknüppel in die niedrigste Position (beim Passieren der Mittenstellung wird erneut ein "beep" Ton ausgegeben). Erhöhe den Wert der Endpunkteinstellung jetzt in diese Richtung, soweit bis der Regler erneut signalisiert, dass die entsprechende Position erkannt wurde. Diesmal kann man eine Doppeltonfolge hören ("beep", "beep"). Gib auch hier wieder ca. 2% "Sicherheitszuschlag". Jetzt kann mit der Konfiguration des MICROBEAST PLUS / AR7210BX begonnen werden.
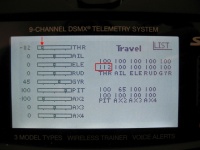
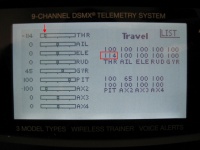
Achtung! Der Motorsteller ist jetzt "scharf" geschaltet!! Bewege auf keinen Fall den Gasknüppel, ansonsten würde der Motor sofort anlaufen.
Failsafe setup
(1) Open the MICROBEAST PLUS Setup menu by pushing and holding down the button for about 2 seconds, until the yellow LED A starts to constantly light up. Then release the button. Now repeatedly press the button until menu point N (LED N) is reached.
(2) Wählen Sie bei Setupmenü Einstellpunkt N mit Hilfe des Hecksteuerknüppels die Option "Elektro Drehzahlregler" aus (Status LED leuchtet rot). Drücken Sie dann wieder kurz auf den Taster um die Einstellung zu übernehmen und um in's Drehzahlregler Einstellmenü zu wechseln.
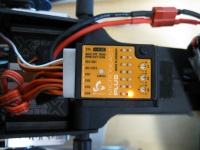
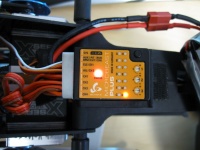
(3) Verfahren Sie bei Einstellpunkt A des Drehzahlregler Einstellmenüs wie in der MICROBEAST PLUS ProEdition Zusatzanleitung beschrieben.
(4) At menu point B again carefully decrease the throttle servo endpoint for throttle low stick position. The motor should start to run immediately when deacreasing the throttle a few percent. If it does, increase the endpoint by a few percent, so the motor will stop again. You can see that the Status LED on MICROBEAST PLUS changed to blue colour indicating that the adjustment has been detected.
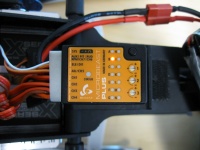
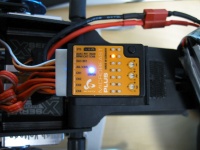
(5) Switch to menu point C by briefly pressing the button and move the thrust stick all the way up. Again the Status LED will light up in "blue" as MICROBEAST PLUS will save the new throttle high position. Confirm by pressing the button briefly.
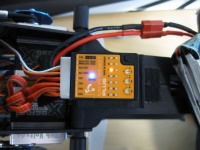
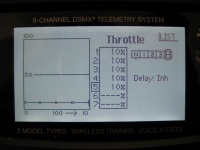
(6) Last step of transmitter setting is to setup your throttle curves resp. the desired rpms for the different flight phases. When moving the thrust stick at menu point D you can see the colour of the Status LED changing: at full stop position it's off, when increasing the throttle slightly it will get blue, it will be red over nearly the whole rest of the throttle range and lastly at full throttle position it'll get purple. So adjust your throttle curves using the indication of the LEDs.
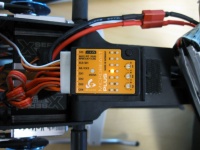
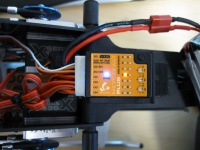
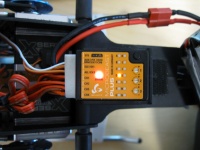
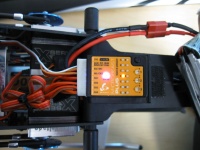
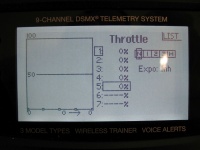
In normal flight mode set the curve flat to 0, so the motor can't start when powering up.
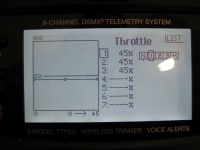
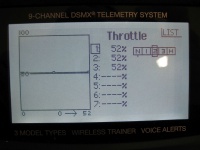
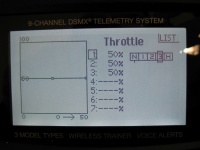
Set flat throttle curves for the other flight modes as high as necessary to gain a specific rotor head speed according to the throttle tables shown in the MICROBEAST ProEdition Addon manual. In this example we use 1800rpm = 45%, 2080rpm = 52% and 2000 rpm = 50%. The Status LED should light up in "red" colour when switching to those flight modes.
For Autorotation bail out set the throttle curve to a flat 10%. The Status LED should light up in "blue" when Autorotation switch is enabled.
That's it. Switch back to your normal mode (motor off!) and proceed with the following steps E, F, G, H as described in the MICROBEAST PLUS ProEdition manual. After exiting the menus you can do a little bench test. When switching to idle up the motor should start to run slowly, then after a short time of stabilization the rpm will increase more forceful (it is not unusual that without rotor blades or with main gear removed the motor may run erratic or the rpm may pump a little bit during spoolup because of the unloaded condition!). If it takes very long time (a few seconds) until the motor starts to initially run or if it doesn't start to run at all, you have to readjust the throttle low point at Governor menu point B. Typically the distance between motor off and motor start position is too large then and as the integrated RPM Governor will not increase the throttle without any limitation for safety reason, the actual motor starting point of the ESC will not be reached.
Using Firmware Version 4.2.x or higher and "External Governor" mode
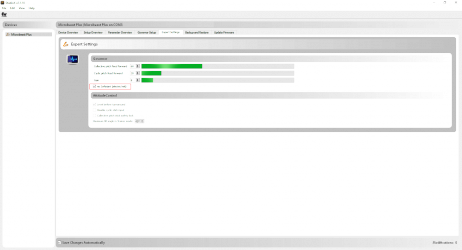
With MICROBEAST PLUS / AR7210BX Firmware Version 4.2.x or higher it is possible to use the "External Governor" mode of your Castle Creations ESC. This will allow to let the ESC do the initial rotor spool up as well as the quick spool up after an auto rotation maneuver and can result in a softer motor start/less motor torque than when powering up the motor in "Fixed wing" mode as this is optimzed for turning air screws. For this purpose you must disable the soft start feature on the MICROBEAST PLUS / AR7210BX which can be done using the Expert Parameter tab in StudioX. Basically the setup procedure is very similar as already shown above, just you need to change a few parameters by software.
Now proceed as described above:
- First define throttle endpoints in the transmitter. This must be done even if you've done it already before in "Fixed wing" or "Multirotor" mode, as in "External Governor" the endpoints will be slightly different!
- Then open MICROBEAST's Receiver setup menu, assign functions and set the low throttle failsafe position in case your low throttle value changed in the transmitter.
- Finally do the complete Governor Setup or at least teach new throttle low and high point to MICROBEAST PLUS / AR7210BX if the Governor mode was already in use before with a different firmware version and another ESC operation mode.
