Receiver Menu - Type selection
In case you are using a single-line receiver, note that in the first menu points of Receiver Menu no control signal is emitted on the throttle output([CH5] or [DI1]). Only at Menu Point N (Throttle failsafe setting) the output will be activated to check throttle position! If you use a speed controller with BEC, disconnect the motor to avoid unintentional starting of the motor! For a heli with combustion engine you should remove the servo horn from the throttle servo to avoid linkage binding or breaking the servo horn.
Adjustment on the device
To get into the Receiver menu press the button on MICROBEAST PLUS and hold it down before(!) and while turning on the receiver power supply. The yellow Menu LEDs start to cycle immediately. When you release the button, Menu LED A will be flashing and the color of the Status LED will indicate the receiver type that is selected at the moment.

In order to detect the connected receiver type make sure the receiver is bound to the transmitter and sending out signals. Also make sure the transmitter is setup correctly as shown in the chapter Radio System. Then briefly press the button to start automatic receiver detection routine. The Status LED will indicate which type the system is scanning for at the moment:
| Status-LED | Receiver type/Transmission protocol |
|---|---|
| off | Standard receiver |
| purple | Remote satellite/receiver connected at remote port |
| red | No receiver detected |
| blue | Serial signal at port DI1 |
- In case a single-line receiver is used, the system will skip to Menu Point B when a valid input signal was detected.
- When a Standard receiver is used, the system will exit and restart immediately.
- When detection fails, the system will stay at Menu Point A and the Status LED will flash in red color. Once again make sure your receiver is connected properly to MICROBEAST PLUS, make sure the receiver is bound to the transmitter and sending out control signals. Then please try again.
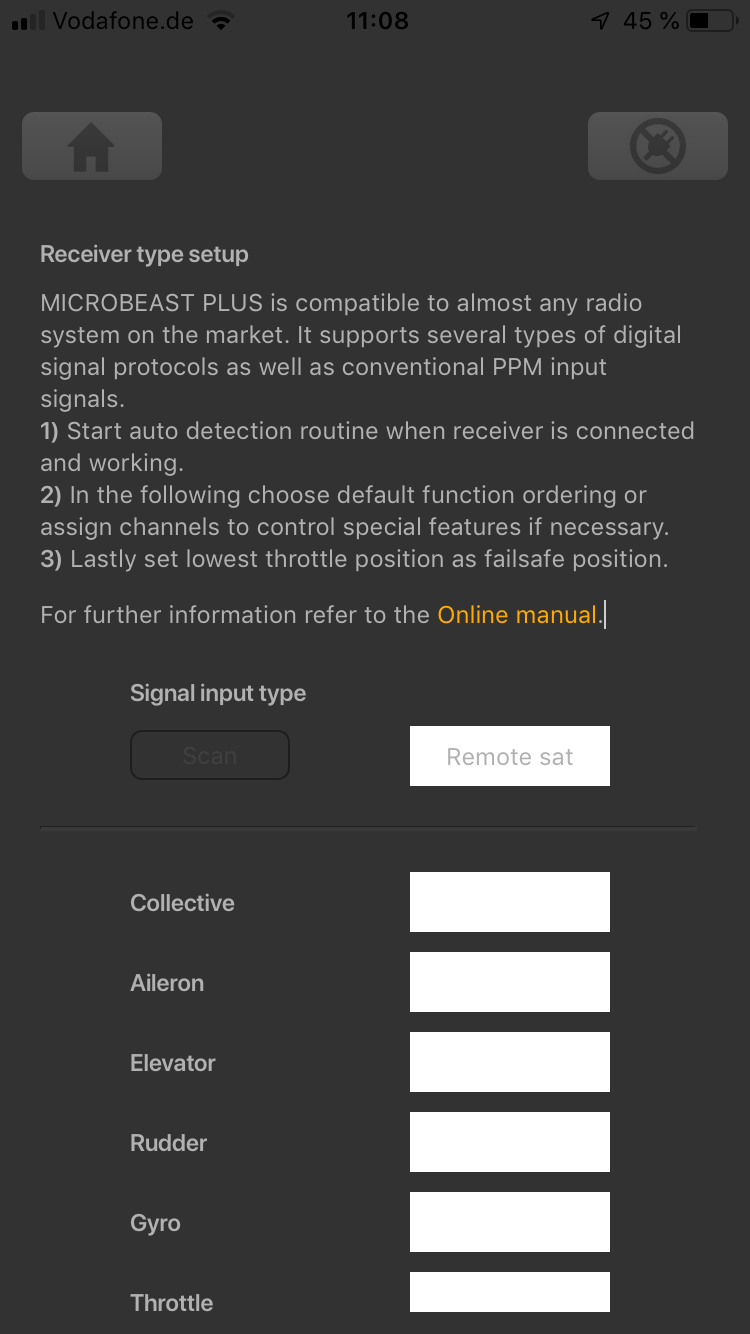
Setup with StudioX
When StudioX is started and your MICROBEAST PLUS is connected with StudioX, click the Control Setup button to show the adjustment options of RECEIVER MENU.
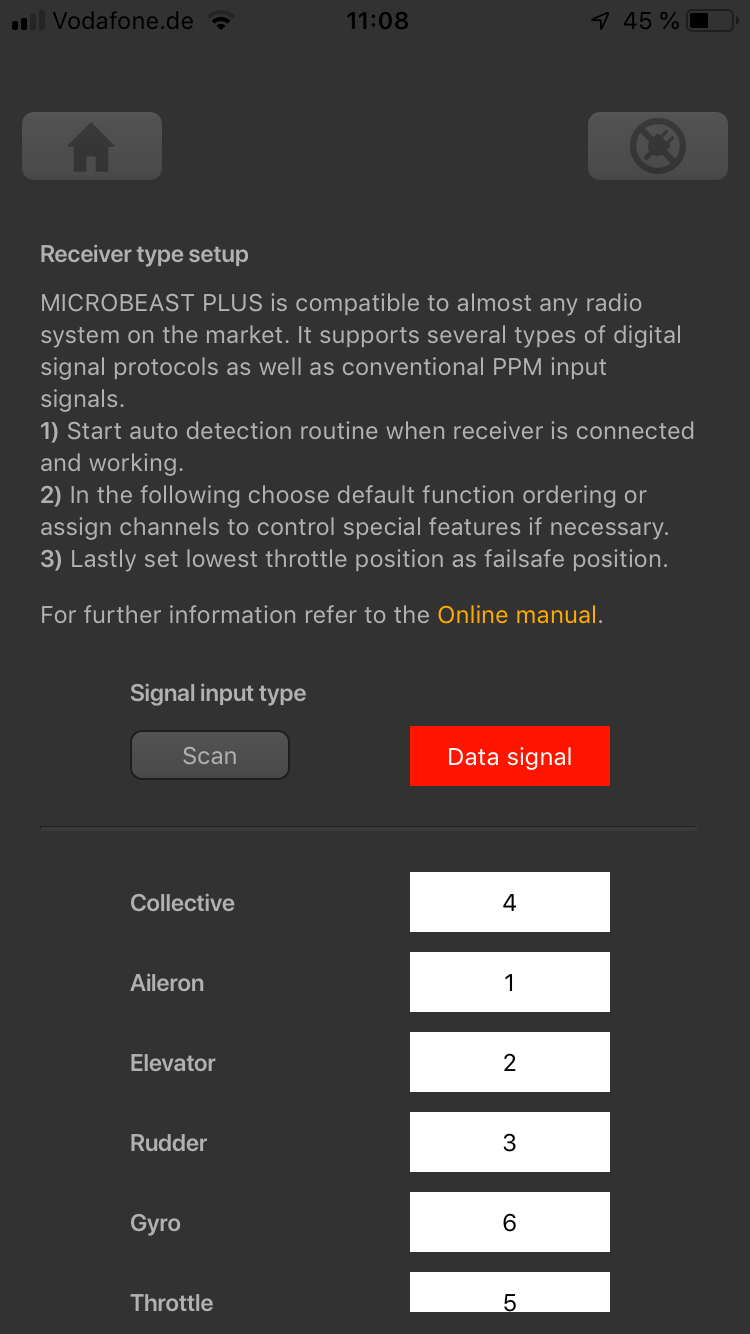
- At the top of the screen you can see which type of input signal is selected at the moment, and which telemetry system/ESC is used (if applicable).
- The rows below show what channels are assigned to which control functions at the moment.
- In the last row you can see the internal value for throttle failsafe position that is set at the moment.

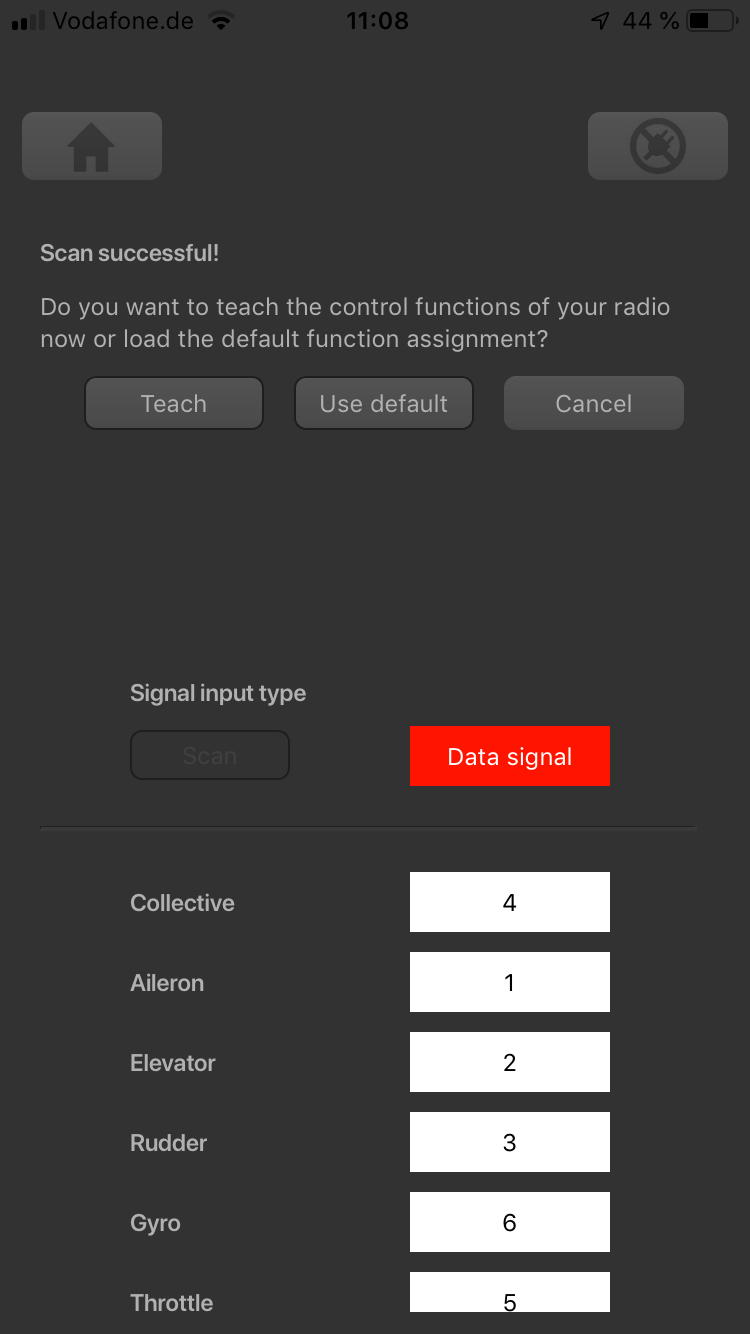
Make sure the receiver is bound to the transmitter and sending out signals. Also make sure the transmitter is setup correctly as shown in the chapter Radio System. Press the "Scan" button to start automatic receiver detection routine. You can follow on the display which type the system is scanning for at the moment.
- In case a single-line receiver is used, a dialog will appear on success. This asks how to proceed with function assignments.
- When a Standard receiver is used, the system will restart directly and you can leave the setup screen.
- When detection fails, once again make sure your receiver is connected properly to MICROBEAST PLUS, make sure the receiver is bound to the transmitter and sending out control signals. Then please try again.