Difference between revisions of "Manuals:MBUltraFblV5:Setupmenu A/en"
Jump to navigation
Jump to search
Shornstein (talk | contribs) (Blanked the page) Tag: Blanking |
(Updating to match new version of source page) |
||
| Line 1: | Line 1: | ||
| + | {{DISPLAYTITLE:SETUP MENU A - Device orientation|noerror}} | ||
| + | {{TOC_MBUltraFblV5|Manuals:MBUltraFblV5:Setupmenu_intro/en|Manuals:MBUltraFblV5:Setupmenu_B/en|SETUPMENU|}} | ||
| + | __TOC__ | ||
| + | <br /> | ||
| + | MICROBEAST ULTRA can be mounted in nearly all possible orientations. The only restriction is that the main connection terminal must point in or against flying direction and the egdes of the unit must be parallel to the rotation axis.<br /> | ||
| + | <br /> | ||
| + | {|class="gallery" style="font-size:75%;" | ||
| + | |- | ||
| + | | style="padding:20px 0px;" align="center" | [[File:Setupmenu_A_off.png|x100px]] <br />Status LED '''off''' | ||
| + | | style="padding:0px 20px;" align="center" | [[File:Setupmenu_A_purple_flashing.png|x100px]] <br />Status LED <span style="color:#EE82EE">'''purple flashing'''</span> | ||
| + | | style="padding:0px 20px;" align="center" | [[File:Setupmenu_A_purple.png|x100px]] <br />Status LED <span style="color:#9400D3">'''purple'''</span> | ||
| + | | style="padding:0px 20px;" align="center" | [[File:Setupmenu_A_flashing_red.png|x100px]] <br />Status LED <span style="color:#FA8072">'''red flashing'''</span> | ||
| + | |- | ||
| + | | style="padding:40px 0px;" align="center" | [[File:Setupmenu_A_red.png|x100px]] <br />Status LED <span style="color:#DC143C">'''red'''</span> | ||
| + | | style="padding:0px 20px;" align="center" | [[File:Setupmenu_A_flashing_blue.png|x100px]] <br />Status LED <span style="color:#87CEFA">'''blue flashing'''</span> | ||
| + | | style="padding:0px 20px;" align="center" | [[File:Setupmenu_A_blue.png|x100px]] <br />Status LED <span style="color:#4169E1">'''blue'''</span> | ||
| + | | style="padding:0px 20px;" align="center" | [[File:Setupmenu_A_redblue.png|x100px]] <br />Status LED <span style="color:#DC143C">'''red'''</span>/<span style="color:#4169E1">'''blue'''</span> | ||
| + | |}<br /> | ||
| + | |||
| + | =Adjustment at the device= | ||
| + | At menu point '''A''' of SETUP MENU select the orientation that the device is actually mounted on your heli by choosing the suitable Status LED color. You can switch between the options by briefly moving the rudder stick to one or the other direction. The Status-LED will change the color accordingly.<br /> | ||
| + | <br /> | ||
| + | {{TABLE | ||
| + | |Device orientation | ||
| + | |flat, sticker on top side, socket points in flight direction | ||
| + | |vertical, button is on the top, socket points in flight direction | ||
| + | |flat inverted, sticker on bottom side, socket points in flight direction | ||
| + | |vertical inverted, button is on the bottom, socket points in flight direction | ||
| + | |flat, sticker on top side, socket points to the tail boom | ||
| + | |vertical, button is on the top, socket points to the tail boom | ||
| + | |flat inverted, sticker on bottom side, socket points to the tail boom | ||
| + | |vertical inverted, button is on the bottom, socket points to the tail boom | ||
| + | }}<br /> | ||
| + | <br /> | ||
| + | <br /> | ||
| + | |||
| + | =Setup with StudioX app= | ||
| + | At the first screen of heli setup wizard choose the orientation that the device is actually mounted on your heli by choosing the matching type in the app.<br /> | ||
| + | <br /> | ||
| + | <div class="iosgallery"> | ||
| + | <img class="ios" src="https://wiki.beastx.com/images/studiox/freakware%202019-07-09%20030.PNG"> | ||
| + | <div class="iostext"></div> | ||
| + | </div> | ||
| + | <br /> | ||
| + | <br /> | ||
Latest revision as of 11:56, 28 February 2023
MICROBEAST ULTRA can be mounted in nearly all possible orientations. The only restriction is that the main connection terminal must point in or against flying direction and the egdes of the unit must be parallel to the rotation axis.
 Status LED off |
 Status LED purple flashing |
 Status LED purple |
 Status LED red flashing |
 Status LED red |
 Status LED blue flashing |
 Status LED blue |
 Status LED red/blue |
Adjustment at the device
At menu point A of SETUP MENU select the orientation that the device is actually mounted on your heli by choosing the suitable Status LED color. You can switch between the options by briefly moving the rudder stick to one or the other direction. The Status-LED will change the color accordingly.
| Status-LED | Device orientation |
|---|---|
| off | flat, sticker on top side, socket points in flight direction |
| purple flashing | vertical, button is on the top, socket points in flight direction |
| purple | flat inverted, sticker on bottom side, socket points in flight direction |
| red flashing | vertical inverted, button is on the bottom, socket points in flight direction |
| red | flat, sticker on top side, socket points to the tail boom |
| blue flashing | vertical, button is on the top, socket points to the tail boom |
| blue | flat inverted, sticker on bottom side, socket points to the tail boom |
| red/blue | vertical inverted, button is on the bottom, socket points to the tail boom |
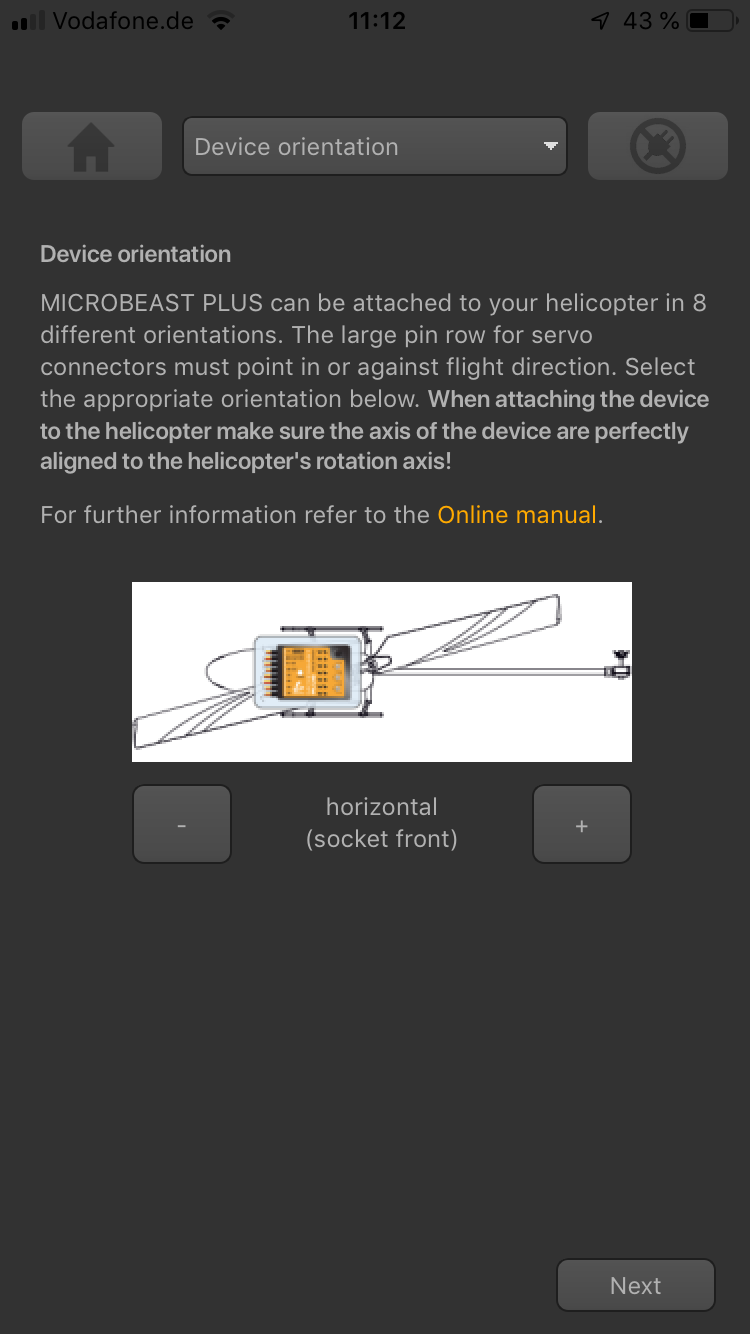
Setup with StudioX app
At the first screen of heli setup wizard choose the orientation that the device is actually mounted on your heli by choosing the matching type in the app.