Translations:Manuals:MB Plus:Preliminary steps/4/en
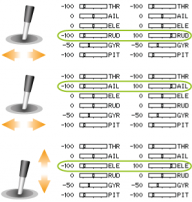
Be sure that all trims and sub trims are disabled and that all servo travels are set to 100%. Increasing or decreasing the servo travel/stick throw for aileron, elevator and rudder will later adjust the (maximum) control rates. For the moment to setup Microbeast PLUS let anything stay at default. Also do not adjust the collective pitch curve at the moment. For the setup procedures it has to be set as a straight line reaching from -100% to +100% (or 0 to 100% depending on radio brand). There mustn't be any active mixing functions (for example rudder revo-mixing). Have a look at the radio’s servo monitor: each stick has to control one channel/servo output (except for thrust stick which typically controls collective pitch and motor). Remember when using Microbeast PLUS you do not directly control the servos of the helicopter. By moving a stick you give a control command to the Microbeast PLUS unit which then performs the necessary servo movements to move the helictoper in the commanded direction. Each control command is bound to one servo output channel of the transmitter. When using flight modes again make sure that there is no mixing active in any flight mode and that all trims and subtrims are zero in all flight modes.
Other functions such as throttle curves, ESC switches or auxiliary functions can be adjusted as usual. When using the RPM Governor function the throttle adjustment will be described later. Also the switch assignment for AttitudeControl will be discussed at the specific topic.
Always make sure that the motor in electric models can not start when doing the adjustment work! If the drive battery is used as power supply for receiver, servos and Microbeast PLUS, disconnect the motor from the ESC.


