Difference between revisions of "Translations:StudioX/21/en"
Jump to navigation
Jump to search
(Importing a new version from external source) |
(Importing a new version from external source) |
||
| Line 1: | Line 1: | ||
=Installation on a Windows system= | =Installation on a Windows system= | ||
| − | [http://studiox.beastx.com/download/ | + | [http://studiox.beastx.com/download/win/StudioXSetup_224.exe <img src="http://www.beastx.com/deu/support_files/studiox_win.jpg" alt="" height="25" /> StudioX for Windows (7, 8, 10)]<br /> |
<br /> | <br /> | ||
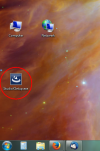
After downloading the StudioXSetup_xxx.exe open it by double clicking from the folder where it was downloaded (here we downloaded it directly to the Desktop): | After downloading the StudioXSetup_xxx.exe open it by double clicking from the folder where it was downloaded (here we downloaded it directly to the Desktop): | ||
Latest revision as of 20:52, 22 November 2018
Installation on a Windows system
![]() StudioX for Windows (7, 8, 10)
StudioX for Windows (7, 8, 10)
After downloading the StudioXSetup_xxx.exe open it by double clicking from the folder where it was downloaded (here we downloaded it directly to the Desktop):

Simply start the install routine by clicking "Next" and "Install". The files will be copied to your default Program Files folder. When done click "Finish":


Before using the software make sure that the driver files for your USB2SYS interface have been installed. For further information see this topic: Driver installation for Microsoft Windows.