EMPFÄNGER MENÜ A - Empfängertyp/Protokoll
Im ersten Menüpunkt des EMPFÄNGERMENÜS stellen wir das verwendete Fernsteuersystem/Übertragungsprotokoll ein. Das System erkennt den Empfängertyp automatisch, wenn du den Scanvorgang startest, basierend auf den (Daten-) Signalen, die der Empfänger aussendet. Wenn der Scanvorgang erfolgreich war, müssen möglicherweise zusätzliche Einstellungen in den folgenden Menüpunkten angepasst werden, die mit dem Fernsteuersystem zusammenhängen.
Beachte, dass in den ersten Menüpunkten des EMPFÄNGERMENÜS kein Steuersignal am Gasausgang ausgegeben wird. Erst ab Menüpunkt N (Einstellung der Gas-Failsafe-Position) wird der Ausgang aktiviert, um die Gasposition zu überprüfen! Wenn du einen Drehzahlregler mit BEC verwendest, trenne den Motor, um ein unbeabsichtigtes Starten des Motors zu vermeiden! Bei einem Hubschrauber mit Verbrennungsmotor solltest du den Servohebel vom Gasservo entfernen, um ein Verhaken oder Brechen des Servohebels zu vermeiden.
MICROBEAST PLUS / ULTRA
Um in das EMPFÄNGERMENÜ zu gelangen, drücke die Taste am MICROBEAST PLUS / ULTRA und halte sie gedrückt, bevor(!) und während du die Stromversorgung des Empfängers einschaltest. Die gelben Menü-LEDs beginnen sofort zu leuchten. Wenn du die Taste loslässt, wird die Menü-LED A blinken und die Farbe der Status-LED zeigt den derzeit ausgewählten Empfängertyp an.

Um den verwendeten Empfänger zu erkennen, stelle sicher, dass der Empfänger ordnungsgemäß angeschlossen, an die Fernsteuerung gebunden und Signale sendet. Stelle auch sicher, dass der Sender korrekt eingerichtet ist. Drücke dann kurz die Taste, um die automatische Empfängererkennungsroutine zu starten. Die Status-LED zeigt den Scanvorgang an:
| Status-LED | Empfängertyp/Protokoll |
|---|---|
| aus | Standard Empfänger |
| violett | Empfänger am seitlichen Anschluss |
| rot | Fehler! Kein Empfänger erkannt |
| blau | Empfänger an vorderer Anschlussleiste |
The system will skip to Menu Point B automatically when a valid input signal was detected. Only if you use a Standard receiver with 5 servo wires connected to each control function at MICROBEAST, the system will exit and restart immediately. Here, there is no need to adjust anything else.
When detection fails, the system will stay at Menu Point A and the Status LED will flash in red color. Make sure your receiver is connected properly to MICROBEAST PLUS / ULTRA. Also make sure the receiver is bound to the radio and sending out control signals at the receiver ports. Then please try again.
NANOBEAST
To get into the RECEIVER MENU connect the push button panel to the [SYS] port after turning on the receiver power supply. Now push and hold the button for 2 seconds and release. The Status LED will flash once, indicating Menu Point 1.
In order to detect the receiver you're using, make sure the receiver is connected properly, bound to the radio and sending out signals. Also make sure the transmitter is setup correctly. Then briefly press the button to start automatic receiver detection routine. The Status LED will indicate the scan process:
The system will skip to Menu Point 2 automatically when a valid input signal was detected (Status LED will flash twice then change to solid blue color). When detection fails, the system will stay at Menu Point 1 and the Status LED will flash in red color. Make sure your receiver is connected properly to NANOBEAST. Also make sure the receiver is bound to the radio and sending out control signals at the receiver ports. Then please try again.
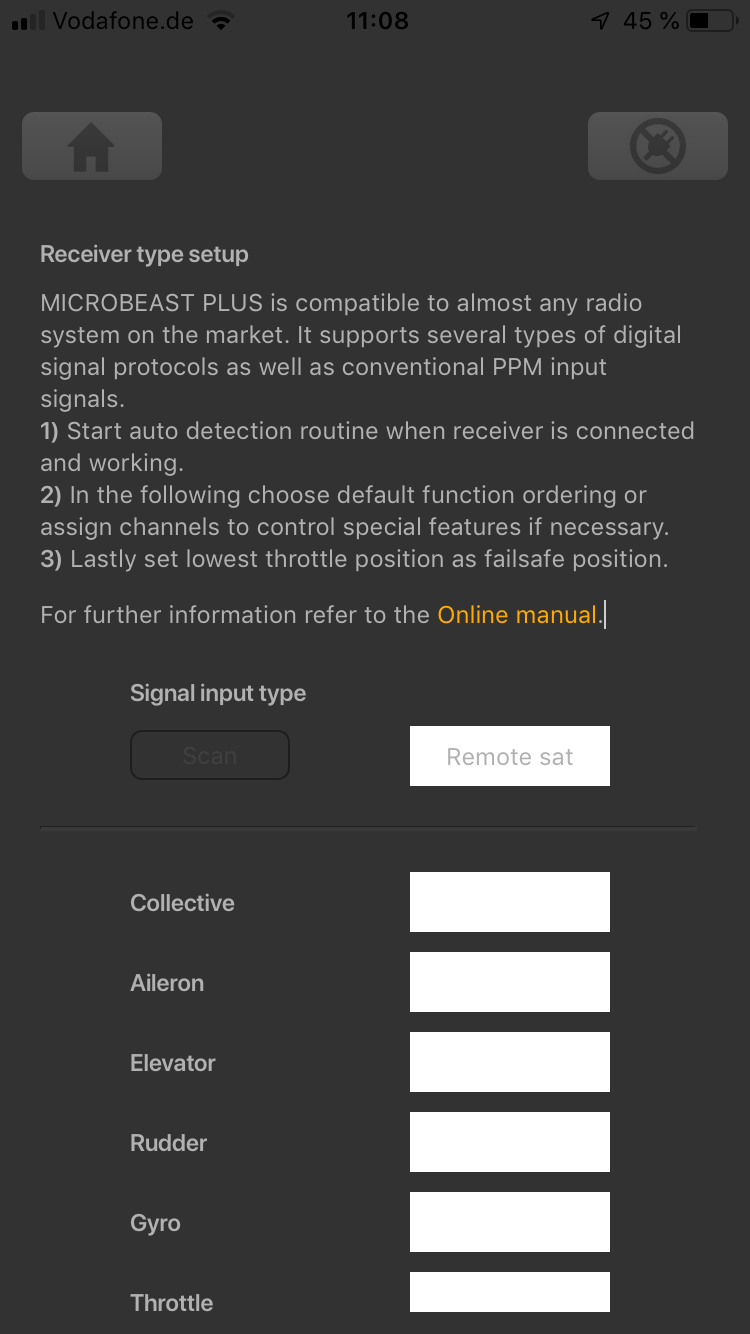
StudioX app
When StudioX is started and your BEASTX device is connected with StudioX, click the Control Setup button to show the adjustment options of RECEIVER MENU.
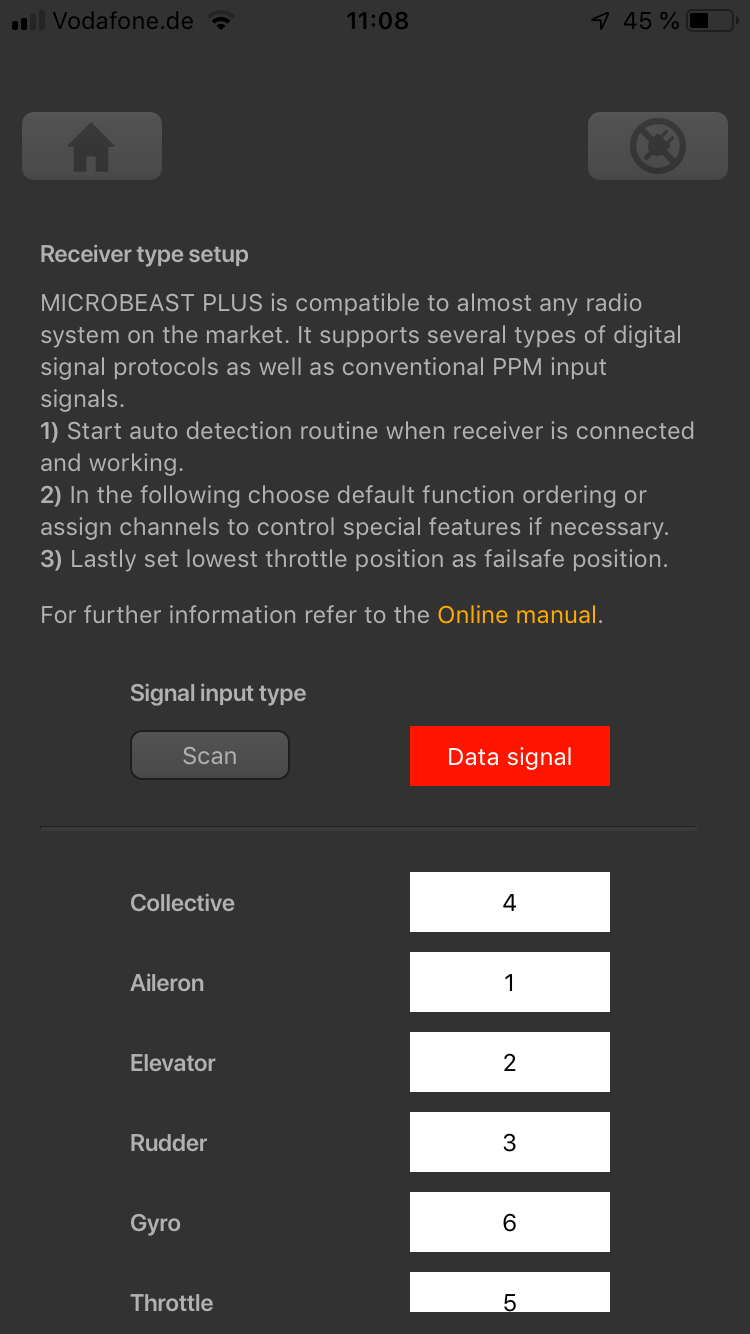
- At the top of the screen you can see which type of input signal is selected at the moment, and which telemetry system/ESC is used (if applicable).
- The rows below show what channels are assigned to which control functions at the moment.
- In the last row you can see the internal value for throttle failsafe position that is set at the moment.

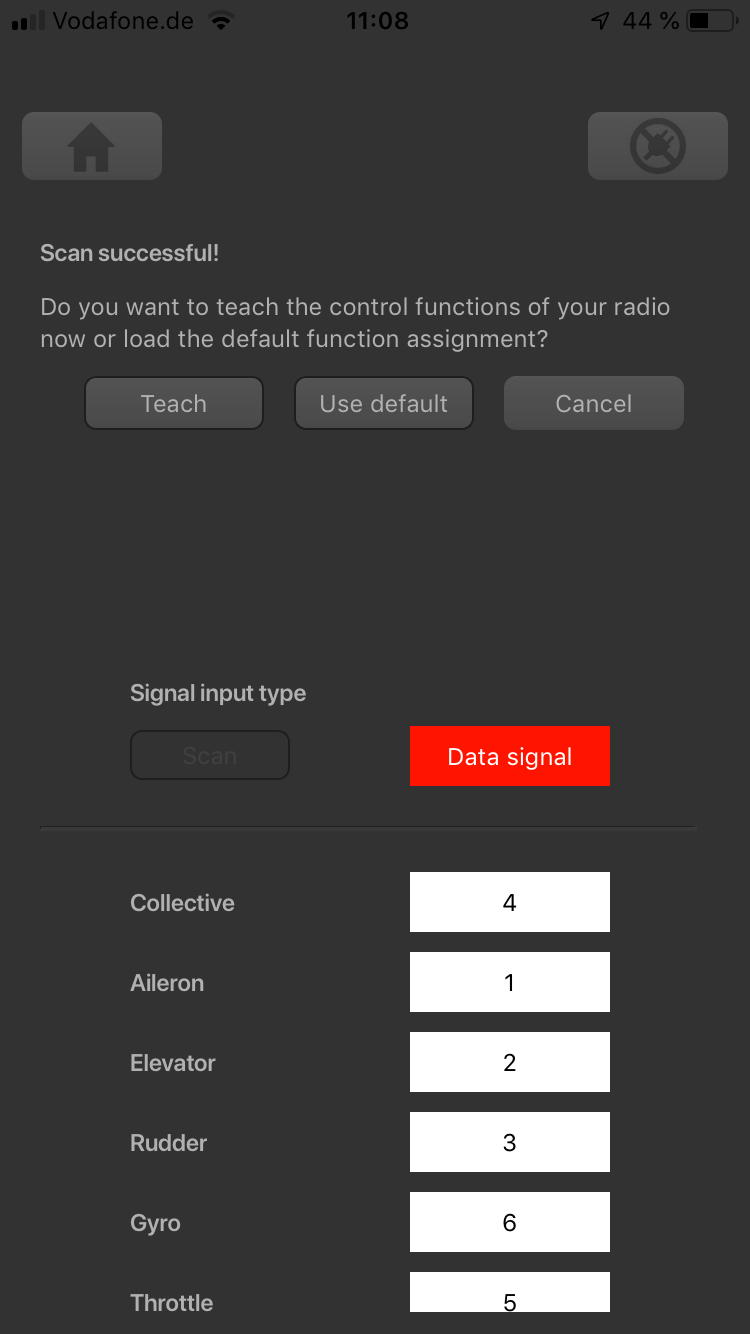
In order to detect the receiver you're using, make sure the receiver is connected properly, bound to the radio and sending out signal. Also make sure the transmitter is setup correctly. Now press the "Scan" button to start automatic receiver detection routine. The ongoing scan process is displayed:
- In case a single-line receiver is used, a dialog will appear on success. This asks how to proceed with function assignments.
- When a Standard receiver is used, the system will restart directly and you can leave the setup screen.
- When detection fails, once again make sure your receiver is connected properly to MICROBEAST ULTRA. Make sure the receiver is bound to the transmitter and sending out control signals. Then please try again.