Difference between revisions of "StudioXm:Overview"
Shornstein (talk | contribs) |
Shornstein (talk | contribs) |
||
| Line 6: | Line 6: | ||
<br /> | <br /> | ||
| − | + | =Overview screen= | |
| − | |||
| − | |||
| − | |||
| − | |||
| − | |||
| − | |||
| − | |||
| − | |||
| − | |||
| − | |||
| − | |||
| − | |||
| − | |||
| − | |||
| − | |||
| − | |||
| − | |||
| − | |||
| − | |||
| − | |||
| − | |||
| − | |||
| − | |||
When connection to your BEASTX device is established, wait until the data is loaded from the device and initialization sequence is finished. At first the system will calibrate to the radio system, Menu LEDs H to N will cycle up and down at the device (MICROBEAST PLUS/AR7210BX) and you can read '''Radio init''' in the opening overview screen. During this time '''do not move the sticks on your radio''' as the system is learning the stick mid positions! In the second step the device checks if the sensors are working correctly and learns the sensor rest positions. Here Menu LEDs A to G will cycle up and down (MICROBEAST PLUS/AR7210BX) and you can read '''Sensor init''' in the opening overview screen. During this time '''do not move the helicopter!''' When initialization is completed, the Status LED will change to blue or purple color indicating the current gyro mode and you can read the gyro gain and mode in the app.<br /> | When connection to your BEASTX device is established, wait until the data is loaded from the device and initialization sequence is finished. At first the system will calibrate to the radio system, Menu LEDs H to N will cycle up and down at the device (MICROBEAST PLUS/AR7210BX) and you can read '''Radio init''' in the opening overview screen. During this time '''do not move the sticks on your radio''' as the system is learning the stick mid positions! In the second step the device checks if the sensors are working correctly and learns the sensor rest positions. Here Menu LEDs A to G will cycle up and down (MICROBEAST PLUS/AR7210BX) and you can read '''Sensor init''' in the opening overview screen. During this time '''do not move the helicopter!''' When initialization is completed, the Status LED will change to blue or purple color indicating the current gyro mode and you can read the gyro gain and mode in the app.<br /> | ||
<br /> | <br /> | ||
Revision as of 13:21, 31 March 2023
Overview screen
When connection to your BEASTX device is established, wait until the data is loaded from the device and initialization sequence is finished. At first the system will calibrate to the radio system, Menu LEDs H to N will cycle up and down at the device (MICROBEAST PLUS/AR7210BX) and you can read Radio init in the opening overview screen. During this time do not move the sticks on your radio as the system is learning the stick mid positions! In the second step the device checks if the sensors are working correctly and learns the sensor rest positions. Here Menu LEDs A to G will cycle up and down (MICROBEAST PLUS/AR7210BX) and you can read Sensor init in the opening overview screen. During this time do not move the helicopter! When initialization is completed, the Status LED will change to blue or purple color indicating the current gyro mode and you can read the gyro gain and mode in the app.

If you can't get through the initialization sequence either because LEDs A-G or LEDs H-N don't stop cycling, please read the FAQ and do the CONTROL SETUP first (see manual of your device for further instructions).
Flight log book
StudioX includes a flight log book that allows to keep record of your flights and battery usage. To synchronize your log book with different devices, you can change the storage location from the Options menu. If you like, you can choose a cloud drive folder there. The log data is stored in a single .xml file. Also you can copy this file between devices or backup this file if needed.
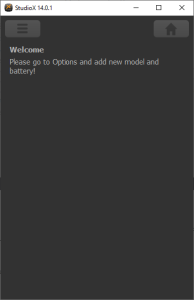
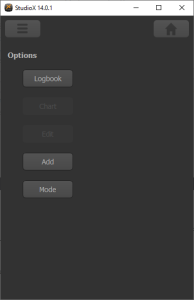
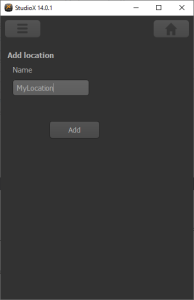
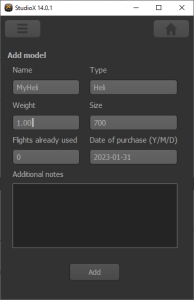
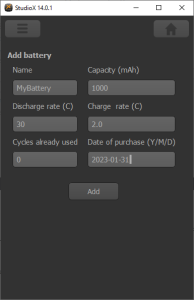
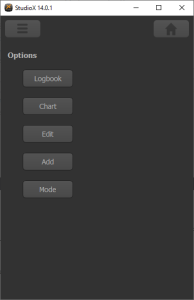
When you open the Flight log for the first time, you have to add a location (your flying field), a model and at least one battery. (If you don't want to add flight log and only want to keep track of your battery usage, you can solely add batteries as well.) Click the Options button on the upper left corner and choose Add, then add the items one after another.
| Choose options and add items | Add a location ... | and a model |
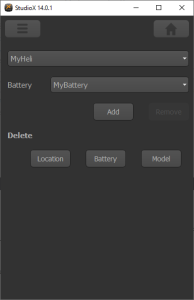
| Also we need a battery | Then choose Edit... | ...and assign battery to the model | Now you can see your model and its batteries |
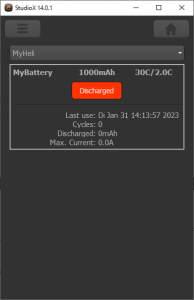
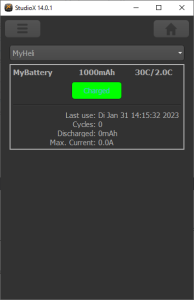
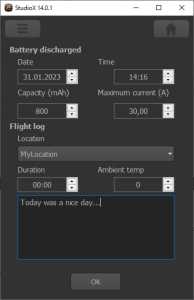
Now by clicking the battery, you can "Charge" it (you can do this at home when you've charged your batteries in reality). Then after flying with the battery click here again to discharge the battery. Then the flight log will open and you can add additional informations.
| Battery charged.. | ..and discharged again |
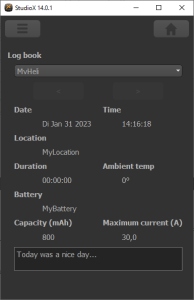
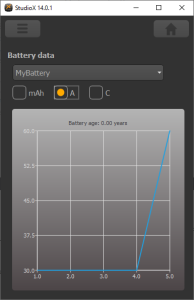
Go to Logs to review your flights. Also you can display some graph about your battery usage.
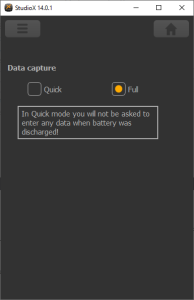
If you feel adding additional flight data is to laborius, you can switch into Quick mode. Here adding log data is not required when "discharging" a battery.
BLE2SYS Configuration
When using an iOS or Android smartphone/tablet you can configure the BLE2SYS device by tapping the BLE2SYS button on top of the main window. This will open a configuration screen (or you will be asked to enter the pin code for the bluetooth device first).
Device Name
You can set a custom device name (maximum length 11 digits) by changing the name in the line on top of the screen, i. e. by entering the name of your helicopter. Then this name will be the bluetooth identifier. Please note when chaging the name you may have to restart the StudioX app as well as the BLE2SYS device in order to see the new name in the main window.
Automatic deactivation
Never ever fly your helicopter when the bluetooth device is active! The bluetooth signal is sent on the 2.4GHz band and may interfer with your radio signal. For your convenience you can set an automatic deactivation timeout here, so the device will power off automatically after the given amount of time when no connection is requested. So you can leave the module plugged into your BEASTX device when flying the helicopter and when not using the app. When you set the timeout to 0 the device will be active all time.
Warning: When you deactivate the timeout, never leave your BLE2SYS connected when flying your helicopter! This can lead to radio signal loss and cause severe injury or damage!
Change pin code
If necessary you can change the pin code for connecting to the BLE2SYS. We highly recommend to do this as the default pin "1111" is known to everyone, so it may be very likely that some moron tries to fool you and connects to your device when on the flying field or even when you intend to fly!
Firmware update
When you are using a computer (PC/mac) to configure your BLE2SYS, you will additionaly see a "Firmware Update" button. So obviously when you click that button you will be able to upload latest firmware updates to your BLE2YS interface (if necessary). The update procedure is not different to any other BEASTX device and is described in the section Firmware Update.
