StudioXm:FirmwareUpdate/en: Difference between revisions
Importing a new version from external source |
Updating to match new version of source page |
||
| (5 intermediate revisions by the same user not shown) | |||
| Line 14: | Line 14: | ||
Now to get the firmware files, at first you will be prompted to log in to the freakware network with your login (=email address) and password. If not already done create an account now. If you have forgotten your password click the corresponding button to request a new password. The login credentials will be stored, so next time when doing a firmware update you can skip this step quickly. If you don't like that your password is saved you can disable the corresponding option.<br /> | Now to get the firmware files, at first you will be prompted to log in to the freakware network with your login (=email address) and password. If not already done create an account now. If you have forgotten your password click the corresponding button to request a new password. The login credentials will be stored, so next time when doing a firmware update you can skip this step quickly. If you don't like that your password is saved you can disable the corresponding option.<br /> | ||
<br /> | <br /> | ||
<div class=" | <html> | ||
< | <div class="ios-gallery-container"> | ||
<div class=" | <!-- Erstes Bild und Text --> | ||
<div class="ios-gallery-item"> | |||
<div class="ios-gallery-image"> | |||
<img src="https://wiki.beastx.com/images/studiox/freakware%202019-07-09%20008.PNG" alt="Screenshot"> | |||
</div> | |||
<div class="ios-gallery-text">Choose Firmware Update from the overview.</div> | |||
</div> | |||
<div class="ios-gallery-item"> | |||
<div class="ios-gallery-image"> | |||
<img src="https://wiki.beastx.com/images/studiox/freakware%202019-07-09%20009.PNG" alt="Screenshot"> | |||
</div> | |||
<div class="ios-gallery-text">Log in to the freakware network with your credentials or create a new account.</div> | |||
</div> | |||
</div> | </div> | ||
< | </html> | ||
< | <br /> | ||
<br /> | |||
</ | |||
= Device registration = | |||
You can only download firmware updates when the device is registered/linked to your user account. When the device belongs to anyone else, a message will tell you. In this case please contact the BEASTX customer service providing your user account (email address) and the device serial number. To make this procedure more convenient, you can click the email link in the app, so an email with your serial number will be opened automatically.<br /> | |||
<br /> | |||
If the device is not registered to anyone, click the '''Register Device''' button once to link it to your account.<br /> | |||
<br /> | <br /> | ||
<br /> | <br /> | ||
= Update procedure = | = Update procedure = | ||
<br /> | <br /> | ||
{{WARNING_QUOTE|For the update procedure it is highly recommended to unplug all servos as the servo can go to full deflection during the setup. This is because the outputs of your device will not send out any signals during the update process. In such situation some servos can behave very strange or unforeseen, especially cheap servos with bad servo software. Using an electric heli it is also recommended to unplug the motor from the ESC or unplug the ESC or main battery in case this is not used for powering the radio system (no BEC), so the motor will not start by accident during or after the firmware update.}}<br /> | |||
On top of the screen you can choose between available features for your device (Headspeed governor, rescue/bailout, Heli specific firmware, ...). The StudioX app will recognize which features are currently installed on your device and select them in advance. You may install/uninstall features as you like. Some feature may need to be unlocked first. Click the '''Upgrade''' button in order to get to the freakware webshop. Here you can buy the additional (locked) features.<br /> | |||
<br /> | <br /> | ||
In the combo box in the middle you can choose from the available firmware files for the selected feature set. The latest/highest firmware version will be selected automatically. '''When the combo box stays empty, make sure to select some features above!'''<br /> | |||
<br /> | <br /> | ||
When you're ready to flash the firmware to your device, click the '''Request''' button. Wait a few seconds until the firmware file was generated individually for your device. Once this is done, again click the button '''Download''' the firmware file. Then for a third time, click '''Flash'''. You will be asked one last time, if you are really sure to flash a new firmware to your device. Please note: Flashing from a different major version (i.e. updating from V4.x.x to V5.x.x) will erase all settings of your device and you will have to do all the setup again. This is because typically a new major version will be created when the whole setup procedure has changed are a bunch of new settings and parameters will be added to the firmware, so the old setup is not applicable to the new firmware anymore. So also make sure you've read and understood the manual for the new firmware as well!<br /> | |||
<br /> | <br /> | ||
The firmware procedure should start immediately after pressing the '''OK''' button. During the update, please do not do anything! Just wait until the progress has gone up to 100%, which will take a few seconds when using a computer with USB2SYS and may take several minutes (!) when using a smartphone with BLE2SYS bluetooth connection. When using the bluetooth keep your smartphone/tablet in very close distance to the BLE2SYS module (just a few inches) as the bluetooth connection can be interrupted easily. Also it is advisable to keep the radio system switched off when performing the update and stay aways from other radio devices, i.e. wifi routers or similar. When the procedure has finished your device will reboot and StudioX/StudioXm will close the connection. Now you can connect again and start over with the setup.<br /> | |||
<br /> | <br /> | ||
<html> | |||
<div class="ios-gallery-container"> | |||
<!-- Erstes Bild und Text --> | |||
<div class="ios-gallery-item"> | |||
<div class="ios-gallery-image"> | |||
<img src="https://wiki.beastx.com/images/6/66/Ios_choose_firmware.PNG" alt="Screenshot"> | |||
</div> | |||
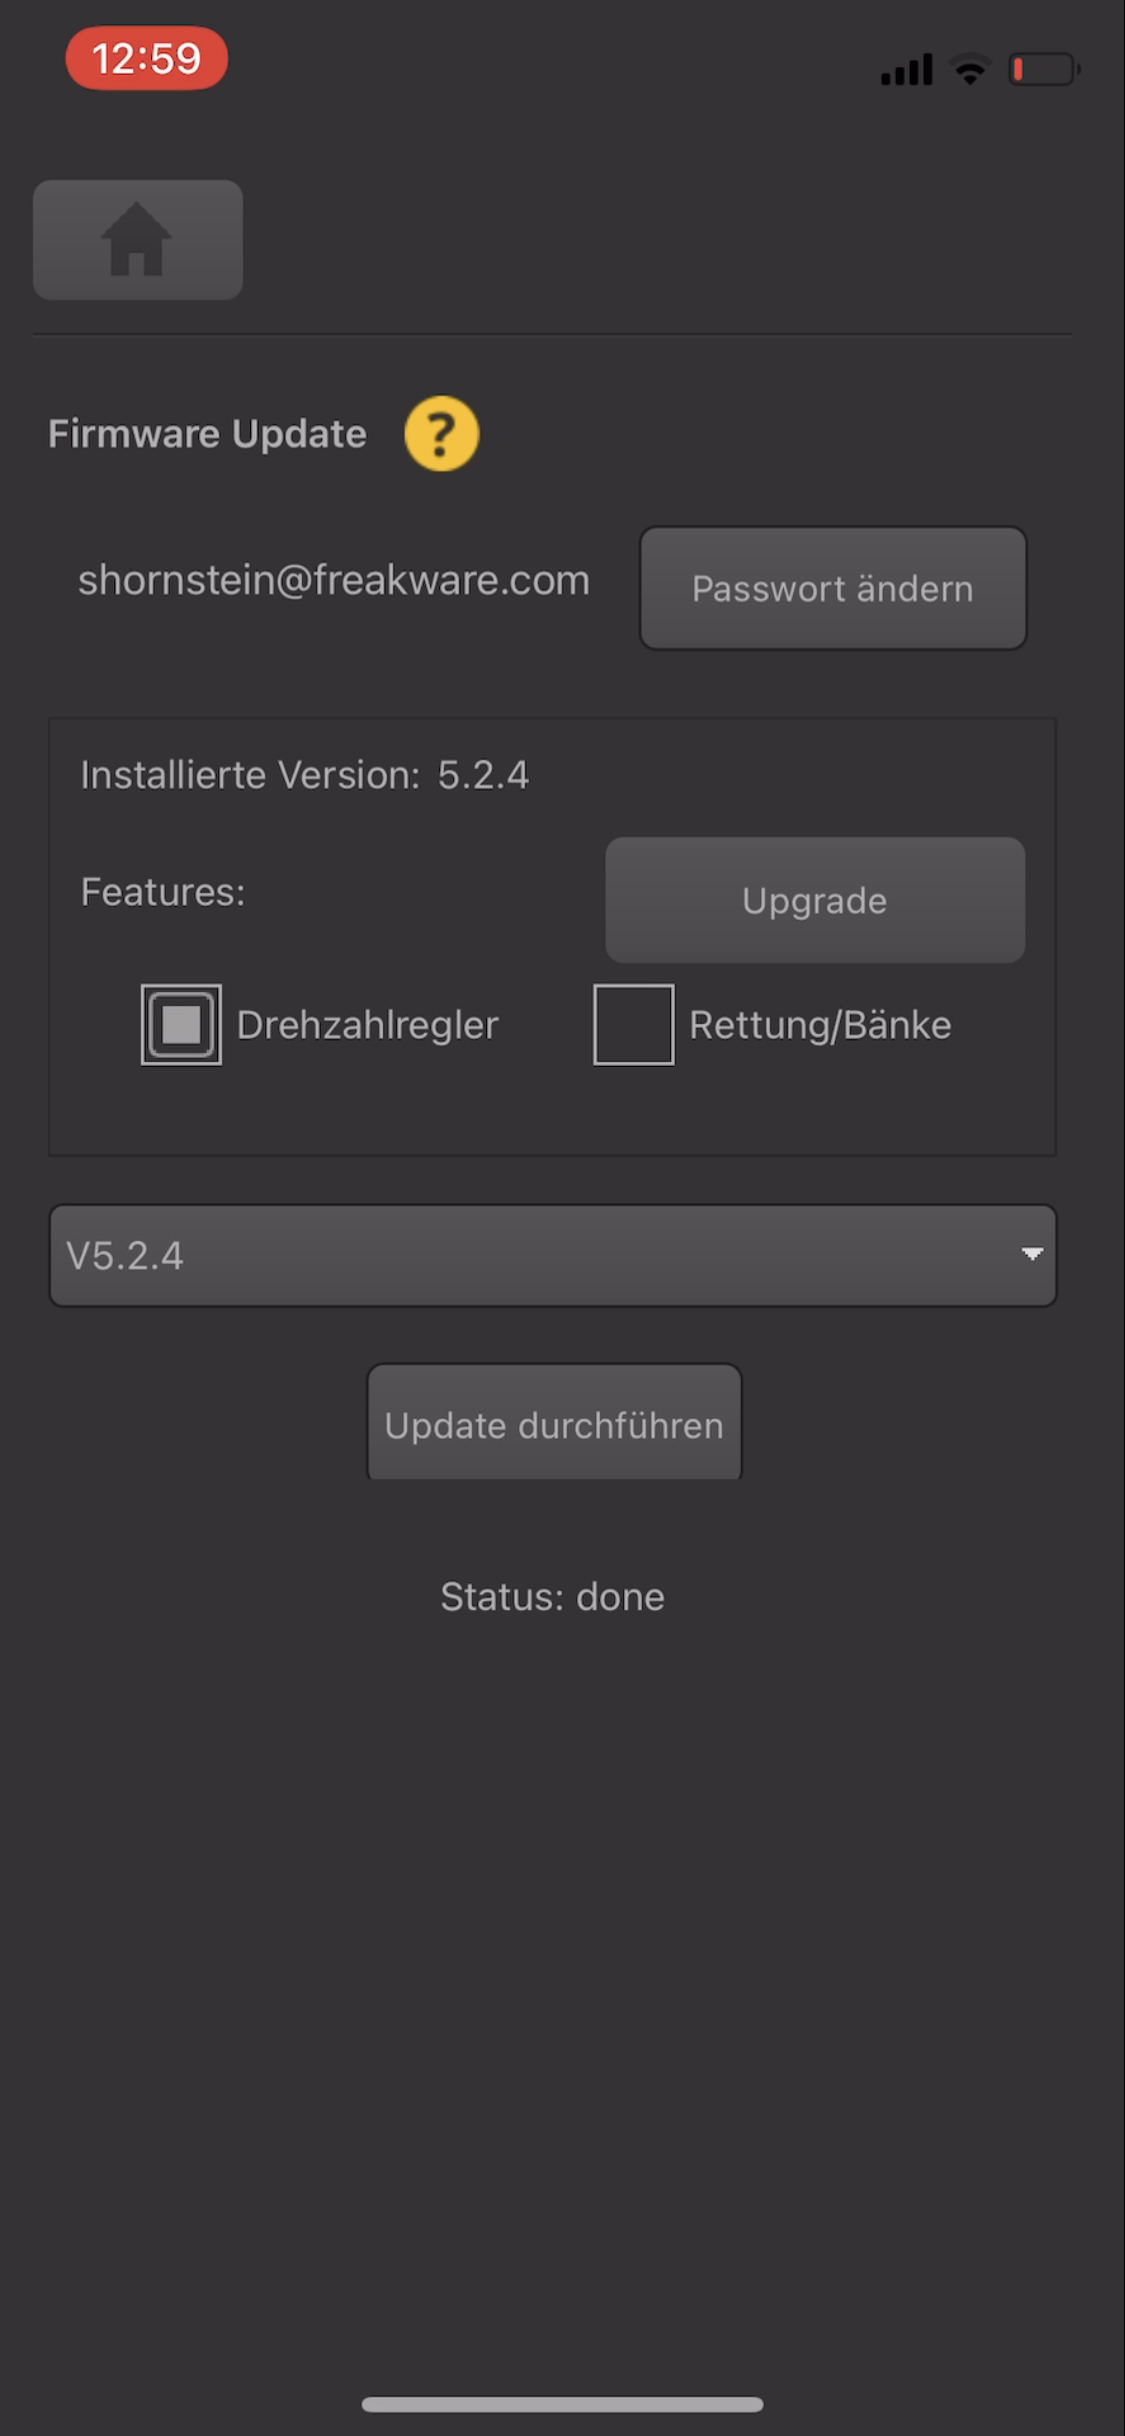
<div class="ios-gallery-text">Choose features first, then firmware version. Download and start update.</div> | |||
</div> | |||
<div class="ios-gallery-item"> | |||
<div class="ios-gallery-image"> | |||
<img src="https://wiki.beastx.com/images/5/56/Ios_click_start.PNG" alt="Screenshot"> | |||
</div> | |||
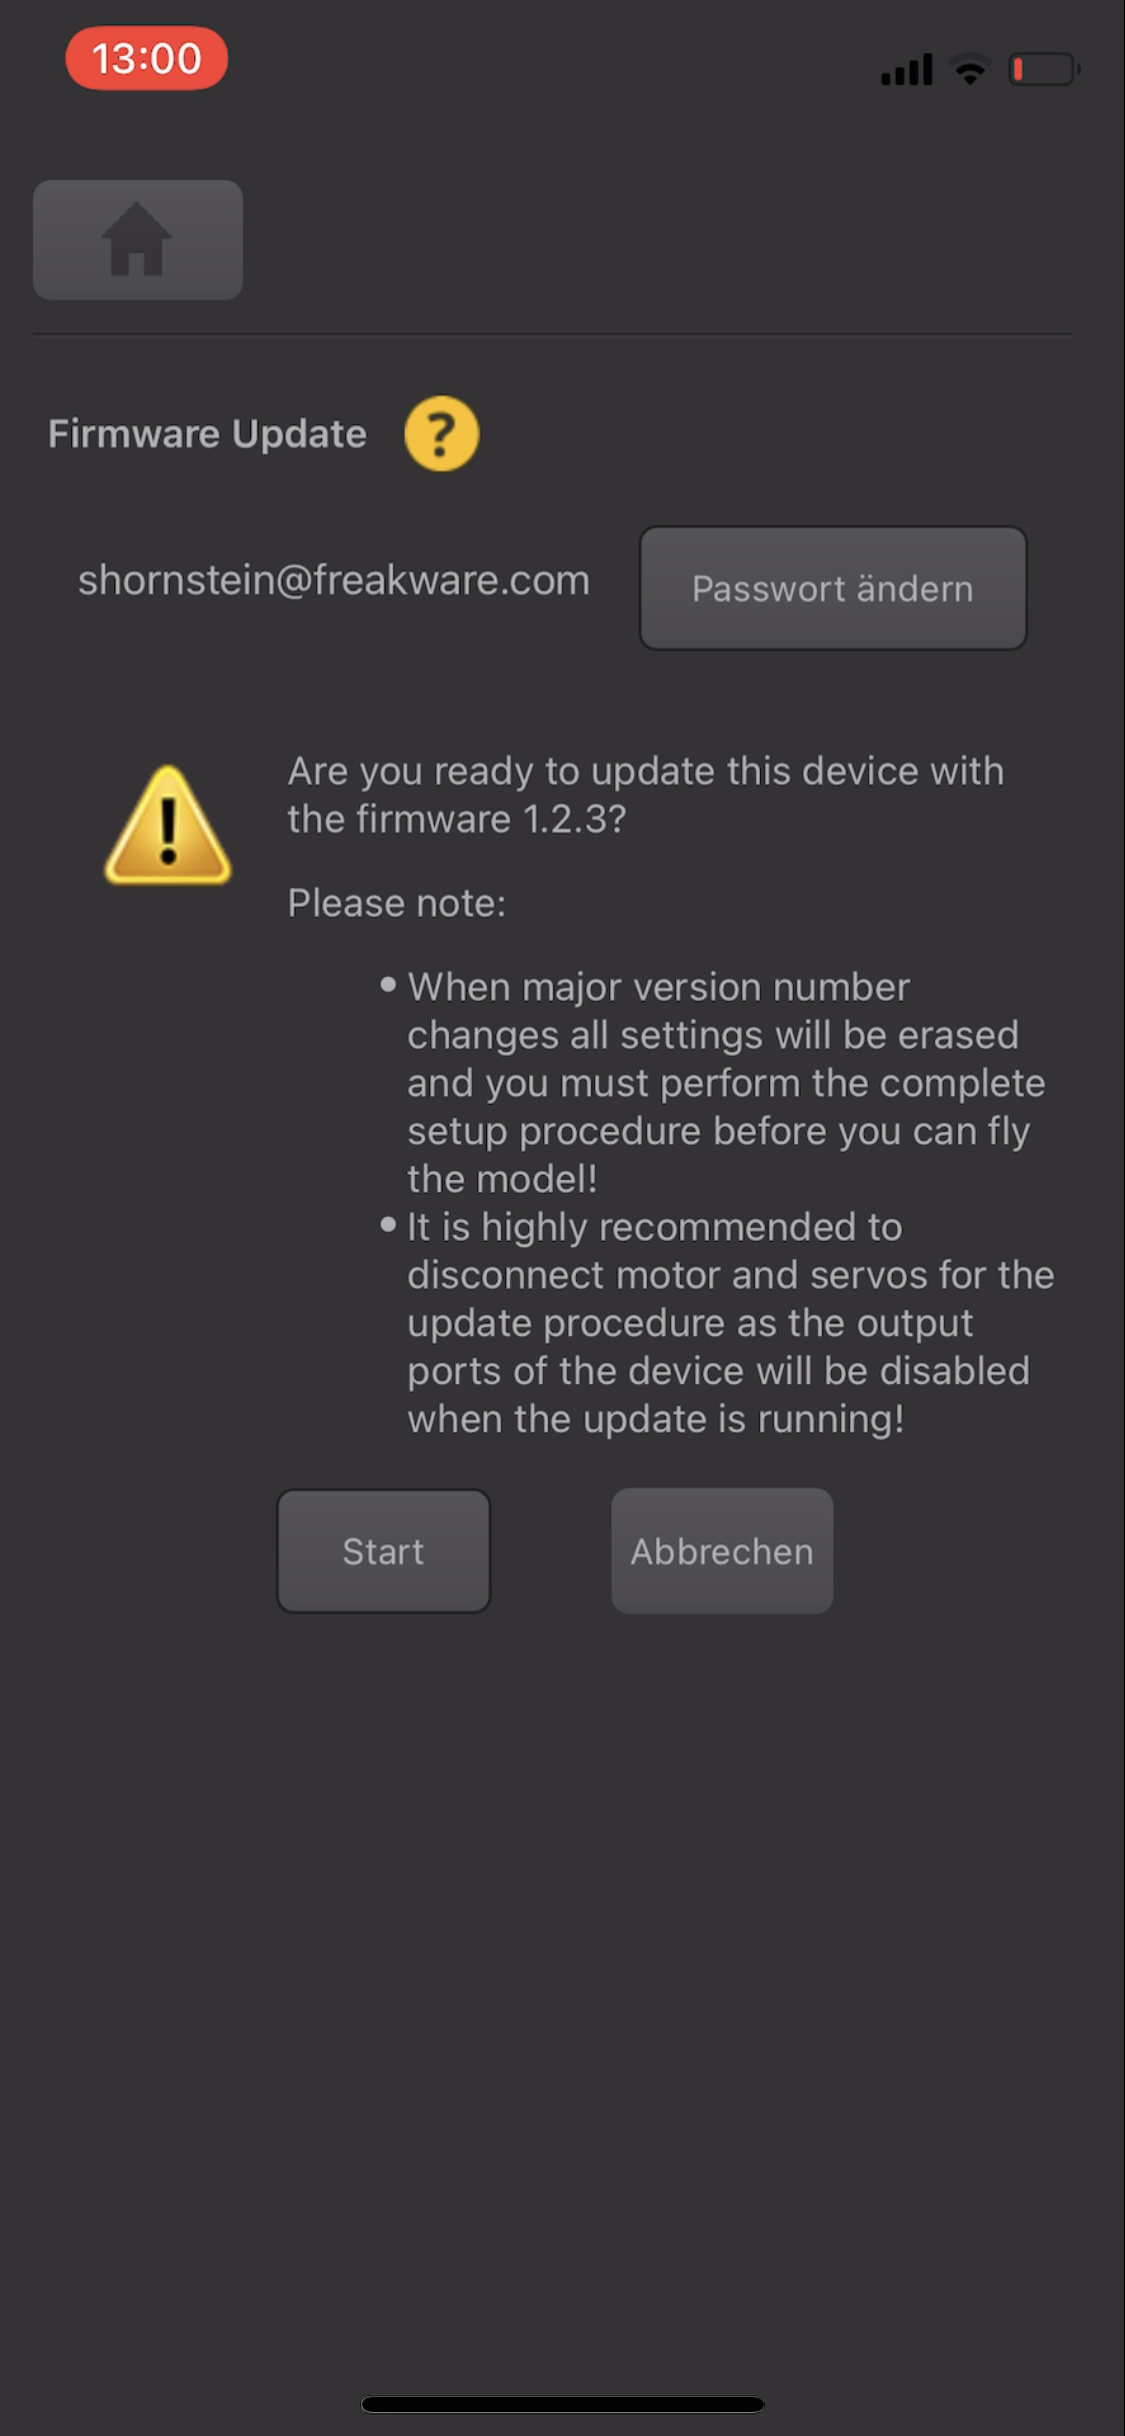
<div class="ios-gallery-text">Confirm to start update for the last time.</div> | |||
</div> | |||
<div class="ios-gallery-item"> | |||
<div class="ios-gallery-image"> | |||
<img src="https://wiki.beastx.com/images/1/14/Ios_updating.PNG" alt="Screenshot"> | |||
</div> | |||
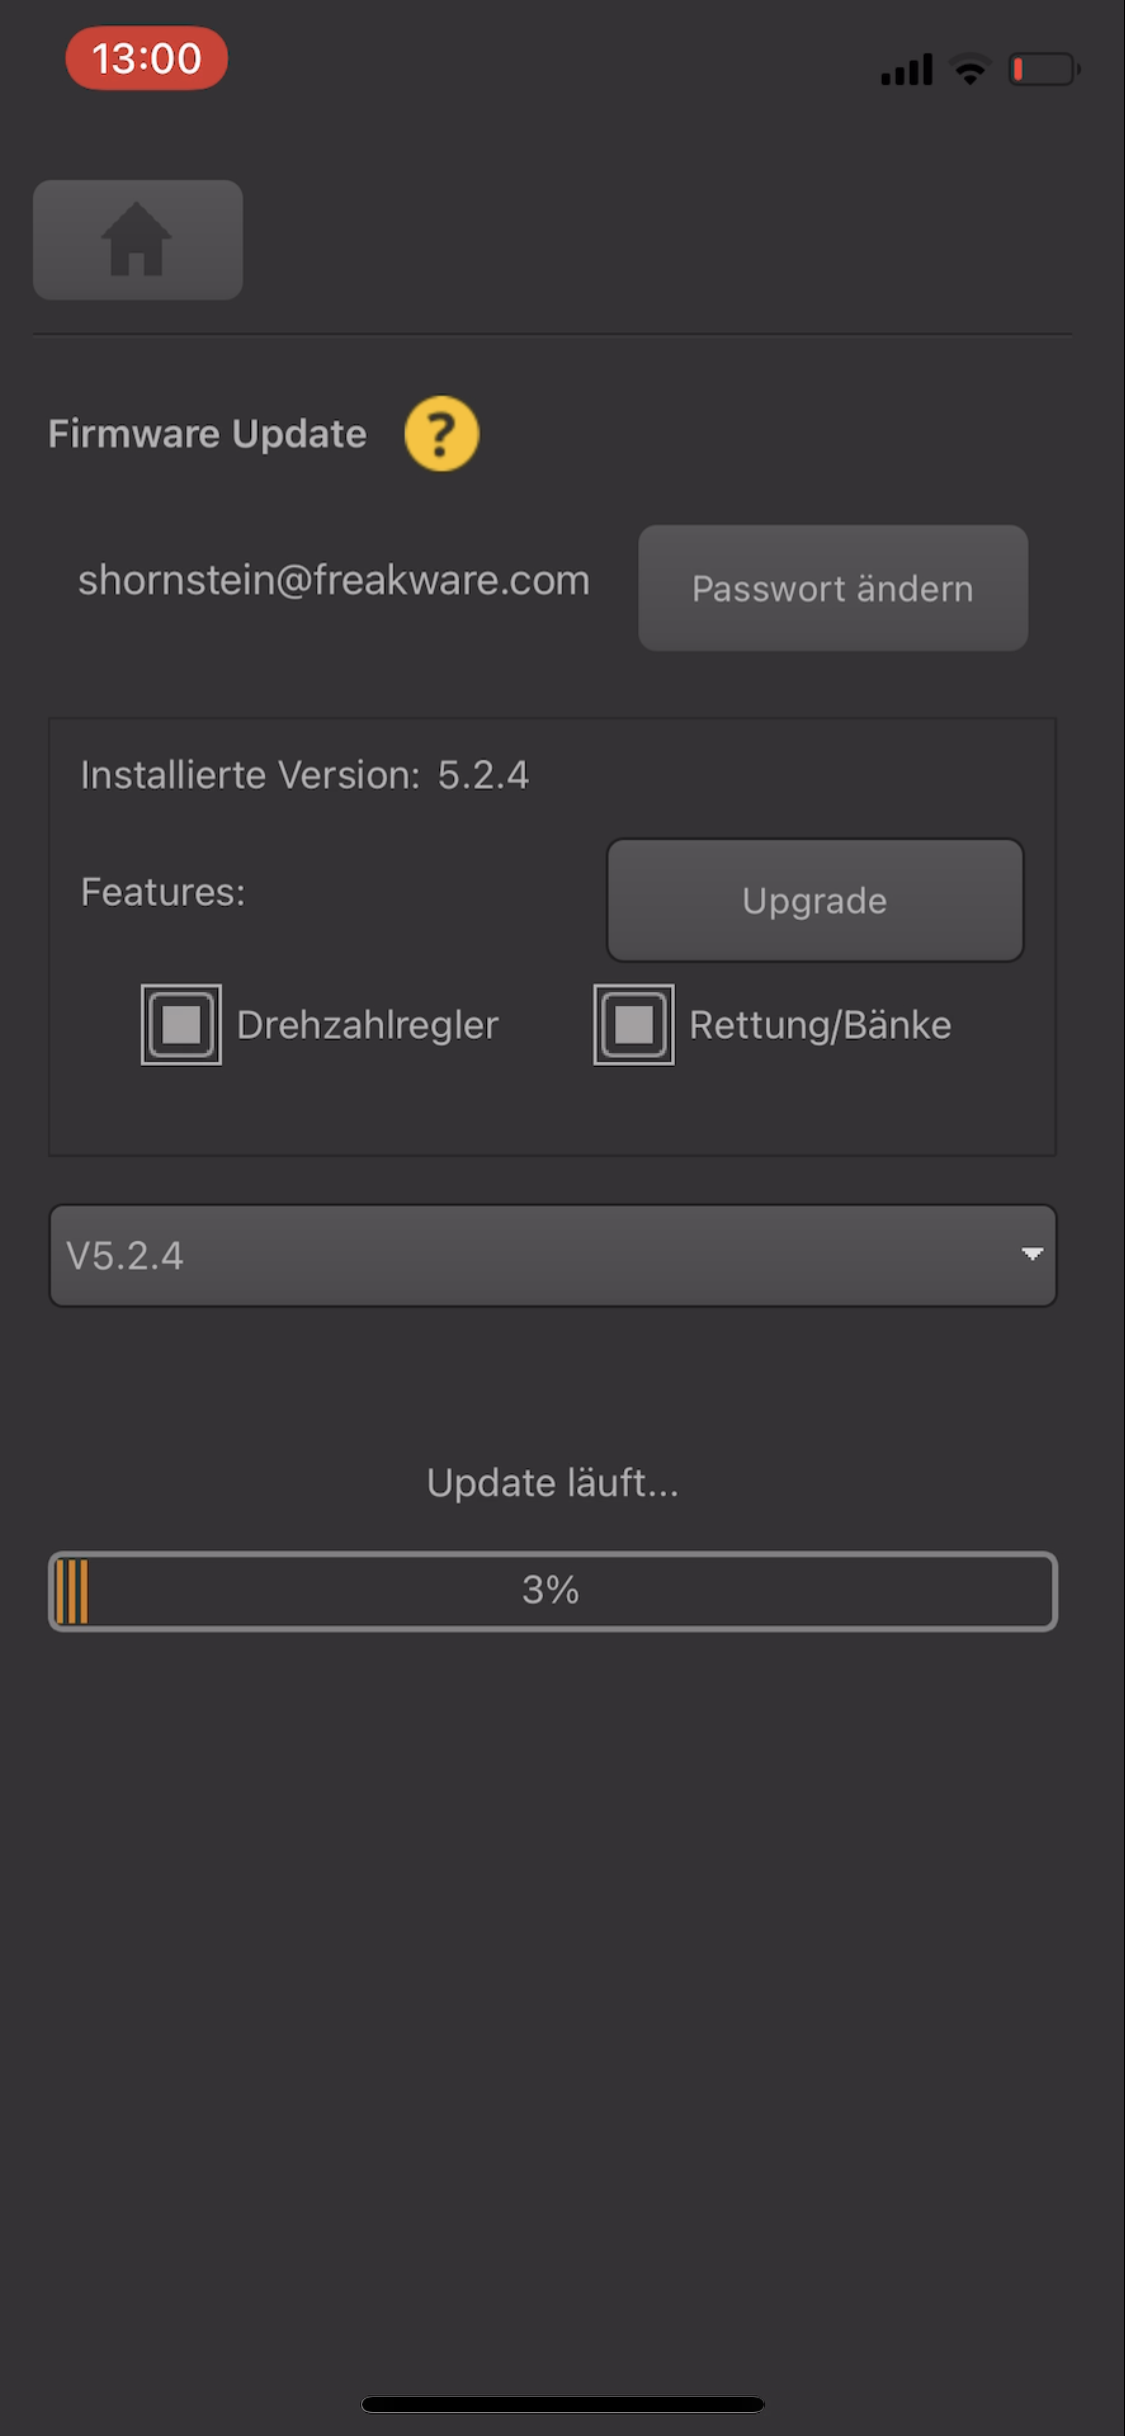
<div class="ios-gallery-text">Wait until update has finished. This can take a few minutes!</div> | |||
</div> | |||
</div> | |||
</html> | |||
<br /> | <br /> | ||
<br /> | <br /> | ||
= When the update fails = | = When the update fails = | ||
When the update | When the update process fails in the middle the device will be stuck in recovery mode as the main application is erased now. Stay calm, this is no problem at all! Just reconnect and try again. If the update fails again and again at some point, completely close the app and power off your device. Power on again, start the app and try again. If that all does not work you please try another computer or smartphone.<br /> | ||
<br /> | |||
Especially when using the bluetooth connection do as mentioned above: Stay away from radio devices that may interfere with the bluetooth connection and try to stay as close to the BLE2SYS as possible.<br /> | |||
<br /> | <br /> | ||
When using a computer in combination with USB2SYS make sure there are no processes running in background that may interrupt USB communication. Especially when using a virtual machine for running the StudioX app it may happen that the USB connection is slow and not performing properly. So do not use a virtual machine for running the app. Also make sure drivers are installed and configured properly. Don't use any USB hubs! In very rare cases it can be that the wire or plugs from USB2SYS to your device may be damaged or have a loose connection, so try a different connection cable. Finally make sure your power supply/battery is fully charged and holding voltage properly. Disconnect all servos for the update procedure to maintain a stable power level.<br /> | |||
<br /> | <br /> | ||
<br /> | <br /> | ||
Latest revision as of 10:18, 10 August 2024
Introduction
StudioX/StudioXm allows to directly flash firmware files to your BEASTX device using the USB (StudioX for PC/Mac) or bluetooth (StudioXm for smartphones) connection. The update process is similar to all our devices so it will be shown here for MICROBEAST PLUS exemplarily. Using a computer in combination with the USB2SYS interface also allows to update the firmware of your BLE2SYS bluetooth interface. Updating the BLE2SYS from a smartphone and via bluetooth is not provided.
freakware Network
The firmware files must be downloaded from the freakware network webserver. So for the update process it is necessary that your computer or mobile device serves an internet connection. Please note that especially when using mobile data this may produce costs! We recommend to not use the mobile network and just do the update process at home where you have (free) wifi. Especially when using a mobile device check that your network settings and privileges for using the internet are set correctly for the StudioXm app in you Android or iOS settings. Typically, when your internet is not configured correctly you will not be able to login to the freakware network and will see an error message when clicking the "Firmware Update" button in the app.
Now to get the firmware files, at first you will be prompted to log in to the freakware network with your login (=email address) and password. If not already done create an account now. If you have forgotten your password click the corresponding button to request a new password. The login credentials will be stored, so next time when doing a firmware update you can skip this step quickly. If you don't like that your password is saved you can disable the corresponding option.


Device registration
You can only download firmware updates when the device is registered/linked to your user account. When the device belongs to anyone else, a message will tell you. In this case please contact the BEASTX customer service providing your user account (email address) and the device serial number. To make this procedure more convenient, you can click the email link in the app, so an email with your serial number will be opened automatically.
If the device is not registered to anyone, click the Register Device button once to link it to your account.
Update procedure
For the update procedure it is highly recommended to unplug all servos as the servo can go to full deflection during the setup. This is because the outputs of your device will not send out any signals during the update process. In such situation some servos can behave very strange or unforeseen, especially cheap servos with bad servo software. Using an electric heli it is also recommended to unplug the motor from the ESC or unplug the ESC or main battery in case this is not used for powering the radio system (no BEC), so the motor will not start by accident during or after the firmware update.
On top of the screen you can choose between available features for your device (Headspeed governor, rescue/bailout, Heli specific firmware, ...). The StudioX app will recognize which features are currently installed on your device and select them in advance. You may install/uninstall features as you like. Some feature may need to be unlocked first. Click the Upgrade button in order to get to the freakware webshop. Here you can buy the additional (locked) features.
In the combo box in the middle you can choose from the available firmware files for the selected feature set. The latest/highest firmware version will be selected automatically. When the combo box stays empty, make sure to select some features above!
When you're ready to flash the firmware to your device, click the Request button. Wait a few seconds until the firmware file was generated individually for your device. Once this is done, again click the button Download the firmware file. Then for a third time, click Flash. You will be asked one last time, if you are really sure to flash a new firmware to your device. Please note: Flashing from a different major version (i.e. updating from V4.x.x to V5.x.x) will erase all settings of your device and you will have to do all the setup again. This is because typically a new major version will be created when the whole setup procedure has changed are a bunch of new settings and parameters will be added to the firmware, so the old setup is not applicable to the new firmware anymore. So also make sure you've read and understood the manual for the new firmware as well!
The firmware procedure should start immediately after pressing the OK button. During the update, please do not do anything! Just wait until the progress has gone up to 100%, which will take a few seconds when using a computer with USB2SYS and may take several minutes (!) when using a smartphone with BLE2SYS bluetooth connection. When using the bluetooth keep your smartphone/tablet in very close distance to the BLE2SYS module (just a few inches) as the bluetooth connection can be interrupted easily. Also it is advisable to keep the radio system switched off when performing the update and stay aways from other radio devices, i.e. wifi routers or similar. When the procedure has finished your device will reboot and StudioX/StudioXm will close the connection. Now you can connect again and start over with the setup.


When the update fails
When the update process fails in the middle the device will be stuck in recovery mode as the main application is erased now. Stay calm, this is no problem at all! Just reconnect and try again. If the update fails again and again at some point, completely close the app and power off your device. Power on again, start the app and try again. If that all does not work you please try another computer or smartphone.
Especially when using the bluetooth connection do as mentioned above: Stay away from radio devices that may interfere with the bluetooth connection and try to stay as close to the BLE2SYS as possible.
When using a computer in combination with USB2SYS make sure there are no processes running in background that may interrupt USB communication. Especially when using a virtual machine for running the StudioX app it may happen that the USB connection is slow and not performing properly. So do not use a virtual machine for running the app. Also make sure drivers are installed and configured properly. Don't use any USB hubs! In very rare cases it can be that the wire or plugs from USB2SYS to your device may be damaged or have a loose connection, so try a different connection cable. Finally make sure your power supply/battery is fully charged and holding voltage properly. Disconnect all servos for the update procedure to maintain a stable power level.