StudioXm:Connection: Difference between revisions
Shornstein (talk | contribs) No edit summary |
Shornstein (talk | contribs) Marked this version for translation |
||
| (3 intermediate revisions by the same user not shown) | |||
| Line 6: | Line 6: | ||
<br /> | <br /> | ||
<!--T:12--> | |||
= Connection to BEASTX device= | |||
All BEASTX gyros come with a serial communication port which typically is marked with the letters ''SYS''. Connect the servo wire coming from your USB interface to this port. Make sure to connect the wire in correct polarity on both sides!<br /> | All BEASTX gyros come with a serial communication port which typically is marked with the letters ''SYS''. Connect the servo wire coming from your USB interface to this port. Make sure to connect the wire in correct polarity on both sides!<br /> | ||
<br /> | <br /> | ||
| Line 31: | Line 32: | ||
<br /> | <br /> | ||
<!--T:14--> | |||
{{QUOTE|Since BEASTX '''firmware version 5.9.x''', it is possible to connect a '''telemetry receiver''' to the [SYS] port to transfer telemetry data and menu settings to and from the BEASTX device. In order to connect the interface for the StudioX app, you can temporarily remove the receiver and connect the SYS interface to the [SYS] port. However, in this case, it may not be possible to control the system from the radio in the StudioX menus. Therefore, as an alternative, you can connect the USB2SYS/BLE2SYS interface to the side of your MICROBEAST PLUS/MICROBEAST ULTRA instead of using the [SYS] port. This will require an adapter from the standard servo connector to the JST 6-pin format.}}<br /> | |||
<br /> | |||
<br /> | |||
<!--T:13--> | |||
= Connection to StudioX app= | |||
If not already done start StudioX now. When using a computer with Windows or macOS, click the '''OPTIONS''' button on top right corner and choose the type of interface there firstly. Then proceed as follows.<br /> | If not already done start StudioX now. When using a computer with Windows or macOS, click the '''OPTIONS''' button on top right corner and choose the type of interface there firstly. Then proceed as follows.<br /> | ||
<br /> | <br /> | ||
| Line 40: | Line 47: | ||
Then connect the USB/BLE Interface to the [SYS] port of your BEASTX device and power everything up. Click '''CONNECT''' to load the data from your device and to enter configuration menus. In case you are asked for the BLE2SYS pin code, this usually is 1111. If that doesn't work, please try 0000 or 1234.<br /> | Then connect the USB/BLE Interface to the [SYS] port of your BEASTX device and power everything up. Click '''CONNECT''' to load the data from your device and to enter configuration menus. In case you are asked for the BLE2SYS pin code, this usually is 1111. If that doesn't work, please try 0000 or 1234.<br /> | ||
<br /> | <br /> | ||
<div class=" | <br /> | ||
<img class="ios" src="https://wiki.beastx.com/images/studiox/freakware%202019-07-09% | <html> | ||
<div class=" | <div class="ios-gallery-container"> | ||
<!-- Erstes Bild und Text --> | |||
<div class="ios-gallery-item"> | |||
<div class="ios-gallery-image"> | |||
<img src="https://wiki.beastx.com/images/studiox/freakware%202019-07-09%20006.PNG" alt="Screenshot"> | |||
</div> | |||
<div class="ios-gallery-text"></div> | |||
</div> | |||
<div class="ios-gallery-item"> | |||
<div class="ios-gallery-image"> | |||
<img src="https://wiki.beastx.com/images/studiox/freakware%202019-07-09%20007.PNG" alt="Screenshot"> | |||
</div> | |||
<div class="ios-gallery-text"></div> | |||
</div> | |||
</div> | </div> | ||
</html> | |||
<br /> | |||
<br /> | <br /> | ||
{{QUOTE|When connection fails, <b>on the computer</b> once again check driver installation and port configuration as shown in [[StudioXm/en|the beginning]]. When your BLE2SYS is not found by the <b>smartphone/tablet</b>, check if the BLE2SYS it is operating properly: The blue LED must flash in short intervals. Note that by default the interface will switch off automatically after 30 seconds. So if you need too long time to initiate connection it may have been disabled. Disconnect it or cylce power and try again. <b>Sometimes it can be helpful to close the app completely, disconnect and reconnect the BLE2SYS and start over again!</b><br /> | {{QUOTE|When connection fails, <b>on the computer</b> once again check driver installation and port configuration as shown in [[StudioXm/en|the beginning]]. When your BLE2SYS is not found by the <b>smartphone/tablet</b>, check if the BLE2SYS it is operating properly: The blue LED must flash in short intervals. Note that by default the interface will switch off automatically after 30 seconds. So if you need too long time to initiate connection it may have been disabled. Disconnect it or cylce power and try again. <b>Sometimes it can be helpful to close the app completely, disconnect and reconnect the BLE2SYS and start over again!</b><br /> | ||
Latest revision as of 10:32, 10 August 2024
Connection to BEASTX device
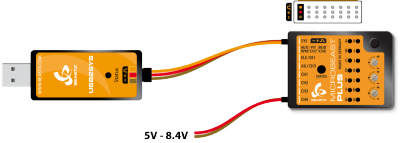
All BEASTX gyros come with a serial communication port which typically is marked with the letters SYS. Connect the servo wire coming from your USB interface to this port. Make sure to connect the wire in correct polarity on both sides!
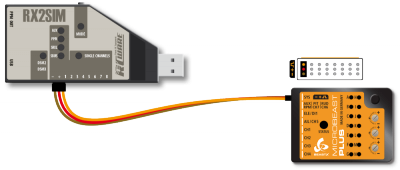
Also you can use a RX2SIM Wireless Multi-Sim Adapter instead of the USB2SYS interface. For this you can switch the RX2SIM into an USB2SYS emulation mode (push button on the RX2SIM several times until the LED lights up in orange color).
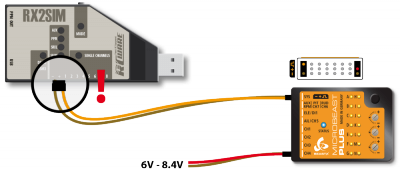
Since BEASTX firmware version 5.9.x, it is possible to connect a telemetry receiver to the [SYS] port to transfer telemetry data and menu settings to and from the BEASTX device. In order to connect the interface for the StudioX app, you can temporarily remove the receiver and connect the SYS interface to the [SYS] port. However, in this case, it may not be possible to control the system from the radio in the StudioX menus. Therefore, as an alternative, you can connect the USB2SYS/BLE2SYS interface to the side of your MICROBEAST PLUS/MICROBEAST ULTRA instead of using the [SYS] port. This will require an adapter from the standard servo connector to the JST 6-pin format.
Connection to StudioX app
If not already done start StudioX now. When using a computer with Windows or macOS, click the OPTIONS button on top right corner and choose the type of interface there firstly. Then proceed as follows.
When the USB2SYS is connected to the computer, make sure the corresponding port is selected in the selection box in the middle of the screen. If you have connected it after starting the software, click the RESCAN button above to refresh the port list, usually the correct port will be selected automatically then. If you don't know which port is the right one, also you can disconnect the USB2SYS once again, click RESCAN to clear the port list, connect the USB2SYS, wait a few seconds and click RESCAN once more. Now the port should be selected.
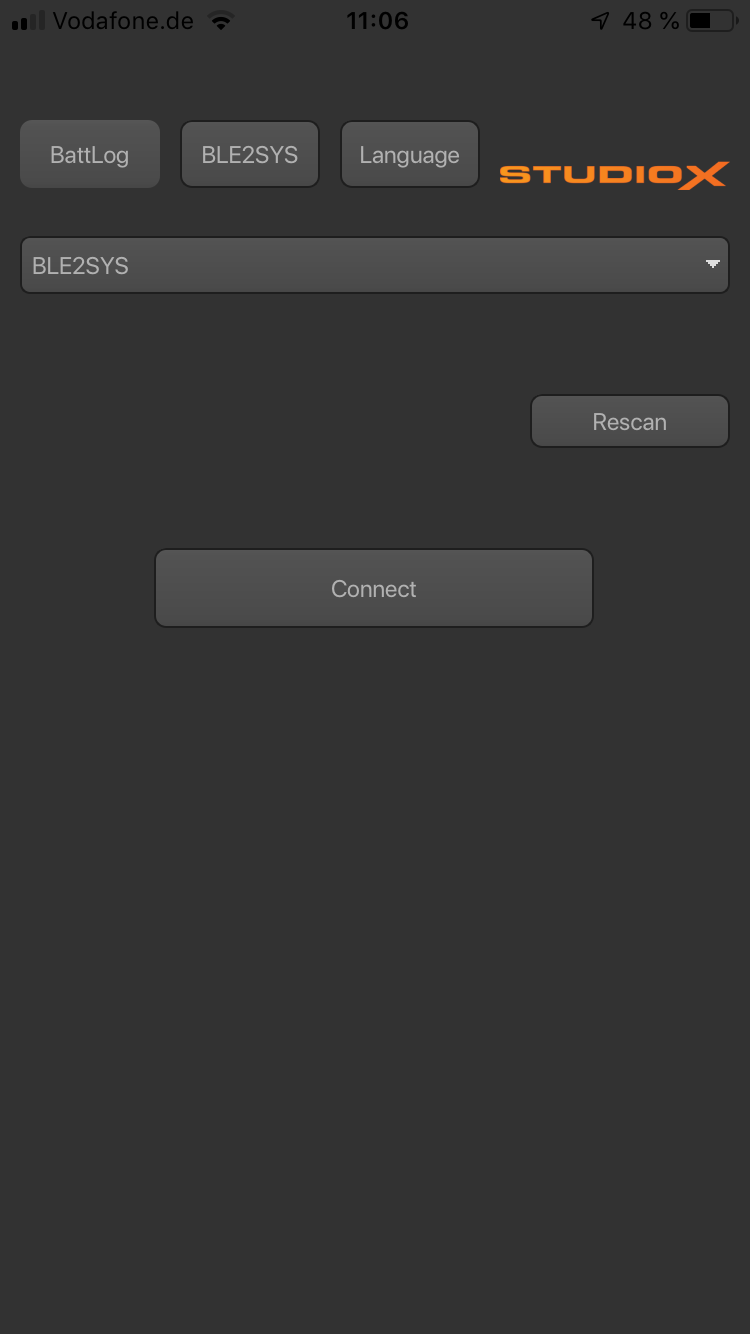
With the BLE2SYS in combination with a smartphone/tablet the BLE2SYS device should appear automatically when starting the app after powering up your flybarless device with BLE2SYS. If this is not the case, click the selection box and choose "BLE2SYS". If nothing's there, click the RESCAN button above to search for new devices. This can take from a few seconds up to a few minutes. If the scan process finishes immediately and the box stays empty it is very likely the bluetooth function is switched off on your phone or the app has no rights to access the bluetooth connection! So check your phone settings in this case.
Then connect the USB/BLE Interface to the [SYS] port of your BEASTX device and power everything up. Click CONNECT to load the data from your device and to enter configuration menus. In case you are asked for the BLE2SYS pin code, this usually is 1111. If that doesn't work, please try 0000 or 1234.
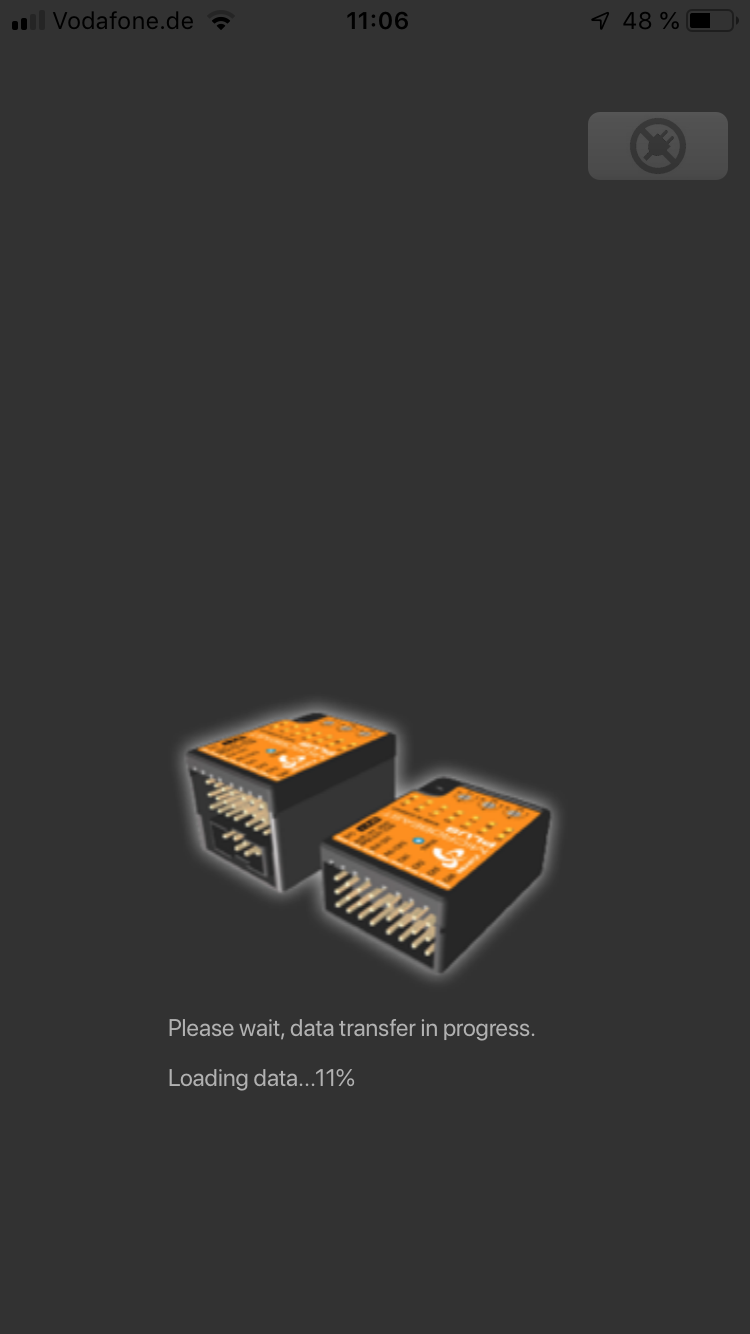
When connection fails, on the computer once again check driver installation and port configuration as shown in the beginning. When your BLE2SYS is not found by the smartphone/tablet, check if the BLE2SYS it is operating properly: The blue LED must flash in short intervals. Note that by default the interface will switch off automatically after 30 seconds. So if you need too long time to initiate connection it may have been disabled. Disconnect it or cylce power and try again. Sometimes it can be helpful to close the app completely, disconnect and reconnect the BLE2SYS and start over again!
Also note that the device name can be different! By default it's "BLE2SYS", but as it's possible to change the bluetooth id, it maybe different.
