Manuals:BXFbl:Receiver B: Difference between revisions
Shornstein (talk | contribs) No edit summary |
Shornstein (talk | contribs) Marked this version for translation |
||
| (2 intermediate revisions by the same user not shown) | |||
| Line 10: | Line 10: | ||
<br /> | <br /> | ||
<!--T:3--> | |||
=Adjustment on the device= | |||
If not already done enter RECEIVER MENU and scan your receiver at Menu Point A. Then setup will skip to Menu Point '''B'''. In order to load the preset channel assignment hold down the button for at least 2 seconds and release. The yellow Menu-LED will immediately jump to Menu Point '''L''' or one of the following.<br /> | If not already done enter RECEIVER MENU and scan your receiver at Menu Point A. Then setup will skip to Menu Point '''B'''. In order to load the preset channel assignment hold down the button for at least 2 seconds and release. The yellow Menu-LED will immediately jump to Menu Point '''L''' or one of the following.<br /> | ||
<br /> | <br /> | ||
| Line 68: | Line 69: | ||
<br /> | <br /> | ||
<!--T:6--> | |||
=Setup with StudioX= | |||
In StudioX open '''Control Setup''' and start the receiver Scan. When this was successful a dialog will appear asking for what to do next.<br /> | In StudioX open '''Control Setup''' and start the receiver Scan. When this was successful a dialog will appear asking for what to do next.<br /> | ||
<br /> | <br /> | ||
| Line 85: | Line 87: | ||
<!--T:15--> | <!--T:15--> | ||
<html> | <html> | ||
<div class=" | <div class="ios-gallery-container"> | ||
< | <!-- Erstes Bild und Text --> | ||
<div>Choose <b>Teach</b></div> | <div class="ios-gallery-item"> | ||
</div> | <div class="ios-gallery-image"> | ||
<div class=" | <img src="https://wiki.beastx.com/images/studiox/freakware%202019-07-09%20016.PNG" alt="Screenshot"> | ||
< | </div> | ||
<div class=" | <div class="ios-gallery-text">Choose <b>Teach</b></div> | ||
</div> | </div> | ||
<div class=" | |||
< | <!--T:17--> | ||
<div class=" | <!-- Zweites Bild und Text --> | ||
</div> | <div class="ios-gallery-item"> | ||
<div class=" | <div class="ios-gallery-image"> | ||
< | <img src="https://wiki.beastx.com/images/studiox/freakware%202019-07-09%20017.PNG" alt="Screenshot"> | ||
<div class=" | </div> | ||
</div> | <div class="ios-gallery-text">At first move the stick for collective. Make sure only one channel is moved on the radio otherwise the system is not able to detect the movement!</div> | ||
<div class=" | </div> | ||
< | |||
<div class=" | <!--T:18--> | ||
</div> | <!-- Drittes Bild und Text --> | ||
<div class="ios-gallery-item"> | |||
<div class="ios-gallery-image"> | |||
<img src="https://wiki.beastx.com/images/studiox/freakware%202019-07-09%20018.PNG" alt="Screenshot"> | |||
</div> | |||
<div class="ios-gallery-text">Proceed with the other function in similar manner</div> | |||
</div> | |||
<!--T:19--> | |||
<!-- Viertes Bild und Text --> | |||
<div class="ios-gallery-item"> | |||
<div class="ios-gallery-image"> | |||
<img src="https://wiki.beastx.com/images/studiox/freakware%202019-07-09%20022.PNG" alt="Screenshot"> | |||
</div> | |||
<div class="ios-gallery-text">The optional functions can be skipped if not needed. See text below!</div> | |||
</div> | |||
<!--T:20--> | |||
<!-- Fünftes Bild und Text --> | |||
<div class="ios-gallery-item"> | |||
<div class="ios-gallery-image"> | |||
<img src="https://wiki.beastx.com/images/studiox/freakware%202019-07-09%20023.PNG" alt="Screenshot"> | |||
</div> | |||
<div class="ios-gallery-text">When skipping the channel number will be shown as <b>-</b></div> | |||
</div> | |||
</div> | |||
</html> | </html> | ||
<br /> | <br /> | ||
Latest revision as of 09:32, 10 August 2024
Due to the fact there a so much different radio brands and receiver types available, it is mandatory to define the function assignment for the receiver output channels. Please compare the preset function assignments shown in the section RADIO SETUP and check if functions are assigned to the same channels on your radio system (i. e. check your the channel monitor on the radio). MICROBEAST/NANOBEAST comes with preset assignment for each receiver/radio type. But assignments can be different, i.e. when using a JETI radio and receiver with Futaba SBUS signal output. In this case the BEASTX system would expect a Futaba radio, so assignments will differ when using a JETI radio. In such case, you can teach the assignment to your BEASTX device in the following menu steps. Otherwise you can skip this section and load the preset configuration by simply pressing the button (again).
Adjustment on the device
If not already done enter RECEIVER MENU and scan your receiver at Menu Point A. Then setup will skip to Menu Point B. In order to load the preset channel assignment hold down the button for at least 2 seconds and release. The yellow Menu-LED will immediately jump to Menu Point L or one of the following.
In case the function ordering of your radio system differs from the preset assignment, you have to manually assign the channels/functions step by step. This is done by simply actuating the appropriate function on your radio at each of the Menu Points B, C, D and so on. Each menu point represents one control function.
| Note: NANOBEAST inidcates the current Menu Point by number of LED flashes, i.e. at Menu Point B the LED flashes twice. |
When you move the stick/move the channel on the transmitter, the Status LED flashes blue in order to indicate the channel has been detected. It is important that only one channel moves on the radio when the requested function is activated. Otherwise the device can't recognize the channel movement. The Status LED will flash in red color in this case! If you have moved the wrong stick/switch, just move the correct one afterwards. The BEASTX device remembers only the last function that was operated and confirmed with flashing blue Status LED!
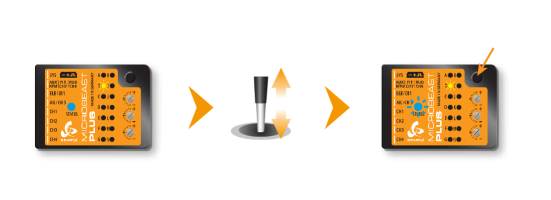 |
| Move the collective at Menu Point B, then push the button when Status LED flashes |
After teaching each function, briefly press the button to save the assignment and to skip to the next function. Once a channel was assigned, it is no longer available and is ignored by your BEASTX device for the remaining process! Thus, after learning the collective pitch function at Menu Point B you can enable the throttle function (remove throttle hold) and teach the throttle channel later at Point G by re-operating the thrust stick there. The collective pitch channel no longer be considered as this channel has already been assigned previously.
| Menu | Function |
|---|---|
| B | Collective/Thrust |
| C | Roll/Aileron |
| D | Pitch/Elevator |
| E | Rudder |
| F | Tail gyro/Bank switch |
| G | Throttle |
| H | Aux Output |
| I | Governor |
| J | Attitude/Rescue |
- The first 6 functions must be assigned as they are necessary for the basic flight control and the button remains locked until you operate a new control function. The other functions are optional to assign and can be skipped. If special features like Rescue/AttitudeControl are not installed on your device, the specific menu points for assignment will not be accessible at all!
- The assignment for Aux Output at Menu Point H can be skipped by pressing the button without teaching a channel for this function in case it is not used. Aux may then be used for a 4th swash plate servo if necessary (MICROBEAST ULTRA only).
- Likewise, the assignment of the channel for the Governor can be skipped in case it is not needed or if you don‘t want to control the governor with a separate channel, e. g. if your transmitter does not provide enough free channels. If needed, the Governor function is then controlled from the throttle channel. When used in an electric model the Governor always is controlled by the throttle channel. Here you can skip Menu Point I, as an assignment will have no effect.
- Finally at Menu Point J you have to assign the channel that is used to engage the AttitudeControl/rescue stabilization (only when you've installed the this feature on your device). Again, this can be skipped if not needed, if you don‘t want to use a separate channel, or in case you haven't enough free channels left. Please see the section about using AttitudeControl for further details.
Setup with StudioX
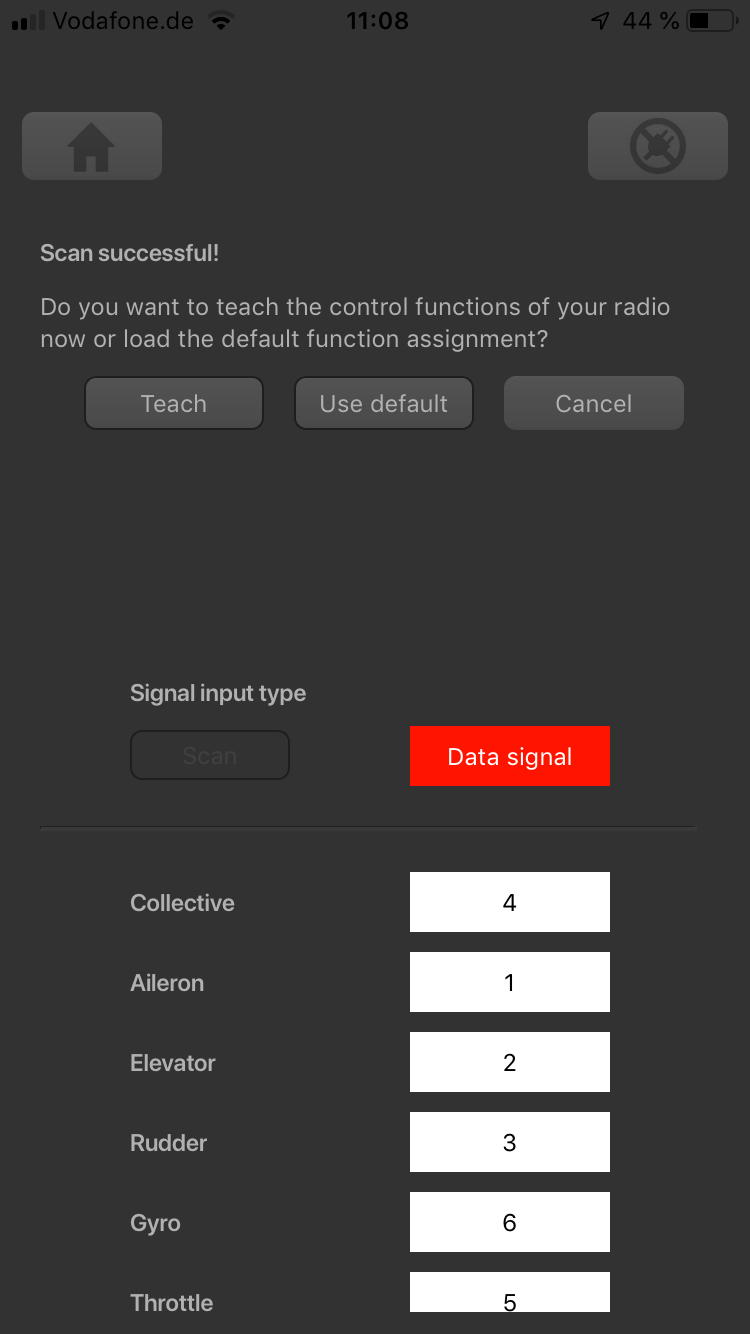
In StudioX open Control Setup and start the receiver Scan. When this was successful a dialog will appear asking for what to do next.
If the assignment on your radio matches the preset functions, simply choose Use default from the dialog.
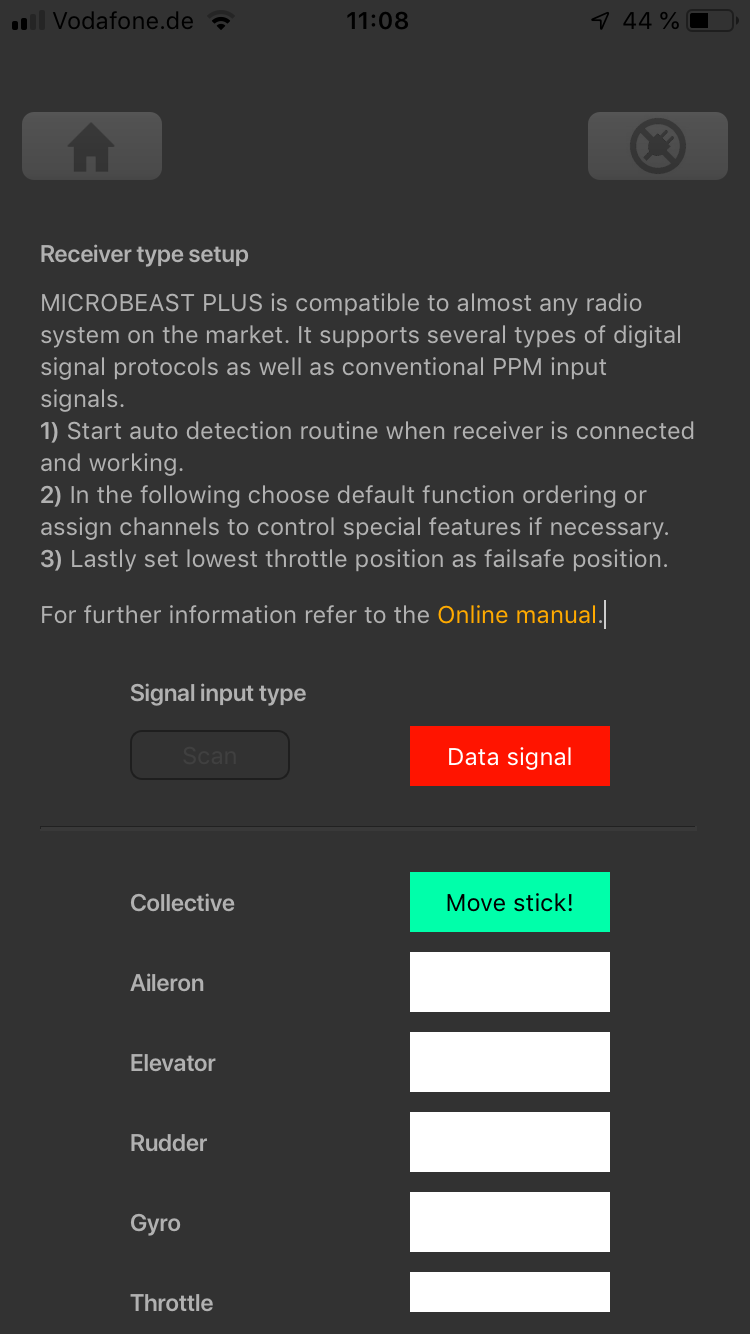
In case the function ordering of your radio system differs from the given tables below, you have to manually assign the channels/functions step by step. This is done by simply actuating the appropriate function on your transmitter at each of the Menu Points B, C, D and so on. Each menu point represents one control function. When you're ready, click Teach in the "New receiver detected!" dialog and start with function assignment at Menu Point B.
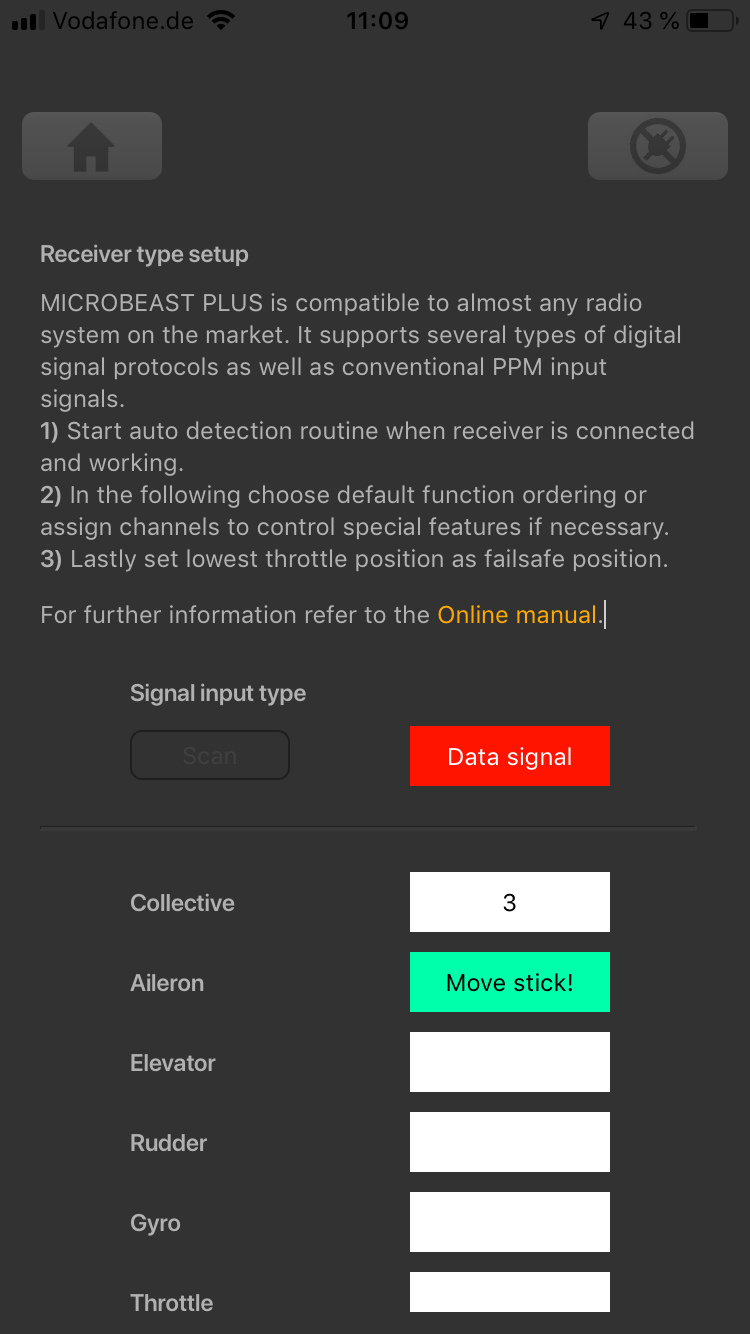
- When you move the control stick/change the channel output on the transmitter, the Status LED will flash in blue color when the channel has been detected and the channel number will appear in the display. The setup procedure will jump to the next function assignment immediately.
- It is important that only one channel moves on the radio when the requested function is activated. Otherwise the system can't recognize the movement. The Status LED will flash red in this case!
- Once a channel was assigned, it is no longer available and is ignored by the device for the remaining process. So after learning the collective pitch function at Menu Point B, you can enable the throttle function (remove throttle hold) to teach the throttle channel at Menu Point G with the thrust stick. The collective pitch channel will no longer be considered as this channel has been assigned already.
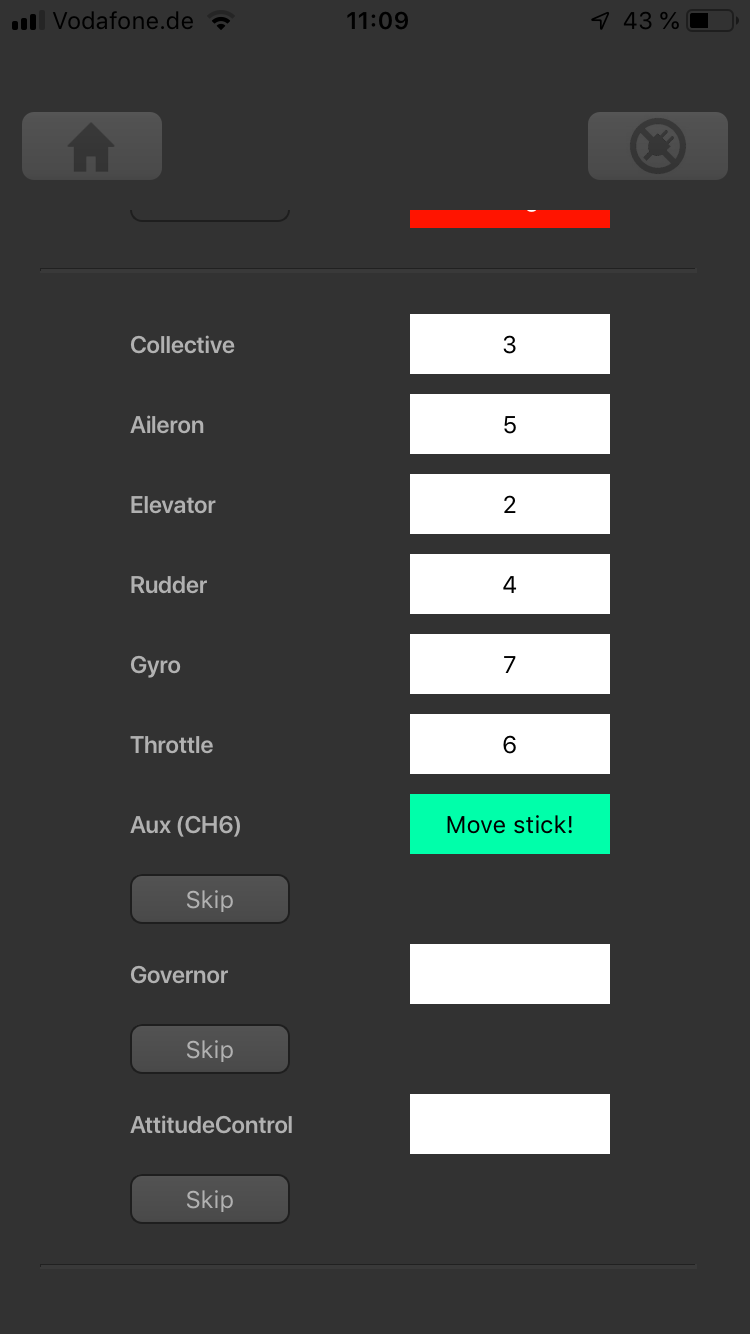
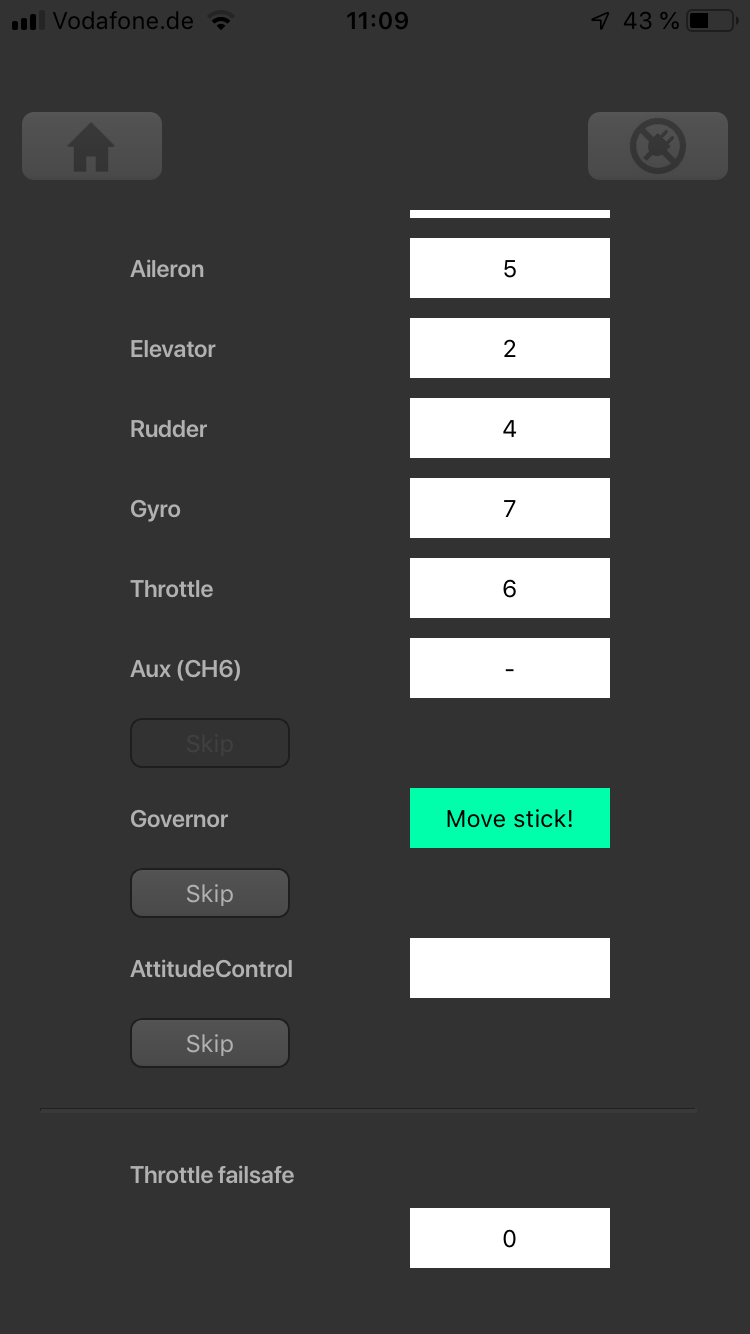
- The first 6 functions must be assigned as theses are necessary for the basic flight control. The other functions are optional and can be skipped. If special features like AttitudeControl/Rescue are not installed on your device, the specific Menu Points will not be shown at all.
- The assignment for Aux Output can be skipped by pressing the "Skip" button without teaching a channel for this function in case it is not used. The Aux may then be used for a 4th swash plate servo if necessary (MICROBEAST ULTRA only).
- Likewise, the assignment of the channel for the Governor can be skipped in case it is not needed or if you don‘t want to control the governor with a separate channel, e. g. if your transmitter does not provide enough free channels. If needed, the Governor function is then controlled from the throttle channel. When used in an electric model the Governor always is controlled by the throttle channel. Here you can skip Menu Point I, as an assignment will have no effect.
- Finally, you can assign the channel that is used to engage the AttitudeControl/rescue stabilization (only available you've installed the PROEDITION Upgrade on your device). Again, this can be skipped if not needed, if you don‘t want to use a separate channel, or in case you haven't enough free channels left. Please see the section about using AttitudeControl for further details.