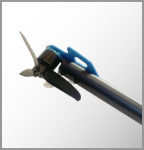
SETUP MENU E & F - Rudder limits and direction (tail motor)
| Note: This setup step applies to BEASTX devices with "Tailmotor" firmware. If you're using a helicopter with normal servo control on the rudder, please follow the descriptions on the previous page. Make sure that you've installed the correct firmware with the feature Tailmotor enabled or disabled. If not using the Tailmotor firmware, you will not be able to correctly control your tail motor as shown below and vice versa! |
When using a helicopter with tail motor instead of a rudder servo, we must set the start, idle and hover position for the motor in the next steps. Additionaly we have to make sure the rudder stick on the radio is set correctly.
 |
The tail motor control is connected to the main throttle control. The tail motor will start automatically when the throttle is raised above 10%. When the throttle is cut, the tail motor will also be stopped after a little delay to make the landing procedure as smooth as possible.
| For this adjustment, the tail motor must be running. Before proceeding with the setup, remove the tail rotor blades. ⚠️ WARNING: Risk of injury! |
Step E - Motor off and idle position
1. When at SETUP MENU POINT E you can change the stop position of the tail motor. This maybe needed in order to make initialzie the ESC for the tail motor when powering up. You can increase/decrease the throttle by tapping the rudder stick left/right or by adjusting the corresponding value in the StudioX app. (If stick left will increase the throttle and stick right will decrease throttle, the stick direction on the radio ist wrong!)
2. Now raise the throttle of the main motor above 10%. The tail motor will start to turn with raised throttle as well. This is the minimum throttle that will not be exceeded when the main motor is running. You can increase/decrease the throttle by tapping the rudder stick left/right or by adjusting the corresponding value in the StudioX app. The motor should run at a steady rpm. Not too high, otherwise turning the heli to the left may be restricted. But also not too low, as switching off the tail motor completely will cause bad gyro behavior in flight!
Step F - Rudder stick direction and hovering throttle
1. When at SETUP MENU POINT F move the rudder stick left right and check the LED color of your BEASTX system or make sure the direction is indicated correctly whe using STUDIOX app or telemetry setup. Rudder left is indicated by red LED, rudder right is indicated by blue LED. If the display is working the wrong way, please change stick direction by reversing the rudder channel in your radio.
| Note: At the moment you can only use the system in combination with helicopters that have a clockwise rotating main rotor! Thus changing gyro direction of the system is not needed and not provided. The system will open throttle when the helicopter needs to turn to the right, and will close throttle in order to turn left. Only thing you need to make sure here is, that the stick on the radio is working the correct way. |
2. Now raise the throttle of the main motor above 10%. The tail motor will start to turn with raised throttle as well. This is the throttle for takeoff and hovering. It should be apprx. 50% of maximum throttle. You can increase/decrease the throttle by tapping the rudder stick left/right or by adjusting the corresponding value in the StudioX app. Adjust this value later if needed. This can be necessery when the helicopter will tends to turn into one or another direction during takeoff or when hovering. Explicitly this effect is more severe when using low tail gyro gain or when not using the heading lock mode of the tail gyro.